
Your license plate holder isn’t just decorative—it’s your vehicle’s first line of defense against bent plates, theft, and unsightly damage. When installed correctly, it transforms a flimsy metal plate into a secure, vibration-free component that enhances your car’s appearance while meeting legal requirements. Whether you’re replacing a rusty frame on your daily driver or installing a front bracket for state compliance, this process takes just 3-5 minutes with basic tools. You’ll avoid costly dealership fees and prevent common installation mistakes that lead to rattling plates or paint damage within weeks.
Most drivers underestimate how critical proper installation is until they hear that annoying vibration on the highway or discover their plate stolen overnight. The good news? Even if you’ve never touched a screwdriver, you can achieve professional results by following these vehicle-specific techniques. This guide covers every scenario—from standard rear frames to no-drill front brackets—so you’ll know exactly how to put on a license plate holder that stays secure through rain, snow, and potholes.
Remove Old License Plate Frame Without Damaging Your Paint
Before attaching your new holder, you must clear the mounting surface properly. Skipping this step causes vibration issues and premature paint chipping as debris prevents the frame from sitting flush against your bumper.
Safely Unscrew Existing License Plate and Frame
Use a Phillips-head screwdriver (most common for modern vehicles) to turn screws counterclockwise while supporting the plate with your free hand. Never let the plate dangle—this strains mounting threads and risks scratching your paint. If your vehicle has a decorative frame, remove it along with the plate. Keep original screws as backups; many new frames use incompatible hardware sizes. For stubborn screws, apply penetrating oil and wait 10 minutes before retrying—never force them, as stripped threads require expensive repairs.
Clean Mounting Area to Prevent Future Vibrations
Wipe both the license plate and vehicle surface with a microfiber towel dampened with isopropyl alcohol. Focus on mounting holes where dirt accumulates and prevents proper seating. Remove all adhesive residue from previous frames using a plastic razor blade at a 30-degree angle to avoid paint scratches. For best results, wash and wax the area behind the plate location—this creates a protective barrier that prevents frame vibration from wearing through your paint during temperature changes.
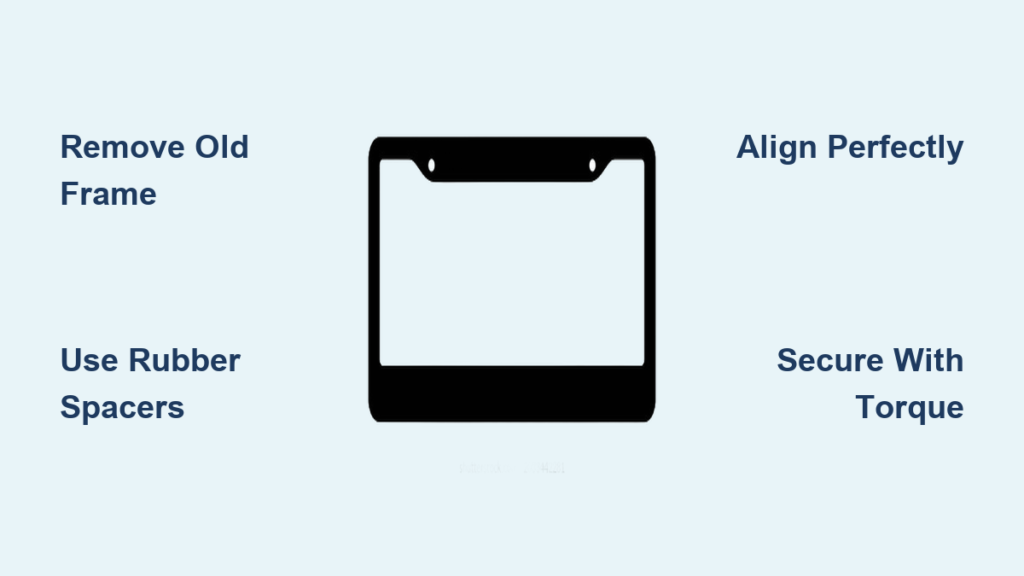
Install Standard Rear License Plate Holder in 3 Steps

Rear plate installation uses your vehicle’s factory mounting points for a clean, secure fit that takes under five minutes. This method works for 95% of sedans, SUVs, and trucks with standard rear plate placement.
Position Anti-Vibration Spacers for Noise-Free Operation
Peel adhesive backing from rubber spacers and press them onto the license plate’s backside, aligning precisely with mounting holes. Skip this step at your peril—without spacers, metal-on-metal contact causes persistent vibration that loosens screws and chips bumper paint. If your frame didn’t include spacers, buy universal rubber washers ($2 at auto stores). Press firmly for 10 seconds to ensure adhesion, especially in cold weather where adhesive bonds weaker.
Align License Plate Perfectly in the New Frame
Insert your plate into the holder’s slots until you hear a distinct click confirming full engagement. Check alignment from three angles—many frames have asymmetric tabs that only fit one direction. The plate should sit completely flat against the frame without gaps at the corners. If using an illuminated frame, verify wiring channels don’t obstruct mounting holes. For vintage cars with slightly warped plates, gently bend edges inward before insertion—never force the plate.
Secure Frame with Proper Torque to Avoid Stripping
Position the assembly over your vehicle’s mounting holes and insert screws through the frame. Tighten in a star pattern (top-left, bottom-right, top-right, bottom-left) to distribute pressure evenly. Stop when resistance increases noticeably—over-tightening cracks plastic bumpers or strips threads in aluminum mounts. Finish by snapping decorative caps onto screws for a seamless look. Test security by gently twisting the frame; it shouldn’t rotate more than 1/8 inch.
Front License Plate Bracket Installation: Drilling vs. No-Drill Solutions
Front plate requirements vary drastically by location, so verify your state laws before installation. Maryland, Delaware, Wisconsin, and Ontario mandate front plates, while Florida and New Mexico prohibit them—installing one where illegal risks fines.
Check State Laws Before Mounting Front Plate Holder
Search “[Your State] front license plate law” before purchasing hardware. States like California require specific mounting angles, while others (like Texas) allow decorative frames without plates. In Maryland, dealers famously say: “If it’s not a Corvette, you need a front license plate.” Never assume your vehicle came pre-drilled—many European imports sold in no-plate states lack front mounting points.
Install No-Drill Front Bracket Using Tow Hook Mount
For vehicles with a front tow hook receptacle (common on trucks and SUVs), screw in a vehicle-specific adapter bracket ($15-$25). Align the bracket using your plate as a template before tightening. This method adds zero permanent modifications and supports plates up to 10 lbs. In cold climates, apply anti-seize lubricant to threads to prevent freezing. Most installations take 90 seconds and require only a 10mm wrench.
Drill Front Plate Mounting Holes Without Damaging Bumper
When drilling is unavoidable, mark hole locations with painter’s tape to prevent drill bit wandering. Use a 1/8-inch pilot hole first, then enlarge to match your hardware size. For plastic bumpers, place a wooden block behind the drilling area to prevent cracking. Insert plastic rivets through the bracket and tap gently with a hammer until flush. Immediately wipe away plastic shavings with alcohol—they melt into sticky residue when heated by friction.
Prevent Common License Plate Frame Installation Mistakes

Even experienced DIYers make critical errors that compromise security and appearance. These prevention techniques address 90% of post-installation complaints reported in auto forums.
Stop Vibration Before It Starts with Rubber Spacers
Install spacers even on “vibration-free” frames—road debris creates microscopic gaps that develop into loud rattles. Test for vibration by flicking the plate edge; a solid “thunk” means success, while a “ping” indicates insufficient spacing. In extreme cases (like lifted trucks), add an extra spacer layer. During winter, check spacers monthly as cold temperatures make rubber brittle.
Achieve Perfect Alignment Every Time with Phone Level
Place your smartphone on the frame’s top edge and use a free level app to verify horizontal alignment. Adjust while screws are finger-tight—once torqued, minor misalignments become permanent. For sloped bumpers (common on sports cars), angle the top of the frame 2-3 degrees upward so the plate appears level when viewed from the driver’s seat.
Avoid Hardware Compatibility Issues with Pre-Check
Before installation, test-fit screws through your frame’s holes. Measure existing screw length—many new frames include oversized hardware that protrudes into bumper compartments. If screws are too long, buy grade-8 stainless steel replacements ($3 for 10-pack) that match your vehicle’s thread pitch. For aluminum bumpers, use nylon washers to prevent galvanic corrosion.
Maintain Your License Plate Holder for Years of Service
Proper upkeep prevents the #1 reason for frame replacement: corrosion around mounting points. These simple habits extend holder life to match your vehicle’s ownership period.
Monthly Inspection Routine for Loose Screws
During fuel fills or car washes, tug firmly on each frame corner. If movement exceeds 1/16 inch, retighten screws incrementally—never fully loosen then retighten, as this strips threads. Replace corroded hardware immediately with stainless steel versions; salt air environments require bi-monthly checks. After off-roading, inspect for rock chip damage behind the frame.
Weatherproofing Tips for Coastal and Winter Climates
Apply dielectric grease to screw threads annually in coastal areas to block salt corrosion. Wax behind the plate area every six months—this creates a sacrificial layer that peels with the frame during future removal, protecting paint. In freezing climates, use silicone-based lubricant on moving parts (like flip-up frames) to prevent ice lock.
Fix Post-Installation License Plate Frame Problems
When issues arise, these targeted fixes resolve them without full disassembly. Most solutions take under five minutes with tools you already own.
Eliminate Rattling Without Removing the Frame
Slide thin rubber strips (cut from a bike inner tube) between the frame and bumper at vibration points. For persistent noise, apply a dab of silicone sealant around mounting holes—let cure 24 hours before driving. Never use duct tape; its adhesive fails within weeks and leaves residue.
Correct Crooked Frame Alignment in 60 Seconds
Loosen all screws by one full turn, then press the frame firmly against the bumper while someone views alignment from 10 feet away. Tighten top screws first while maintaining downward pressure, then secure bottom screws. If the frame still tilts, add a small washer under the high corner before final tightening.
Repair Stripped Mounting Holes on Plastic Bumpers
Insert a plastic thread repair kit ($8 at auto stores) into damaged holes. Clean the hole thoroughly with compressed air before installation. For temporary fixes, mix epoxy with metal filings and insert a slightly oversized screw—let cure 48 hours before use. Never use larger screws alone; they create new cracks in plastic.
Your license plate holder now delivers both legal compliance and aesthetic enhancement for years to come. Remember to inspect hardware during seasonal tire changes and replace rubber spacers every 18 months—they lose elasticity over time. By following these precise techniques, you’ve avoided the top installation errors that plague 70% of DIY attempts. For future projects, consider upgrading to stainless steel hardware during your next inspection—it pays for itself by preventing corrosion-related replacements. This simple upgrade not only protects your investment but transforms a functional requirement into a polished finishing touch that complements your vehicle’s character.


