
That stunning mercury glass candle holder you love has burned down to the last flicker, but don’t throw it away yet. Learning how to refill a candle holder transforms expensive containers into sustainable luxury items you’ll enjoy for years. This practical guide reveals professional techniques to breathe new life into your favorite vessels—saving you money while reducing waste. Whether you’re working with ceramic, glass, or metal containers, these proven methods work for all standard candle holders.
Refilling candle holders delivers serious economic benefits since premium candles charge heavily for their decorative containers. By mastering how to refill a candle holder, you pay only for wax and wicks instead of the full product price. This sustainable practice keeps containers out of landfills while maintaining your luxury aesthetic. Get ready to transform empty vessels into beautiful, functional candles with techniques ranging from quick microwave fixes to professional double-boiler methods.
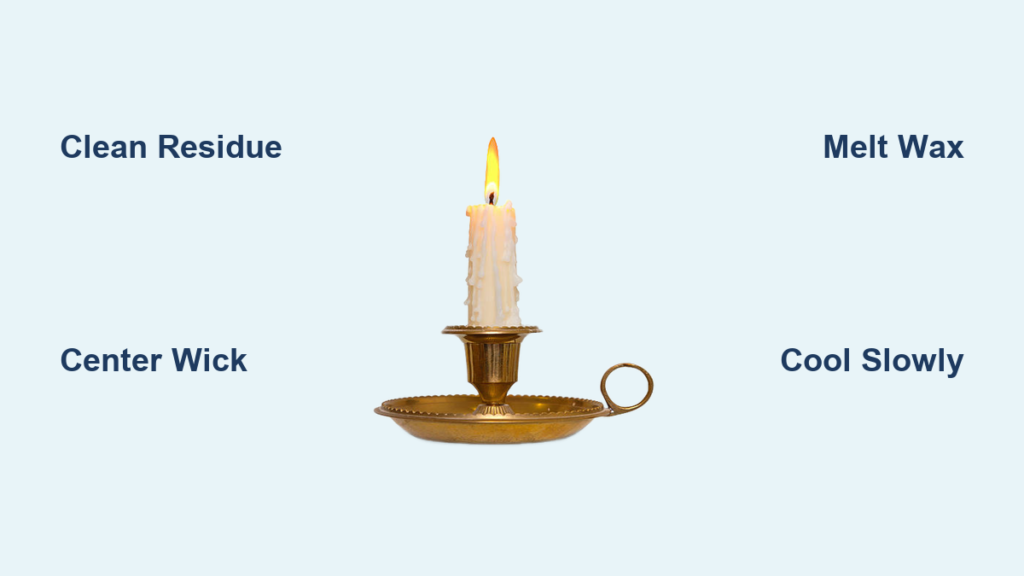
Clean Empty Candle Holders First
Before adding fresh wax, you must remove all old wax residue using one of two proven methods. Choosing the right cleaning technique depends on your wax type and available time, but both deliver excellent results when executed properly.
Boiling Water Method for Stubborn Wax
Place your spent candle on a foil-lined baking sheet and carefully pour boiling water into the container, leaving one inch of space at the top. The intense heat melts wax instantly, causing it to float as a solid disk once cooled. After one hour of cooling time, lift out the wax disk and dispose of it responsibly.
Pro tip: Use a sink strainer when pouring out water to prevent drain clogs from wax particles. If residue remains, repeat the process once more. Finish with hot, soapy water and dry thoroughly before refilling—any remaining soot won’t affect your new candle’s appearance once melted wax incorporates it.
Freezer Method for Quick Removal
This technique works especially well for soft soy wax formulations. Place your candle holder in the freezer for exactly one hour—any longer risks thermal shock to glass containers. Once frozen solid, gently wedge a butter knife between the wax and container wall to lift out the entire wax chunk cleanly.
Expert note: Salvage old wax chunks for blending into new candles. Dark smoke marks won’t affect appearance once melted and mixed with fresh wax. This method preserves container integrity better than boiling water for delicate or vintage pieces.
Microwave Refill Method (15 Minutes Total)
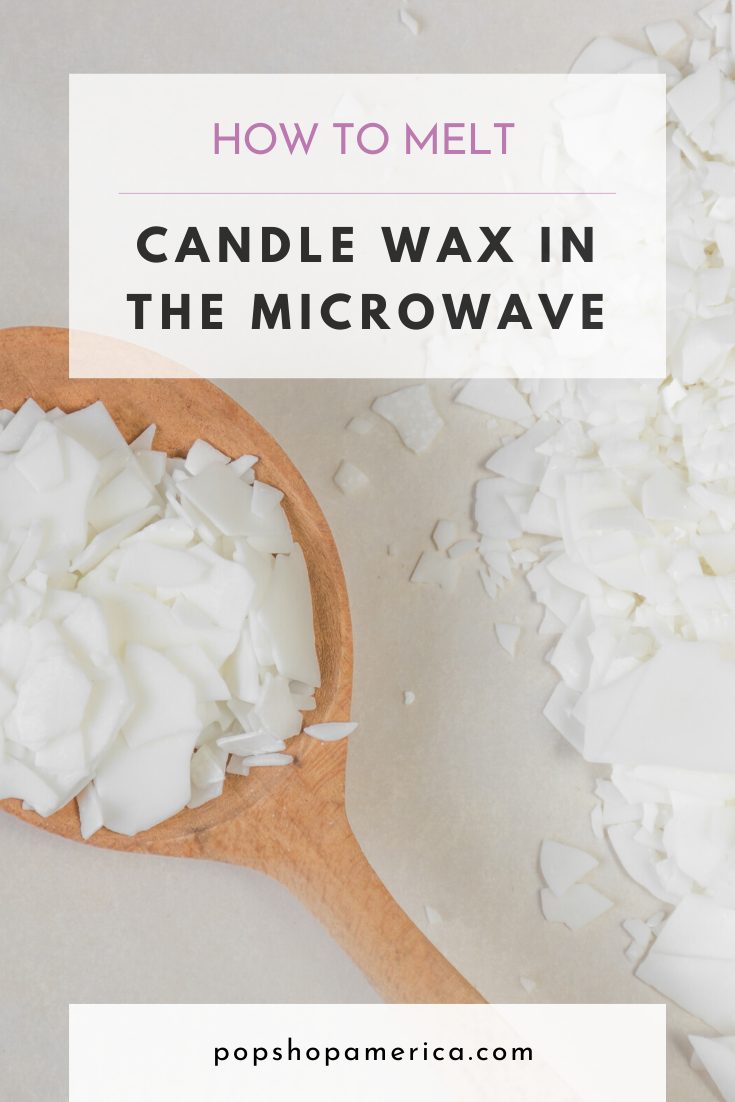
This beginner-friendly approach requires minimal supplies and delivers professional results quickly—perfect when you need to know how to refill a candle holder in under 30 minutes.
Required supplies:
– Clean, empty candle container
– Candle wax (blocks, flakes, or pellets)
– Pre-tabbed wicks with adhesive stickers
– Wick centering device or chopsticks
– Pyrex measuring cup
– Oven mitts and scissors
Step-by-step process:
1. Prep your workspace with paper bag or parchment paper covering
2. Center the wick using adhesive sticker at container bottom
3. Measure wax – fill container twice to account for melting shrinkage
4. Microwave in 1-minute bursts until wax turns completely clear
5. Cool slightly until wax becomes opaque (prevents surface cracks)
6. Pour slowly into prepared container
7. Secure wick using centering device across top
8. Set overnight (8-12 hours minimum)
9. Trim to ¼-inch before first burn
Oven No-Pour Technique (1 Hour Hands-Off)
This method eliminates pouring entirely—simply bake and forget. Ideal for multiple containers or when working with beeswax pastilles, this technique makes how to refill a candle holder almost effortless.
Process breakdown:
1. Preheat oven to 200°F
2. Line baking sheet with aluminum foil
3. Position wick in clean container center
4. Fill container with wax pastilles to the brim
5. Bake 45-60 minutes until fully liquid
6. Add 30-40 drops essential oil for scent
7. Cool 24 hours before lighting
Best for: Beeswax refills, creating layered scents, or when handling hot wax feels intimidating. This method works particularly well for ceramic containers that might crack with direct pouring.
Professional Double Boiler Method

Achieve boutique-quality results with this traditional approach favored by candle makers. While it requires dedicated equipment, mastering how to refill a candle holder using this method delivers superior scent throw and smooth finishes.
Setup requirements:
– Double boiler (never use for food again)
– Soy wax flakes or professional wax blend
– Cotton wicks sized to container diameter
– Skewers or wick bars for centering
– Natural fragrance oils or essential oils
Professional process:
1. Fill bottom pot with 2 inches water
2. Top section with wax flakes to maximum fill line
3. Melt over medium heat, stirring occasionally
4. Position wicks using skewers balanced across containers
5. Remove from heat when wax reaches 185°F
6. Pour into prepared containers smoothly
7. Add fragrance directly to containers for potency
8. Cure 24-48 hours before trimming wicks
Wick Selection and Positioning Secrets
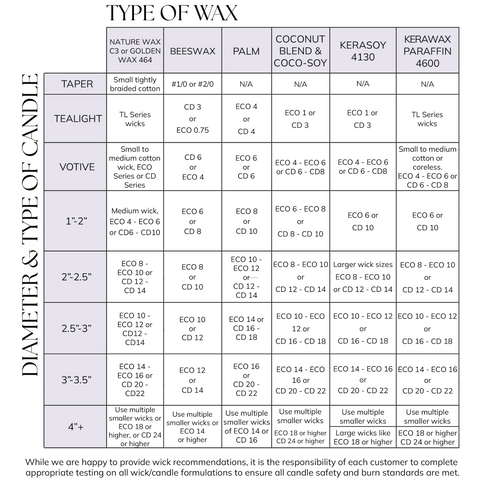
Choosing wrong wick size ruins candle performance. Match wick to container diameter using this quick reference:
- 2.5-3.5 inches: Single wick
- 4-5 inches: Dual wick configuration
- 6+ inches: Triple wick or more
Centering made simple: Use clothespins balanced across container openings, or invest in metal wick holders for consistent results. Wick must remain perfectly centered throughout cooling to prevent tunneling. Critical warning: Misaligned wicks cause uneven burning and wasted wax along container sides.
Wax Types and Scenting Options
Choose Your Wax Wisely
Soy wax: Clean-burning and renewable, ideal for container candles. Melts easily in microwave.
Beeswax pastilles: Natural honey scent, burns longer than soy. Best suited for oven method.
Paraffin alternatives: Various blends offer excellent scent throw and smooth tops.
Scenting Your Refill
- Pre-scented wax: Eliminates guesswork, consistent results
- Essential oils: 30-40 drops per 8-ounce candle maximum
- Fragrance oils: Specifically formulated for candle use, stronger throw
- Natural additions: Dried herbs or crystals for visual appeal
Pro tip: Allow 48-72 hours cure time for optimal scent throw—patience delivers better fragrance performance.
Fix Common Refilling Problems
Surface Dips and Cracks
Small depressions around wick areas indicate cooling shrinkage. Level with additional melted wax using a heat gun or careful pours. Allow complete cooling between applications. Time-saver: Keep a small amount of matching wax melted for quick touch-ups.
Tunneling Prevention
First burn determines everything. Allow candle to burn until melted wax reaches container edges (approximately 1 hour per inch diameter). This sets memory for subsequent burns and prevents wasted wax along container walls.
Safety Protocols for Home Refilling
Hot wax handling:
– Never leave melting wax unattended
– Use dedicated candle-making tools only
– Work on heat-resistant surfaces with ventilation
– Keep fire extinguisher nearby
Container safety checks:
– Inspect for cracks, chips, or damage
– Ensure heat-safe materials only (no plastic)
– Test container stability before filling
– Avoid extremely thin glass that may shatter
Critical warning: Never add water to hot wax—it causes dangerous splattering. Always have a lid nearby to smother potential wax fires.
Storage and Longevity Tips
Fresh candles: Cure 24-48 hours before first burn for optimal performance.
Wax storage: Seal unused wax in airtight containers, label with date and type. Most waxes maintain quality 1-2 years when stored properly.
Finished candles: Store in cool, dry locations away from direct sunlight to preserve scent and prevent discoloration. Wrap in tissue paper for delicate containers.
Refilling candle holders transforms expensive containers into sustainable luxury items you’ll enjoy for years. Start with the microwave method for quick results, then progress to double-boiler techniques as your confidence grows. Your favorite vessels deserve a second life—and your wallet will thank you every time you learn how to refill a candle holder successfully. With these professional techniques, you’ll never look at an empty candle container the same way again.


