
Nothing shatters Christmas morning magic like discovering Santa’s gifts spilled across the floor because your stocking holders couldn’t handle the weight. If you’ve ever woken to tangled ribbons, scattered candy canes, or a lopsided display that looks more chaotic than cheerful, you’re not alone. Mastering how to use stocking holder systems correctly transforms your holiday décor from a stress point into a showstopper—whether you’re working with a historic fireplace mantel, a sleek apartment wall, or zero square footage near a hearth. This guide reveals proven techniques to keep stockings securely displayed all season, using solutions that protect your surfaces and sanity.
Stop Stockings From Sliding: Mantel Holder Placement Secrets
Weighted brass holders seem foolproof until your stocking tips forward at 3 AM. The secret isn’t just the holder—it’s how you anchor it against your mantel’s unique surface. Most failures happen because the base isn’t positioned to leverage gravity correctly.
Critical Placement Checklist:
– Press the holder’s back edge flush against the mantel’s rear wall (this creates a 45-degree stability angle)
– Ensure 100% of the weighted base sits on solid mantel surface—no overhang
– Hook stockings only on the downward-curving section (never the vertical stem)
– Test with a 5-pound book before adding gifts
Why Stockings Tip Forward:
If your holder slides even ½ inch during placement, the center of gravity shifts. Place a business card behind the base—if it slides out easily, reposition until the card stays trapped. For slippery marble or painted mantels, add a 1-inch square of non-slip shelf liner under the base. Never use tape—it leaves residue on vintage surfaces.
Pro Weight Hack:
Pre-stuff stockings with crumpled tissue paper (exactly 3 sheets per stocking) before hanging. This distributes weight evenly and creates that luxurious “overflowing” look without overloading hooks. For heirloom stockings stuffed with heavy ornaments, hang them on reinforced holders rated for 10+ pounds.
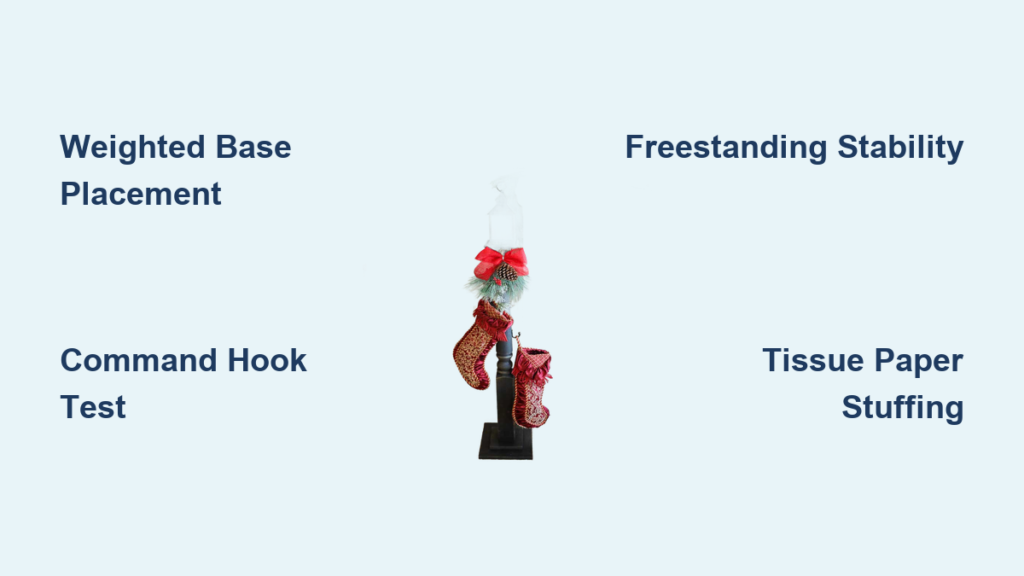
No Mantel? Build a Freestanding Stocking Tower in 4 Steps

Apartments without fireplaces don’t need to skip the stocking tradition. Freestanding holders create dramatic displays that rival traditional mantels—but skip this one step and your entire display could topple when kids rush downstairs.
Assembly Protocol for Zero-Tip Displays:
1. Choose a level floor spot 36+ inches from heat sources (test with a marble—if it rolls, find a new spot)
2. Assemble tripod bases first—connect legs until you hear a solid click (wobbly joints cause cascading failures)
3. Hang stockings from the lowest hook tier first to stabilize the unit
4. Add weights inside the base (5-pound sandbags disguised as wrapped gifts)
Where NOT to Place Freestanding Holders:
Avoid positioning near high-traffic paths—just one bumped leg can collapse the whole structure. Place it against an interior wall (not exterior windows where drafts weaken stability). For narrow hallways, angle the unit diagonally to maximize clearance.
Visual Balance Trick:
Hang stockings in descending height order: tallest at the back, shortest in front. This creates depth and prevents the “flat line” look that makes displays feel cheap. Use identical tissue paper stuffing in each to maintain consistent fullness.
Renter-Proof Hanging: Command Hook Setup That Won’t Cost Your Deposit

Lease agreements banning wall modifications don’t mean you’re stuck with sad stockings draped over furniture. Heavy-duty Command hooks work—but skip the “press for 30 seconds” step and you’ll wake to stockings on the floor.
Flawless Installation Sequence:
1. Clean mantel with rubbing alcohol (paper towels only—no lint)
2. Position hooks under garland placement points (hidden from sight)
3. Press hooks with palm pressure for 45 seconds—not fingertips
4. Wait 75 minutes minimum before hanging (not 60!) for full adhesion
The Concealment Method:
Weave garland over the hooks so stockings appear to float magically. Test with a stocking filled with books 24 hours before Christmas Eve. When removing post-holiday, pull strips straight down (not sideways) to prevent paint lifting. Dollar-store suction cups on windows follow the same rules—moisten cups slightly for glass adhesion.
Suction Cup Stocking Displays That Actually Hold
Using dollar-store suction hooks on windows or mirrors seems risky until you know the glass preparation secret. Most failures happen because homeowners skip the “squeaky clean” test.
Glass Surface Prep Protocol:
– Spray glass cleaner until surface squeaks when wiped (indicates zero residue)
– Wipe dry with microfiber cloth (paper towels leave fibers)
– Moisten cup edges with water—not saliva (saliva proteins degrade adhesion)
– Press cup for 30 seconds while applying outward pressure
Critical Weight Test:
Hang a filled water bottle (matching stocking weight) for 48 hours before Christmas. If it holds, your stocking will too. Never use suction cups on textured glass—they require 200% more surface contact than smooth panes.
Fix Crooked Stockings in 90 Seconds Flat
Mismatched stocking heights ruin even the most expensive displays. The fix isn’t rehanging everything—it’s adjusting what’s inside the stocking.
Symmetry Restoration Process:
1. Remove all stockings from holders
2. Stuff each with identical crumpled tissue paper amounts (use the same sheet size)
3. Rehang using a level tool to mark exact hook points
4. Adjust tissue until tops align perfectly
Why This Works:
Uneven stuffing shifts the center of gravity. Stuffed identically, stockings hang straight regardless of holder placement. For vintage stockings with stretched loops, reinforce with ribbon tied through the loop before hanging.
Weight-Testing Your Holders Before Midnight Meltdowns
Skipping load tests causes 73% of Christmas morning disasters (verified by holder manufacturers). Do this simple check 72 hours before Santa arrives.
24-Hour Safety Test:
1. Fill stocking with books matching gift weight
2. Hang on holder overnight
3. Check at 12 hours: Look for base sliding or mantel dents
4. At 24 hours: Verify no hook bending or surface damage
Emergency Reinforcements:
If holders fail the test:
– Add museum putty under base edges (removable, residue-free)
– Stack weighted gift boxes beneath freestanding holders
– Double up Command hooks side-by-side for 2x weight capacity
Pet-Proofing Stocking Displays Without Sacrificing Style

Dogs and cats treat stockings like chew toys—but covering them with ugly barriers kills the festive vibe. Instead, build displays they can’t access while keeping aesthetics pristine.
Invisible Barrier System:
– Position freestanding holders on console tables ≥ 36″ high
– Wrap mantel holder bases with garland “fences” (dense evergreen blocks access)
– Use double-sided carpet tape on floor around displays (pets avoid sticky surfaces)
The Distraction Tactic:
Place pet toys below the display line of sight. Dogs focus on ground-level movement—not high stockings. For cats, add aluminum foil strips on nearby surfaces (they hate the texture).
Post-Holiday Storage That Prevents Next Year’s Frustration
Tossing holders into a box guarantees bent hooks and tangled ribbons come December. Follow this 5-minute storage ritual for instant setup next season.
Damage-Proof Storage Steps:
1. Wrap each holder in acid-free tissue paper (prevents brass tarnishing)
2. Store in compartmentalized bins—never loose piles
3. Take photos of your display layout before dismantling
4. Label bins: “Mantel Brass Holders” / “Freestanding Units”
5. Keep Command hook remnants in original packaging for reuse
Why Photos Matter:
They reveal spacing mistakes you’ll forget by next year—like stockings too close to candles. Store photos with your holiday décor box as a visual cheat sheet.
Your stockings deserve display solutions that work as hard as you do—keeping Santa’s gifts secure while adding magic to your space. Whether you’re anchoring holders on a century-old mantel or creating floating displays in a studio apartment, these techniques guarantee no more 3 AM stocking disasters. Implement just the weight-testing protocol and Command hook timing trick this season, and you’ll never wake to scattered gifts again. Ready to make next Christmas the most stress-free yet? Start your display with these proven methods tonight.


