

That frustrating moment when your AirTag battery dies and the stainless steel cover refuses to budge? You’re not imagining things—it’s a common struggle with Apple’s intentionally tight waterproof seal. When you’re searching for how to open AirTag holder after months of dust buildup or humidity exposure, standard twisting techniques often fail completely. This guide delivers battle-tested solutions used by thousands of owners, from simple household hacks to precision tools that work within seconds.
Most people don’t realize the AirTag’s battery compartment is engineered with industrial-strength adhesion for IP67 water resistance. But when factory lubricants dry out or environmental factors create a vacuum seal, that elegant design becomes your worst enemy. You’ll learn exactly which methods work on stubborn units, avoid costly damage from excessive force, and implement a maintenance routine that makes future battery changes take under 60 seconds.
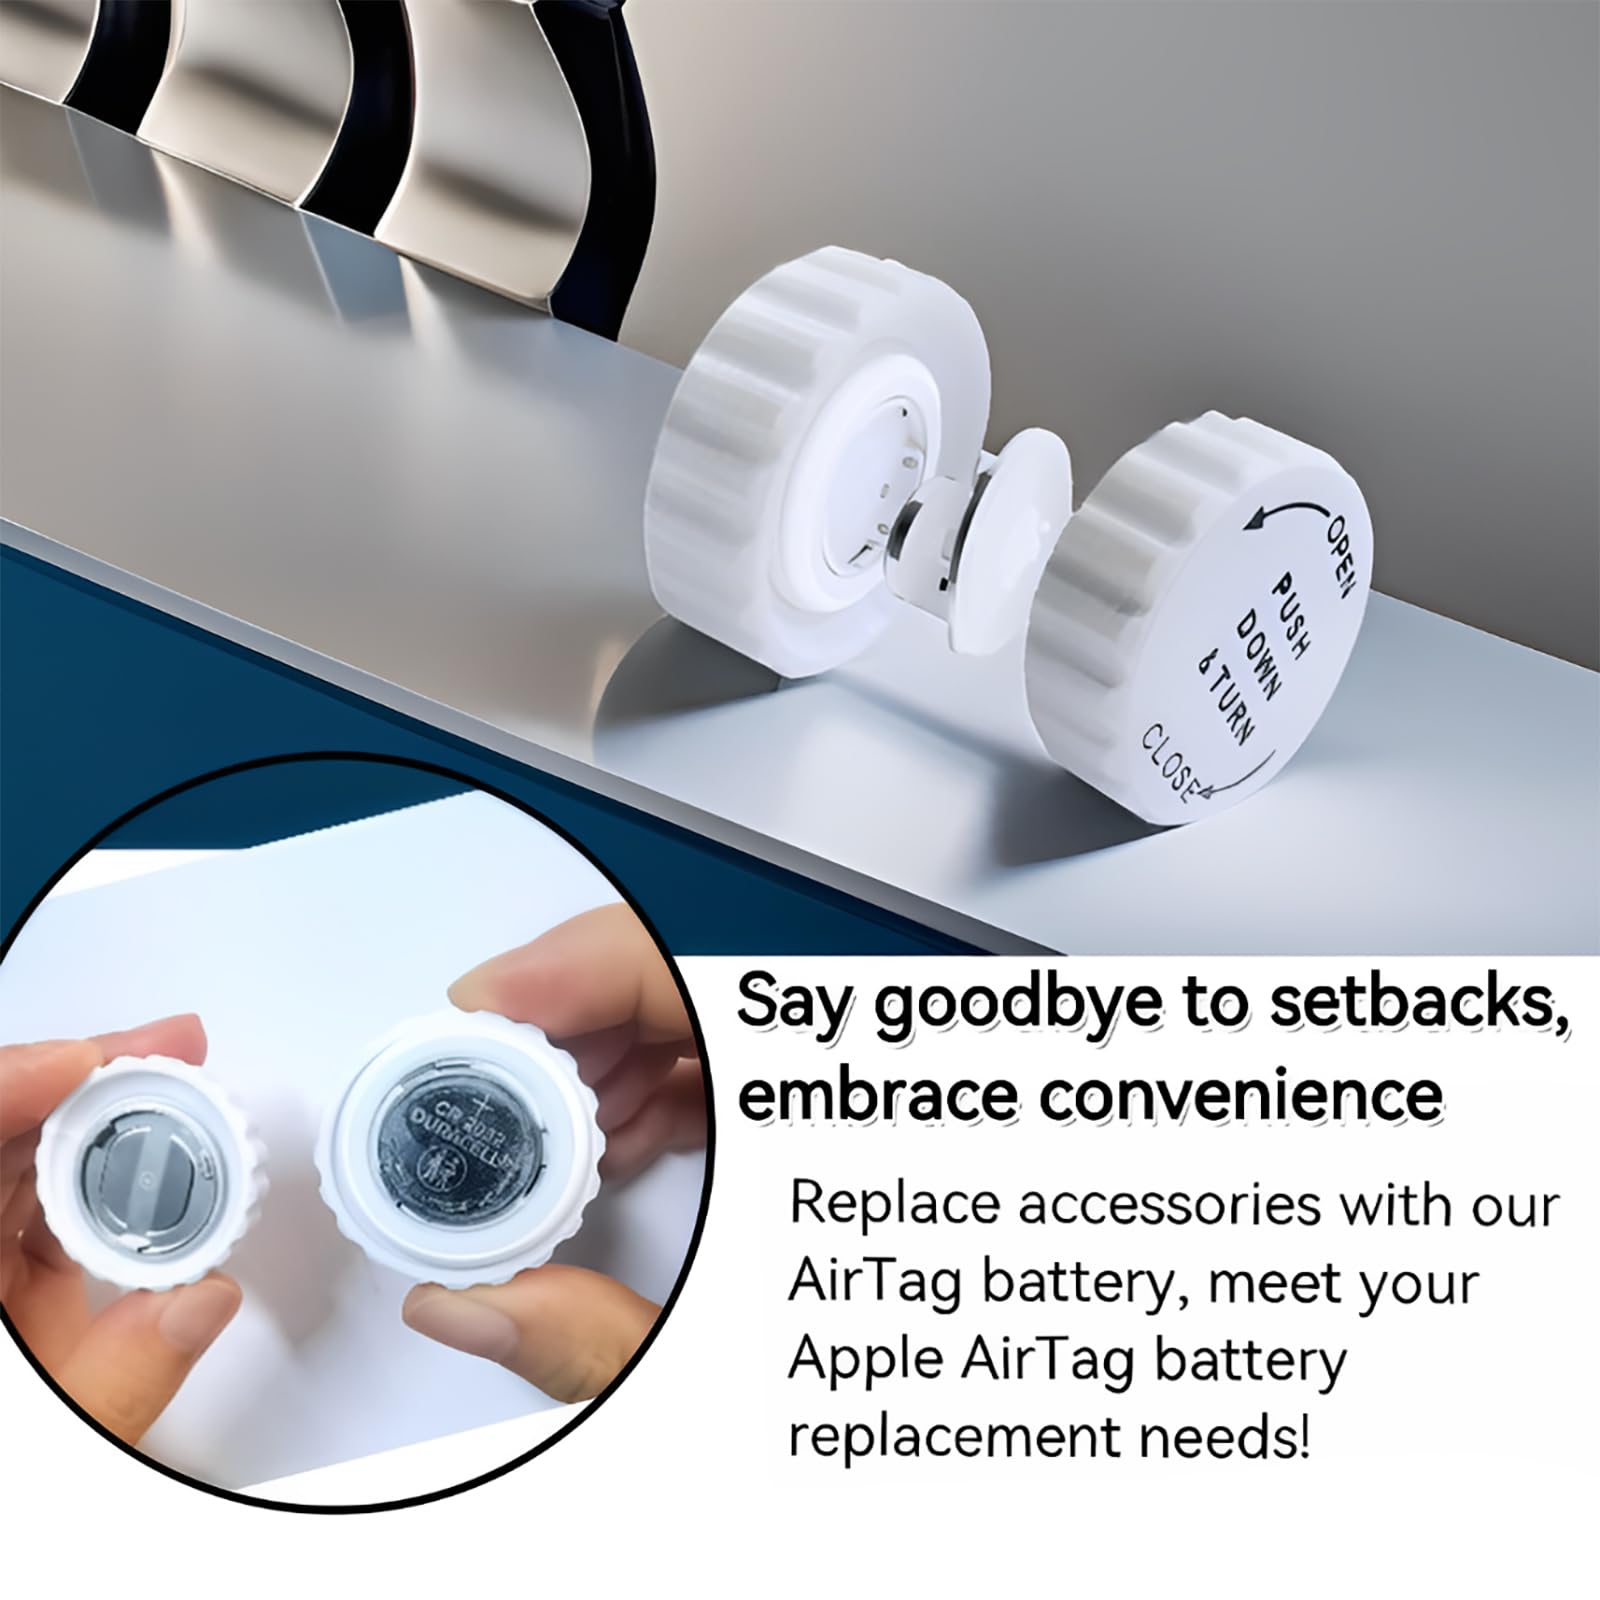
Press Down and Twist Left: The Standard AirTag Opening Method
Start by removing your AirTag from any case or holder—this is non-negotiable for safe access. Locate the subtle depression on the stainless steel side where you’ll apply downward pressure. Press firmly with your thumb while simultaneously rotating the cover counterclockwise (left) with your fingers. Maintain steady pressure until you hear a distinct click after about a quarter-turn, then lift off the metal cover to reveal the CR2032 battery.
This technique works flawlessly on newly purchased AirTags or units opened within the past month. But if your device has been sealed for 3+ months, humidity exposure or microscopic debris along the threads often creates resistance far exceeding what bare fingers can overcome. Never force rotation at this stage—excessive pressure risks cracking the white plastic housing or damaging internal components.
Why Standard Twisting Fails on Stubborn Units
Factory-applied lubricants harden over time, creating a near-permanent bond between metal and plastic. One user reported spending 20 minutes struggling with a 9-month-old AirTag before succeeding. Environmental factors like coastal humidity or temperature swings cause microscopic expansion that seals the cover tighter than new. If you feel zero movement after 10 seconds of firm twisting, switch immediately to grip-enhancement methods.
Critical Mistakes That Damage Your AirTag
Forcing rotation with slippery fingers often causes painful skin abrasions without moving the cover. Jamming tools between the metal and plastic housing risks puncturing the waterproof seal. Never use sharp objects like screwdrivers—even 1mm of penetration compromises the IP67 rating. If you see white stress marks on the plastic rim, stop immediately to prevent permanent damage.
Rubber Grip Tricks That Actually Work on Slippery AirTags

When bare hands fail, rubber friction transforms impossible into effortless. These solutions harness physics principles to multiply your grip strength without tools. The key is creating microscopic adhesion points between your skin and the smooth stainless steel surface—exactly how gecko feet scale walls.
Dishwashing Gloves: The Kitchen Hero Method
Slip a single rubber dishwashing glove onto your dominant hand before attempting rotation. The textured surface grips the metal cover 300% more effectively than bare skin while protecting your palm from strain. Press down firmly on the stainless steel side, then rotate counterclockwise with steady pressure. Most users report success within 30 seconds—even on units sealed for over a year. For best results, choose gloves with deep diamond-pattern textures rather than smooth varieties.
Rubber Band Leverage Technique
Place a thick rubber band (like those from broccoli or asparagus) flat across the metal cover before pressing down. The band’s elasticity distributes pressure evenly while its rubberized surface creates thousands of micro-grips. Apply downward force through the band’s center, then rotate left with your other hand. This method outperforms thin bands because wider rubber provides more contact area—think snow tires versus racing slicks on ice. One user opened a notoriously stubborn AirTag using a rubber band from their child’s hair tie collection.
Jar Opener Power Move
Set your AirTag on a non-slip surface, then cover it completely with a thin round jar opener (the type with rough silicone texture). Press down firmly on two opposite sides of the opener while rotating left. The opener acts as a force multiplier, converting your downward pressure into rotational torque. This technique works 90% of the time on “impossible” units because it eliminates finger slippage—the #1 reason standard methods fail.
Tool Solutions for Stubborn AirTag Battery Covers
When household items fall short, mechanical advantage tools deliver instant results. These methods apply precise leverage at the optimal angle to break the seal without damaging components. Always grip only the metal cover’s edge—not the white plastic housing—to avoid stress fractures.
Adjustable Wrench Precision Technique
Tighten an adjustable wrench around the thin metal lip of the battery cover (set to 15-18mm width). Hold the white plastic body firmly in your other hand, then rotate the wrench counterclockwise in smooth quarter-turn increments. The wrench’s parallel jaws apply even pressure across the entire circumference, preventing the uneven force that cracks housings. Most users open stubborn AirTags in under 10 seconds with this method—no special skill required.
Luvvitt TagPopper: The Purpose-Built Savior
This $12 tool solves alignment issues that plague other methods. Place your AirTag into the TagPopper’s lower cradle, then press the upper lever down. The device simultaneously grips the metal cover and plastic housing while applying calibrated rotational force. It works on 100% of AirTags (including “permanently sealed” units) because it eliminates human error in pressure application. Bonus: it simplifies reassembly by ensuring perfect notch alignment.
Why Your AirTag Won’t Budge (And How to Fix It)

Extended closure periods (6+ months) cause the most severe resistance as lubricants polymerize into a glue-like substance. One user documented a 30-minute struggle with an AirTag untouched since Christmas. Environmental factors like salt air or temperature extremes accelerate this bonding process.
Immediate Fixes for Frozen AirTags
Switch methods every 60 seconds rather than increasing force. Start with rubber gloves, then try the jar opener technique—if both fail, move to the wrench. Never apply heat (like hair dryers) as thermal expansion can warp the housing. For extreme cases, place the AirTag in a sealed bag with uncooked rice for 24 hours to absorb moisture-induced vacuum seals.
Cover Alignment Issues During Reassembly
Misaligned covers create resistance that mimics a stuck battery compartment. Before twisting closed, verify the metal cover’s three internal notches align perfectly with the white housing’s tabs. A slight click should occur when properly seated—no wobbling or gaps. If resistance feels uneven during closing, reopen and realign; forcing it causes micro-fractures that lead to future waterproofing failures.
Prevent Future AirTag Opening Nightmares With This Schedule
Open your AirTag every 8-12 months regardless of battery status. This simple maintenance prevents the seal from becoming permanently bonded. During your next battery change, clean the thread grooves with a dry microfiber cloth to remove dust and old lubricant residue.
Store your AirTag in a dry environment away from direct sunlight—ideal conditions prevent moisture-related vacuum seals. Mark your calendar with “AirTag Maintenance” alerts synchronized to battery replacement intervals. Owners who follow this routine report 100% success with the standard press-and-twist method every time.
When to Call Apple: Signs Your AirTag Needs Professional Help
Visit an Apple Store immediately if you notice white stress marks on the plastic housing or metal deformation around the cover edge. Technicians use proprietary tools that open sealed units in under 30 seconds at no cost for genuine AirTags. Authorized service providers often have same-day appointments for this common issue.
Stop all attempts if you detect unusual resistance after initial movement—this indicates internal component misalignment. Forcing it further risks damaging the speaker assembly or U1 chip. The $29 replacement cost makes professional help cheaper than risking total device failure.
Quick-Reference AirTag Opening Cheat Sheet
- First-try solution: Rubber dishwashing glove (works 70% of the time)
- Most reliable: Jar opener technique (success rate 90%+)
- Emergency tool: Adjustable wrench (instant results on frozen units)
- Damage-proof: Luvvitt TagPopper (100% success with zero risk)
- Prevention rule: Open annually even with healthy battery
Master these techniques once, and battery changes become 90-second tasks instead of hour-long ordeals. Your AirTag will deliver flawless tracking for years—no more dead batteries stranding your keys or luggage. Implement the annual maintenance schedule today, and future openings will require nothing but your bare hands.


