
You’ve just pulled your holiday turkey from the fridge, unwrapped it with anticipation, and there it is—that stubborn white plastic clip pinning the drumsticks together like miniature handcuffs. While it seems designed to defy removal, this hock lock (as the industry calls it) yields in under two minutes with the right technique. Leaving it on risks uneven cooking where dark meat stays raw while breast dries out—a Thanksgiving disaster waiting to happen. Whether you’re stuffing the cavity or aiming for picture-perfect presentation, this guide delivers the exact steps to remove the plastic leg holder safely and efficiently. You’ll gain complete control over your bird’s cooking process without damaging skin or wasting precious prep time.
Spot the Plastic Hock Lock: What It Is & Why It’s There
That hard plastic clamp isn’t random packaging—it’s a food-grade nylon device officially called a hock lock or leg truss. Manufacturers like Volk Enterprises trademark theirs as Handi-Clamp®, while Butterball markets it as an “oven-safe leg holder.” This heat-resistant clip secures drumsticks during processing to prevent splaying and maintain that store-shelf-perfect presentation.
Critical details you need to know:
– Material: Medical-grade nylon certified for food contact
– Temperature tolerance: Withstands up to 500°F (260°C)—far hotter than standard roasting temps
– Location: Fixed where drumstick ends cross above the cavity opening
– Purpose: Keeps legs tucked for packaging, not for cooking performance
Critical Safety Check: When You MUST Remove the Plastic Clip
While the hock lock won’t melt in a standard 325°F oven, food scientists warn that leaving it on creates dangerous cooking imbalances. University of Georgia Extension research confirms it “makes even cooking much more difficult” by trapping heat around the breast while starving dark meat of circulation. Harold McGee’s NYT analysis proves the plastic itself won’t contaminate your bird—but it will cause your thighs to lag 20-30°F behind breast temperature, risking undercooked dark meat.
Remove immediately if:
– You’re deep-frying (oil temps hit 375°F with hot spots exceeding 500°F)
– Grilling over direct high heat (common above 400°F)
– Stuffing the cavity (the clip blocks access completely)
– Pursuing faster cooking (loose legs reach safe temps 25% quicker)
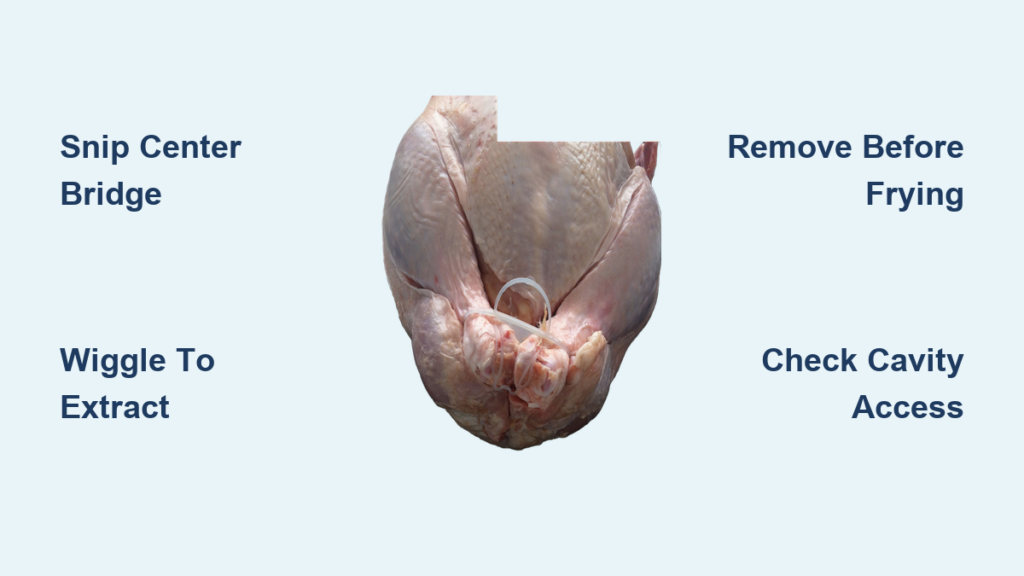
Snip & Pull: 3-Step Removal in Under 60 Seconds
Position Your Turkey for Safe Access
Place the bird breast-side up on a stable, non-slip cutting board. Locate the hock lock where drumstick ends converge above the cavity—it’s impossible to miss with its stark white or translucent appearance against the skin. Ensure your workspace has ample light; this plastic blends with raw poultry under dim lighting.
Cut the Central Bridge with Precision
Grab kitchen shears—not household scissors. Standard scissors lack the leverage for thick nylon and often slip, risking cuts to your hand or punctured skin. Position shears at the exact center of the plastic bridge connecting both legs. Apply firm, steady pressure downward in one motion. You’ll feel slight resistance as the blades slice through the 1/8-inch-thick nylon—this is normal.
Extract Embedded Halves Without Damage
Grasp each plastic half firmly between thumb and forefinger. Wiggle gently side-to-side while pulling outward—never yank straight back. The clip often embeds slightly into joint tissue or skin folds during processing. If resistance feels extreme, reposition your grip closer to the drumstick joint. Discard pieces immediately in a lined trash can; these aren’t recyclable and contaminate compost systems.
Re-Trussing Your Turkey: Twine vs. Loose-Leg Methods
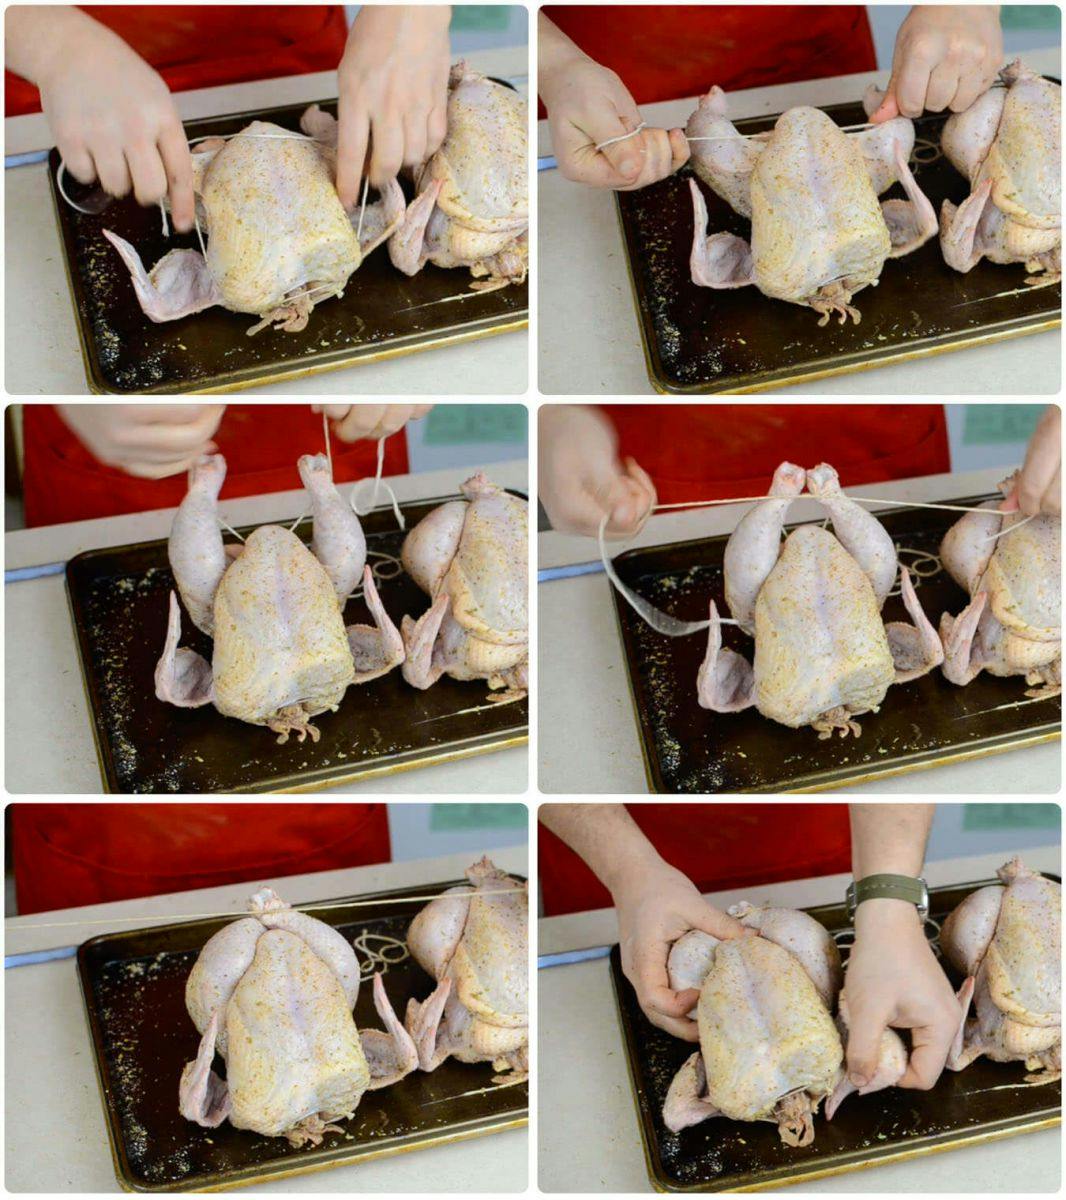
Classic Butcher’s Twine Technique (5-Minute Fix)
Want that magazine-cover presentation? Replace plastic with food-safe cotton twine:
1. Cross drumstick ends over the cavity opening
2. Wrap twine tightly twice around both legs just below the joint
3. Pull ends to cinch snugly—allowing one finger’s width of slack
4. Tie a secure square knot and tuck excess under the tail flap
Pro Tip: Chill twine in freezer for 2 minutes first—it grips slippery skin better.
Modern Loose-Leg Approach (2-Minute Advantage)
Skip re-trussing entirely for faster, more even cooking:
– Hot air circulates freely around thighs, accelerating dark meat to 180°F
– Prevents breast meat from exceeding 165°F while waiting for legs
– Ideal for spatchcocked birds or convection roasting
Warning: Only skip trussing if your recipe specifies loose-leg cooking—some brines require tucking.
Critical Mistakes That Ruin Your Turkey
Using dull shears creates jagged cuts that tear skin. Test blades on cardboard first—if they snag, sharpen them. Dull tools increase slip risk by 70% according to culinary safety studies.
Forgetting the deep-fry exception melts plastic into your oil. One home cook’s viral post documented $300 in ruined peanut oil after skipping removal—the nylon leached chemicals that contaminated the entire batch.
Leaving clips near heat sources invites disaster. If you roast with it on (against recommendations), never remove it immediately post-oven. Wait 15+ minutes—nylon conducts heat like metal and can cause third-degree burns on contact.
Oven vs. Deep-Fry: Plastic Removal Decision Table
| Cooking Method | Must Remove? | Time Saved | Cooking Impact |
|---|---|---|---|
| Standard Roasting (325°F) | Recommended | 2 min | Prevents undercooked thighs |
| Convection Roasting | Strongly Recommended | 2 min | Speeds dark meat by 20 min |
| Grilling (Direct Heat) | Required | 2 min | Avoids melted plastic |
| Deep-Frying | Non-Negotiable | 2 min | Prevents oil contamination |
| Slow Roasting (<275°F) | Optional | 0 min | Minimal impact on doneness |
Deep-Fry Emergency Protocol: Non-Negotiable Steps
If you’re deep-frying, hock lock removal isn’t optional—it’s a food safety imperative. Oil temperatures of 350-375°F create localized hot spots exceeding 500°F where nylon degrades. Melted plastic releases caprolactam (a known irritant) into your oil, ruining both turkey and expensive frying medium.
Follow this sequence:
1. Remove hock lock before brining (salt solutions make plastic harder to grip)
2. Rinse cavity thoroughly to eliminate shears debris
3. Pat drumsticks bone-dry—water causes oil splatter
4. Verify no plastic fragments remain using flashlight inspection
One slip here risks $200 in wasted oil and potential cross-contamination.
Final Pre-Roast Verification Checklist
Before your turkey hits heat, run this critical safety scan:
– [ ] Hock lock completely removed (check cavity edges with fingertips)
– [ ] Cavity fully accessible for stuffing or herb placement
– [ ] Drumsticks positioned per cooking method (tucked or loose)
– [ ] Meat thermometer calibrated (test in ice water first)
– [ ] Shears cleaned of poultry residue (prevents cross-contamination)
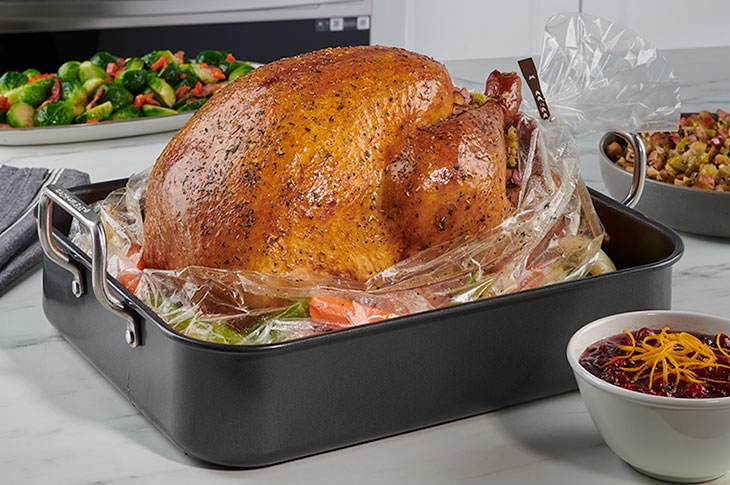
Whether you choose classic twine trussing or modern loose-leg roasting, removing that plastic leg holder gives you command over your turkey’s cooking destiny. This two-minute task prevents undercooked thighs, avoids melted plastic disasters, and unlocks even browning—transforming a potential holiday catastrophe into your most tender, juicy bird ever. Remember: that tiny clip served its purpose in transit, but your oven demands freedom. Grab your shears, follow these steps, and serve a turkey worthy of the feast. Your perfectly cooked centerpiece awaits—plastic-free and presentation-ready.


