
Nothing beats the satisfaction of pulling a hot baking dish from the oven with a pot holder you crafted yourself. Hand-knitted pot holders aren’t just practical kitchen tools—they’re durable, heat-resistant guardians that outperform flimsy store-bought versions while adding personality to your cooking space. Whether you’re a first-time knitter or refreshing your skills, this guide delivers everything needed to create pot holders that actually protect your hands from scalding pans. Forget generic patterns; we’ll focus exclusively on 100% cotton construction that withstands 400°F temperatures safely.
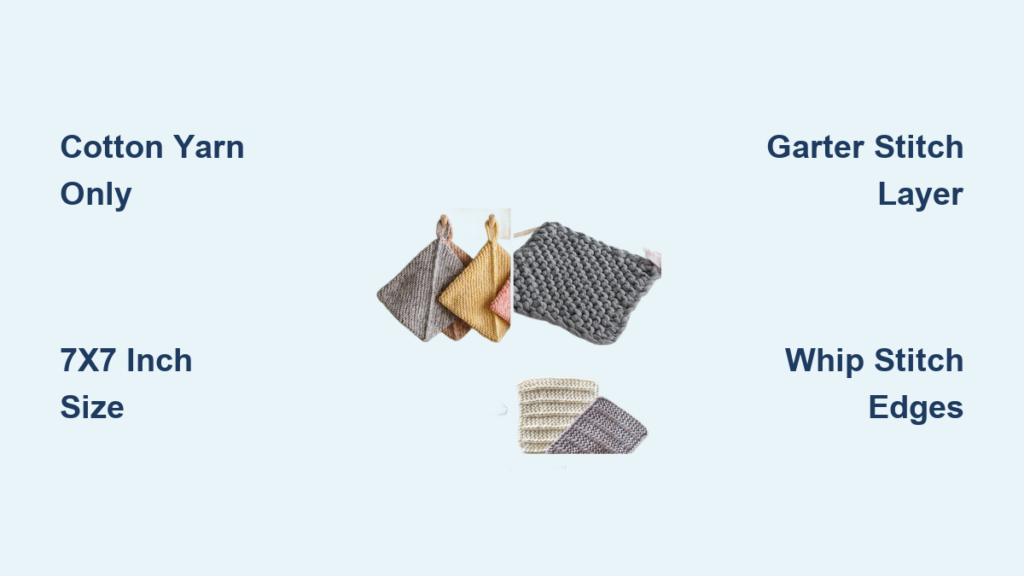
Why Cotton Yarn Is Your Only Safe Choice for Knit Pot Holders
Synthetic yarns melt against hot pans—that’s why 100% cotton is non-negotiable for functional pot holders. Unlike acrylic or polyester, cotton fibers resist scorching and won’t transfer heat to your skin. For best results, use worsted weight (medium/4) cotton yarn—light colors reveal stains for timely cleaning, while variegated options cleverly hide everyday splatters. Budget 50-75 yards per pot holder; a single 100g skein typically covers two projects.
Needle Selection That Prevents Slipping Stitches
Bamboo or wooden needles grip cotton better than slippery metal options. Opt for US 7 (4.5mm) or US 8 (5.0mm) straight needles—these sizes create the dense, heat-resistant fabric required. Double-pointed needles work well for smaller 5×5 inch versions. Don’t skip essential tools: sharp scissors, a tapestry needle for seamless weaving, and a measuring tape to verify squareness. Critical safety note: Always pre-wash cotton yarn to test for color bleeding before starting.
Optional Heat-Resistant Upgrades
Boost grip with silicone dots applied to the back surface or sandwich heat-resistant fabric between layers. These additions transform basic pot holders into professional-grade tools that won’t slip when handling heavy Dutch ovens. For frequent bakers, consider reinforced corners by doubling yarn during assembly—this prevents tearing at stress points.
Exact 7×7 Inch Measurement Guide for Heat Protection
A standard 7×7 inch square fits most adult hands comfortably, while 7×9 inch rectangles handle oversized roasting pans. Thickness matters more than size—aim for compressed layers measuring at least 0.25 inches. For reliable heat protection, your pot holder needs three distinct layers: two outer knitted squares plus a thermal barrier between them.
Gauge Swatch Protocol You Can’t Skip
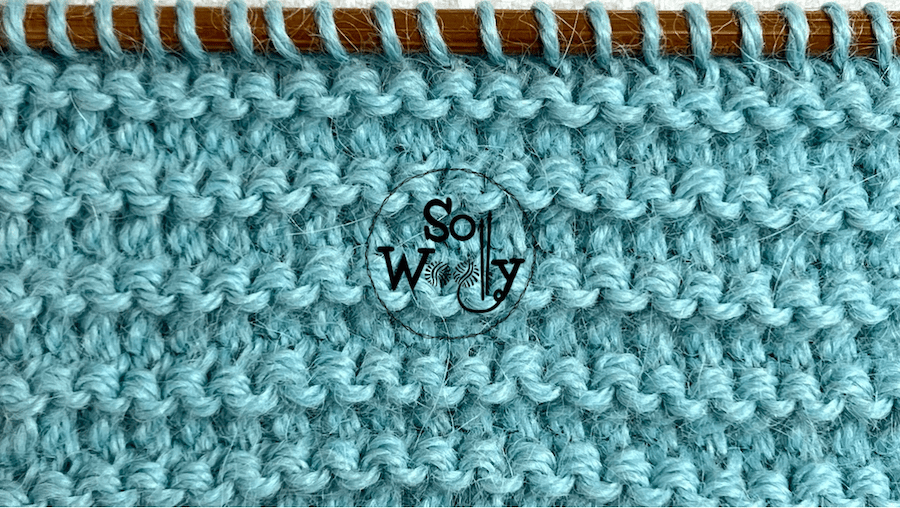
Knit a 4×4 inch swatch in your chosen stitch pattern before starting. For garter stitch (knit every row), expect 16 stitches and 32 rows per 4 inches. Stockinette stitch (alternating knit/purl rows) yields 18 stitches and 24 rows. This step prevents disastrous size mismatches—cotton yarn stretches differently based on brand and tension. If your swatch measures smaller, switch to larger needles; if larger, go down a size.
Garter Stitch vs. Double Knit vs. Thermal Stitch: Which Method Wins?
Each technique creates superior heat resistance, but your skill level determines the best approach. Beginners should start with the garter stitch double-layer method—it’s forgiving and produces reversible results. Advanced knitters save assembly time with simultaneous double knitting, while thermal stitch offers built-in thickness without sewing layers.
Garter Stitch Double Layer Method (Beginner-Friendly)
Cast on 30 stitches using the long-tail method. Knit every row until the piece measures exactly 7 inches (approximately 56-60 rows). Bind off loosely to prevent curling. Repeat identically for the second layer—even minor size variations create dangerous heat-transfer gaps. Whip stitch layers together with wrong sides facing, reinforcing corners with triple stitches.
Simultaneous Double Knitting Technique (Advanced)
Cast on 60 stitches (double your required count). Work the first 30 stitches as the front layer, then the next 30 as the back layer. Key tip: Place a stitch marker between layers to avoid twisting. Knit both layers simultaneously until you reach 7 inches, then use the 3-needle bind-off to join the top edge seamlessly. This eliminates assembly but requires constant tension monitoring.
Thermal Stitch for Built-In Heat Resistance
Cast on 32 stitches (a multiple of 4). Row 1: K2, slip 2 with yarn in front; Row 2: P2, K2. Repeat these two rows to create a waffle texture that traps air for superior insulation. No assembly needed—this single-layer method achieves professional thickness through its unique structure. Ideal for medium-skill knitters seeking efficiency.
Knit a 7×7 Garter Stitch Pot Holder: Step-by-Step
Follow this foolproof sequence to create your first functional pot holder. This method delivers maximum safety with minimal complexity.
Prep Phase: Avoid Costly Mistakes
Verify all materials are cotton—check yarn labels twice. Knit your 4×4 inch gauge swatch and calculate exact stitch count. For worsted cotton on US 8 needles, 30 stitches typically yields 7 inches. Never skip this step: mismatched layers compromise heat protection.
Knitting Both Layers Perfectly
Cast on 30 stitches and knit every row for 7 inches. Measure vertically every 20 rows—cotton grows unexpectedly. Bind off loosely by knitting two stitches together, then passing the first over the second. Critical reminder: Use identical tension for both layers. Stack them and hold to light; any size difference shows as visible gaps.
Assembly Without Heat-Leaking Gaps
Place layers with wrong sides together. Thread an 18-inch yarn tail through a tapestry needle. Whip stitch around all edges with 1/4-inch seam allowance, maintaining even tension—too loose creates gaps, too tight causes puckering. Reinforce corners with 5 extra stitches: these endure the most stress when grabbing heavy pans.
How to Attach a Secure Hanging Loop That Won’t Rip

A flimsy loop ruins an otherwise perfect pot holder. Pick up 6-8 stitches along one corner edge. Knit 3-4 inches in garter stitch, then fold the strip in half. Sew the folded end securely to the opposite corner using a whip stitch through all layers. Test strength immediately by gently tugging—the loop should feel as solid as the pot holder itself. For heavy-duty use, double the yarn when attaching.
Seed Stitch and Basket Weave Patterns for Better Grip
Beyond basic garter stitch, textured patterns enhance functionality. Seed stitch (alternating knit/purl stitches) creates a bumpy surface that grips pans even when wet. Cast on an even number of stitches, then work K1, P1 across every row. Pro tip: This pattern naturally lies flat—no border needed to prevent curling.
Colorwork Without Complexity
Add visual interest with stripes: change colors every 4-6 rows, carrying unused yarn up the side edge. For subtle effects, use 1-2 row stripes; bold statements need 6+ rows. Avoid tangled floats by twisting yarns every 4 stitches when changing colors. Variegated cotton yarns achieve color variation automatically while hiding stains.
Pass the 200°F Heat Test: Safety Protocol for Handmade Pot Holders
Never trust a new pot holder with a 400°F oven immediately. Start testing with a 150°F pan for 30 seconds—no heat should transfer to your hand. Gradually increase temperature in 50°F increments. Stop immediately if you see: discoloration, scorch marks, or any warmth sensation. Test grip when damp (simulating real kitchen conditions) and ensure the pot holder springs back to shape after folding.
Wash Without Damage: Longevity Tips for Cotton Pot Holders
Machine wash cold with mild detergent—never use bleach or fabric softeners as they degrade cotton’s heat resistance. Tumble dry low or air dry flat; never wring out excess water. Wash weekly with regular use to remove grease buildup that reduces effectiveness. Storage secret: Hang by the loop in a dry area away from stove heat. Never fold for storage—permanent creases weaken fibers at stress points.
Fix Curling Edges and Layer Gaps in Minutes
Curling edges indicate inconsistent tension. Fix immediately: Add 3-5 garter stitch rows at the beginning and end, plus a 3-stitch seed stitch border on each side. For gaps between layers, steam block both pieces separately before assembly—this relaxes cotton fibers and evens tension. If heat transfers through, insert heat-resistant batting between layers or add a third knitted square.
2 Hours vs. $5: Real Cost of Hand-Knitted Pot Holders
Your first pot holder takes 2-3 hours; experienced knitters finish in 45 minutes. Quality cotton yarn costs $3-8 per project, while needles ($8-15) last for dozens of pot holders. Compare this to store-bought versions: $15-25 mass-produced pot holders often use unsafe synthetics and wear out faster. Hand-knitted versions last 2-3 years with proper care—making them both economical and eco-friendly.
Create Gift-Worthy Pot Holder Sets in 3 Colors
Impress foodie friends by making coordinated sets: knit one in garter stitch, one in seed stitch, and one in basket weave using the same color palette. Personalize effortlessly with duplicate stitch embroidery—add initials using contrasting yarn after assembly. Package sets tied with kitchen twine for rustic charm. For holiday gifts, choose seasonal colors like cranberry/cream for Christmas or sage for spring.
Your handmade pot holders will become kitchen workhorses that outlast store-bought versions while providing genuine safety. Start with the garter stitch method to build confidence, then experiment with textured patterns as your skills grow. Remember: every pot holder you knit protects your hands better than thin, synthetic alternatives—and the best part? That quiet pride when you grab a steaming casserole with something you made yourself. Grab your cotton yarn and needles—your first heat-safe kitchen essential awaits.


