

Tangled garden hoses create frustrating tripping hazards and dramatically shorten your hose’s lifespan. Every time you wrestle with knotted rubber instead of watering your plants, you’re wasting precious gardening time. A well-designed water hose holder solves these problems while adding functional beauty to your outdoor space.
The good news is you don’t need to buy an expensive, generic holder that doesn’t fit your space. Learning how to build a water hose holder lets you create a custom solution matching your garden layout, hose length, and personal style. Whether you have a small urban patio or sprawling acreage, this guide provides exact methods for constructing professional-grade holders that last for decades.
You’ll discover three distinct construction approaches, material selection secrets that prevent premature rot, and clever troubleshooting techniques most guides overlook. By the end, you’ll transform that messy hose pile into an organized garden feature that neighbors will admire.
Select the Perfect Hose Holder Design for Your Space
Wall-Mounted Options for Space Efficiency
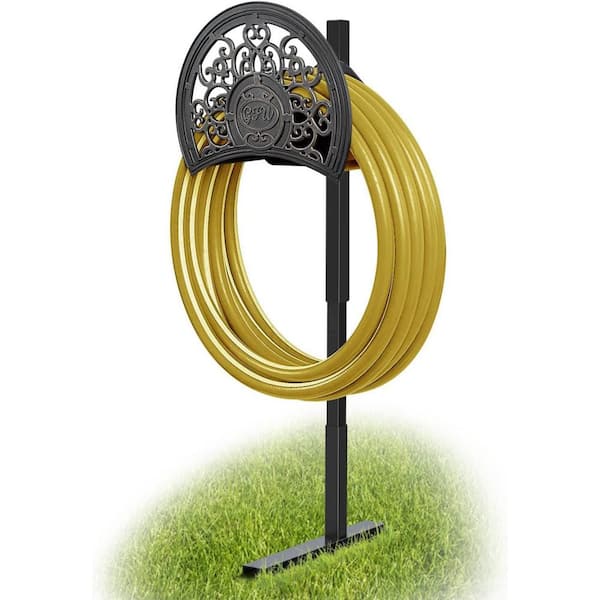
Wall-mounted water hose holders maximize yard space while positioning your hose exactly where you need it—near your spigot. Standard brackets support 50-100 feet of standard garden hose, making them ideal for suburban properties. If curb appeal matters, decorative scroll designs provide functional storage while enhancing your home’s exterior aesthetic.
Before building, measure your fully extended hose length. Most residential hoses require 12-18 inches of horizontal wall space for proper coiling. Consider your wall material too—wood siding accommodates easier installation than brick or stucco, which may require specialized anchors. For brick walls, plan to install your how to build a water hose holder project using masonry anchors rated for outdoor use.
Freestanding Designs for Flexible Placement
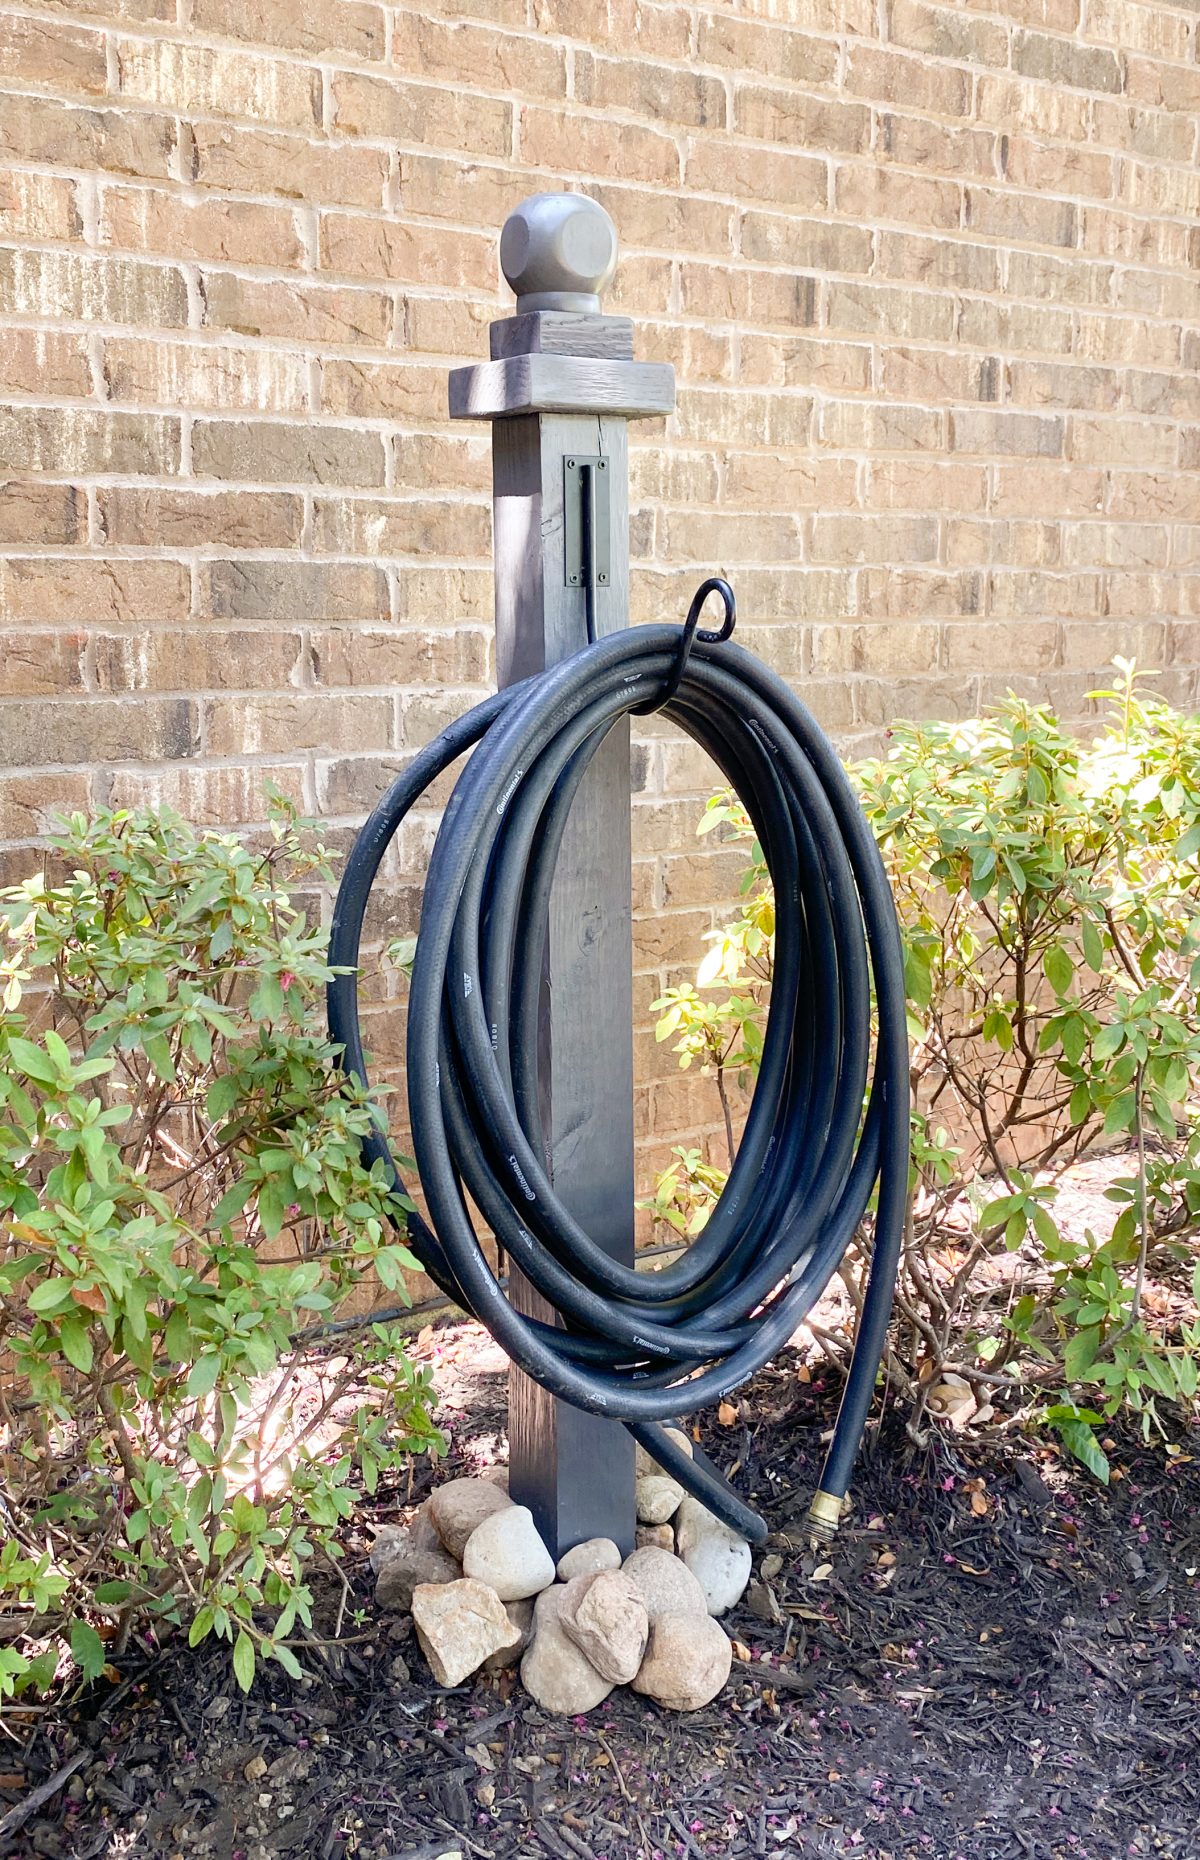
Freestanding water hose holders work anywhere in your yard, independent of wall access. Post-style holders using 4×4 lumber buried 24 inches deep provide rock-solid stability that won’t tip when pulling heavy, water-filled hoses. These become permanent garden fixtures that can support multiple hoses simultaneously.
Decorative obelisks serve dual purposes—hiding 150+ feet of hose while functioning as garden art. Their pyramid shape creates natural drainage during rain, preventing water accumulation that damages hoses. Consider your soil type before installation; clay soils may require wider post holes with additional gravel for proper drainage in your how to build a water hose holder project.
Portable Solutions for Multiple Watering Zones
For properties with multiple watering zones, build a rolling cart with 10-inch pneumatic wheels that easily navigates uneven terrain. These mobile holders eliminate tripping hazards by keeping hoses elevated during transport between garden beds. Box-style holders with secure lids protect hoses from UV damage while providing storage for nozzles and attachments.
Portable designs require more initial investment but deliver unmatched flexibility. When building these for your how to build a water hose holder project, reinforce wheel attachments with gusset plates to handle the weight of a fully coiled, water-filled hose. Consider adding a small tool tray on top for immediate access to frequently used gardening accessories.
Gather Essential Materials and Tools Before Starting
Select Long-Lasting Lumber for Outdoor Durability
Choose cedar for your water hose holder if longevity matters—its natural oils repel rot and insects, delivering 15+ years of service with minimal maintenance. Pressure-treated pine offers a budget-friendly alternative but requires annual sealing to prevent chemical leaching and surface checking. Cypress provides a middle ground with natural resistance to splitting and moderate decay resistance.
Composite decking materials have gained popularity for water hose holders due to their zero-maintenance properties and modern appearance. While initially more expensive, they won’t warp, crack, or require finishing—simply cut to size and assemble. Remember that composites expand more than wood in heat, so leave 1/8-inch gaps between boards in your how to build a water hose holder construction.
Critical Hardware for Weather Resistance
Never use standard drywall screws in outdoor hose holder construction—galvanized or stainless steel fasteners prevent rust stains and structural failure. Purchase heavy-duty brackets rated for 50+ pounds to support water-filled hoses without sagging. Exterior wood glue creates stronger joints than screws alone when building your water hose holder.
Waterproof sealant completes your protection system. Apply it to all end grain surfaces and joints where moisture penetrates most easily. For metal components, choose a sealant specifically formulated for outdoor use that remains flexible through temperature changes without cracking.
Must-Have Tools for Precision Construction
A miter saw ensures clean, accurate cuts for professional-looking water hose holders, though a circular saw with a guide works for straight cuts. Drill quality matters—invest in a cordless model with torque control to prevent stripping screw heads in softwoods. Use 1/8-inch bits for pilot holes and 3/8-inch bits for countersinking screw heads.
Don’t skip the level and measuring tape—these inexpensive tools prevent costly alignment mistakes. Sandpaper in both 120 and 220 grit creates smooth surfaces that accept finish better. Finally, use a high-quality paintbrush for sealant application to avoid bristle contamination in your waterproofing process.
Construct a Simple Wall-Mounted Hose Bracket
Prepare and Cut Lumber for Clean Assembly
Cut cedar 1×8 boards to 18 inches for the back plate—this width accommodates standard hose coils without excessive bulk. Rip a 1×4 board to 3.5 inches for the hose support arm using your miter saw’s fence for precision. Sand all surfaces thoroughly with 120-grit paper, then finish with 220-grit for a smooth feel.
Round all sharp edges slightly with sandpaper to prevent splinters and create a more professional appearance. Pre-drill all screw holes using a 1/8-inch bit to prevent splitting, especially near board ends where wood is most vulnerable during your how to build a water hose holder project.
Assemble Components for Maximum Strength
Position the support arm perpendicular to the back plate, leaving 1 inch of overhang at the bottom for hose clearance. Apply exterior wood glue to the joint before securing with two 3-inch galvanized screws driven at opposing angles. This creates a mechanical lock that prevents separation better than parallel screws.
Add a 45-degree triangular brace underneath the support arm using scrap cedar. Cut this brace from 1×4 material for sufficient strength. Test the assembly against your wall before final tightening—adjust the support arm angle slightly downward if your hose tends to slide off during use.
Install with Professional-Mounting Techniques
Locate wall studs using a stud finder and mark their centers on your wall. Hold the back plate in position and transfer these stud locations to the wood. Drill pilot holes through the back plate that match your stud spacing exactly.
Use 3-inch lag screws instead of standard screws for maximum holding power—these require pre-drilled 5/32-inch holes in the back plate. Apply waterproof sealant around the screw heads after installation to prevent water infiltration behind the holder. Check for level during installation; even a slight tilt causes hoses to slide to one side.
Weatherproof Your Water Hose Holder for Longevity

Apply Protective Finishes Based on Material
For natural cedar holders, apply penetrating oil annually to maintain moisture resistance without altering the wood’s appearance. Pressure-treated pine benefits from solid stain that both colors and protects—choose earth tones that complement your garden. Sunny locations demand marine-grade spar varnish for maximum UV protection on any wood holder.
Seal all end grain surfaces first, as this area absorbs moisture most readily. Apply finishes in thin, even coats rather than thick layers that may peel. Allow proper drying time between coats as specified by the manufacturer—rushing this step compromises protection.
Maintain Metal Components Year-Round
Replace any standard screws contacting soil or frequently wet areas with stainless steel equivalents. Powder coat metal brackets before installation for superior rust resistance compared to standard paint. Spray WD-40 on pivot points and moving parts every spring to prevent corrosion and ensure smooth operation.
Elevate wall-mounted holders 1/2 inch off siding using small spacers during installation. This air gap promotes drying and prevents moisture buildup that damages both the holder and your home’s exterior. Check all metal components annually for early signs of rust before problems become severe.
Troubleshoot Common Hose Holder Problems
Fix Sagging Arms with Structural Reinforcement
Sagging support arms indicate insufficient reinforcement. Install steel L-brackets underneath the affected arm, ensuring screws penetrate into solid structural members. For severe cases, add a second vertical support post midway along long arms to reduce leverage stress.
Consider reducing arm length if your hose consistently causes sagging—shorter arms create less torque on mounting points. This might mean building multiple smaller holders rather than one oversized unit, which often provides better long-term functionality for your how to build a water hose holder project.
Prevent Hose Kinking at Critical Contact Points
Increase your coil diameter to 18+ inches minimum to prevent kinks during storage. Add rubber bumpers at all hose contact points using adhesive-backed weatherstripping tape. Install a swivel connector between your hose and faucet to reduce twist accumulation during regular use.
Kinking often occurs at the holder’s entry point—round this edge generously during construction or add a smooth PVC sleeve to guide the hose gently onto the support arm. This small modification dramatically extends both hose and holder lifespan.
Transform Your Garden with a Custom Hose Solution
A properly built water hose holder eliminates daily frustration while adding functional beauty to your outdoor space. Start with a simple wall bracket this weekend, then progress to more elaborate designs as your skills grow. Remember the carpenter’s adage: “Measure twice, cut once”—this saves materials and prevents costly mistakes in your how to build a water hose holder project.
Your custom holder transforms hose management from a chore into an effortless part of your gardening routine. Share photos of your completed project—you’ll inspire other gardeners while showcasing your unique solution to a universal problem. Within weeks, you’ll wonder how you ever gardened without this simple yet transformative addition to your outdoor space.


