
That stubborn paint caked inside your roller frame or dried into the ridges of your paint tray isn’t just messy—it’s costing you money. Every time you toss a reusable tool because you didn’t know how to clean paint holder components properly, you’re throwing away $15-$50 per project. The good news? With the right techniques, you can restore even the grimiest paint trays and roller frames in under 45 minutes using supplies already in your garage. This guide reveals the exact step-by-step process professional painters use to make tools look new, whether you’re dealing with water-based latex splatters or stubborn oil-based enamel. You’ll learn paint-type identification tricks, solvent-saving hacks, and storage methods that extend tool life across multiple projects—saving you hundreds annually while guaranteeing smooth application every time you paint.
Before grabbing water or solvents, identifying your paint type is the make-or-break step that determines your entire cleaning approach. Using the wrong method—like water on oil-based paint—locks in residue permanently. Latex paint dissolves in warm soapy water, while oil-based varieties require mineral spirits to break down. Check your paint can label, or perform the quick test below. Skipping this step wastes time and ruins tools, so take 60 seconds to verify what you’re working with before proceeding.
Diagnose Paint Type and Safety Essentials
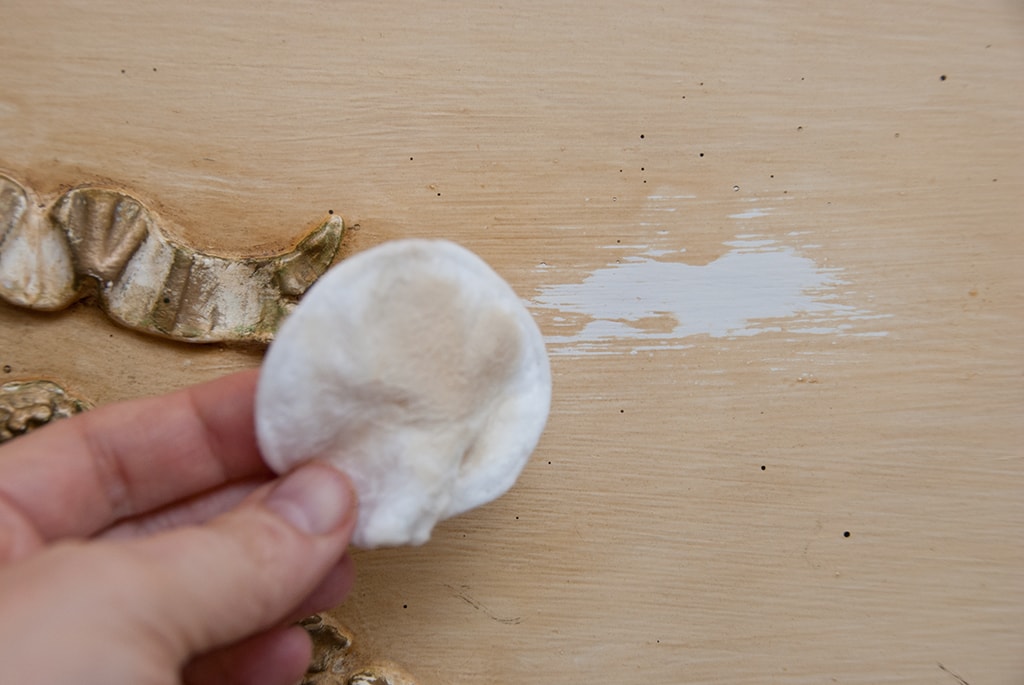
Perform the Rag Swab Test
Grab a damp rag and rub a small area of dried paint. If the paint softens, smudges, or transfers to the fabric, you’re dealing with latex. If it remains rock-hard with zero transfer, it’s oil-based. Critical tip: For oil paints, never use water first—it creates an impossible-to-remove emulsion. Always wear nitrile gloves and eye protection when handling mineral spirits, and work in a ventilated area like an open garage. Never pour solvents down drains; dispose of paint solids only after they’ve fully hardened in disposable containers.
Gather Paint-Specific Cleaning Kits
Assemble these items before starting—most are household staples:
For Latex Paint Cleanup:
– Rubber gloves and bucket
– Dish soap (Dawn works best)
– 5-in-1 painter’s tool for scraping
– Stiff nylon brush (1-inch bristles)
– Clean rags or paper towels
For Oil-Based Paint Cleanup:
– Mineral spirits in a sealed glass jar (never plastic)
– Dedicated metal bucket (plastic absorbs solvents)
– Extra rags for solvent disposal
– Zip-top bags for solvent storage
Pro Tip: Label all solvent containers clearly. Mineral spirits degrade plastic, so use glass or metal bottles with tight lids. Store away from heat sources—solvents are flammable.
Reclaim Every Drop Before Cleaning Begins
Paint Trays: Maximize Paint Recovery
Pour unused paint back into the original can by tilting the tray against a wall at 45 degrees. Use a 2-inch paintbrush to guide every last drop toward the spout—this recovers up to 30% more paint than free-pouring. Never scrape dried flakes into the can; contaminants ruin future batches. For stubborn residue, roll newspaper across the tray surface to absorb excess before moving to deep cleaning. Waiting just 10 minutes for paint to stop dripping increases recovery by 25%.
Roller Covers: Scrape Without Damage
Hold the roller cover horizontally over the paint can. Use the curved edge of your 5-in-1 tool (not the sharp edge) to scrape paint toward the can in long, downward strokes. Apply light pressure—digging too hard frays the roller nap. After scraping, roll the cover on cardboard scraps until paint stops transferring. This pre-cleaning step cuts solvent/water usage by half and prevents clogs in your sink.
Clean Roller Frames Within the Critical Window
Act within 30 minutes while paint stays workable. Dried paint requires harsh scraping that damages metal coatings.
Latex Paint: Hot Water Technique
Fill a bucket with 3 inches of near-boiling water (140°F). Add 1 tablespoon dish soap. Submerge the frame and scrub the roller cage interior with a stiff brush using circular motions—focus where paint pools near the axle. Rinse under running water until clear. Warning: Cold water sets latex paint instantly; always start hot. Dry frames completely with a microfiber cloth to prevent rust.
Oil Paint: Solvent Soak Method
Pour 2 inches of mineral spirits into a metal tray. Disassemble the frame if possible. Soak for 5 minutes, then scrub crevices with an old toothbrush. For high-gloss paints, wrap a rag around the brush handle to reach narrow gaps. Wipe residue with clean rags until no color transfers. Pour used solvent into a storage jar—don’t discard yet. Rinse frames with fresh mineral spirits before air-drying for 24 hours.
Deep Clean Roller Covers Without Ruining the Nap

Latex Paint: Squeeze-and-Rinse Method
Submerge the cover in hot soapy water. Squeeze from the center outward 10-15 times to force paint out of the fibers. Change water when cloudy. For dried spots, rub gently with a nylon brush. Rinse under strong water pressure while rotating the cover. Never spin-dry in a washer—this mats the fibers. Stand covers upright on a rack to dry completely (8+ hours); storing damp causes mildew.
Oil Paint: Two-Stage Solvent Process
- Initial soak: Submerge cover in mineral spirits for 5 minutes. Squeeze gently every minute.
- Solvent transfer: Move to fresh solvent for 2 minutes, then squeeze into a separate jar.
- Final wash: Clean with hot soapy water to remove solvent residue.
Solvent hack: Let used mineral spirits sit overnight—the paint solids sink. Pour clear liquid into a clean jar for reuse. Discard sludge by drying it in cardboard trays before trash disposal.
Paint Tray Cleaning: Three Foolproof Methods
Latex Paint: The Peel-Off Trick
Leave trays undisturbed for 3-4 hours until paint forms a solid sheet. Lift a corner with your 5-in-1 tool and peel upward in one motion—90% of residue comes off cleanly. Scrape remaining bits with the tool’s sharp edge held flat against the tray. For stubborn spots, apply hot vinegar for 2 minutes before wiping.
Oil Paint: Solvent Scrub Protocol
Wipe excess paint with rags first. Pour ½ cup mineral spirits into the tray basin. Scrub ridges with a stiff brush dipped in solvent. For dried paint, cover spots with solvent-soaked rags for 10 minutes before scraping. Pour used solvent into your recovery jar. Finish with a soapy water wash to remove fumes.
Emergency Reuse Method
When repainting within 24 hours: For latex trays, cover with a damp cloth. For oil trays, mist lightly with mineral spirits and seal in a plastic bag. Never store wet—this breeds bacteria in latex or thins oil paint.
Temporary Storage for Multi-Day Projects
Roller Cover Preservation
Remove covers from frames immediately. Wrap tightly in plastic wrap, squeezing out all air. For overnight breaks, refrigerate (40°F). For weekend pauses, freeze (-5°F). Thawing rule: Bring to room temperature 2 hours before reuse—applying cold rollers causes uneven paint texture. This method only works for covers; frames and trays still require full cleaning.
Solvent Storage Hack
Store mineral spirits in glass jars with headspace for expansion. Keep in a cool, dark place. Properly sealed solvent stays effective for 6 months. Discard if cloudy or separated.
Extend Tool Life for 10+ Projects
Roller Cover Maintenance
After drying, store covers upright in original packaging. Never stack them flat—this crushes the nap. Replace covers when fibers feel stiff or leave lint on walls. Quality covers last 5-10 uses with proper cleaning.
Frame Rust Prevention
After drying, apply a light coat of machine oil to metal parts with a rag. Wipe excess to avoid attracting dust. Store frames hanging vertically to maintain spring tension.
Eco-Friendly Disposal Protocol
Dry paint solids in cardboard boxes before trash disposal. For solvents, evaporate small amounts in well-ventilated areas (never indoors). Check Earth911.com for local hazardous waste drop-offs—most communities accept solvents monthly for free.
Mastering how to clean paint holder components transforms frustrating cleanup into a 30-minute routine that pays for itself in tool longevity. By reclaiming paint, using solvent recovery, and following the critical timing windows, you’ll avoid $200 in annual replacement costs while ensuring flawless results every project. The key takeaway? Never let paint dry on tools—act while wet, match cleaners to paint types, and store solvents properly. For your next project, keep mineral spirits and dish soap pre-measured in labeled containers for instant cleanup. If you tackle oil-based paints regularly, invest in a dedicated metal bucket and glass solvent jars—they’ll outlast plastic by years. Finally, set phone reminders to clean tools immediately after painting; that 30-minute window makes all the difference between effortless restoration and permanent damage. Your future self (and wallet) will thank you when these tools deliver professional results on your tenth project.


