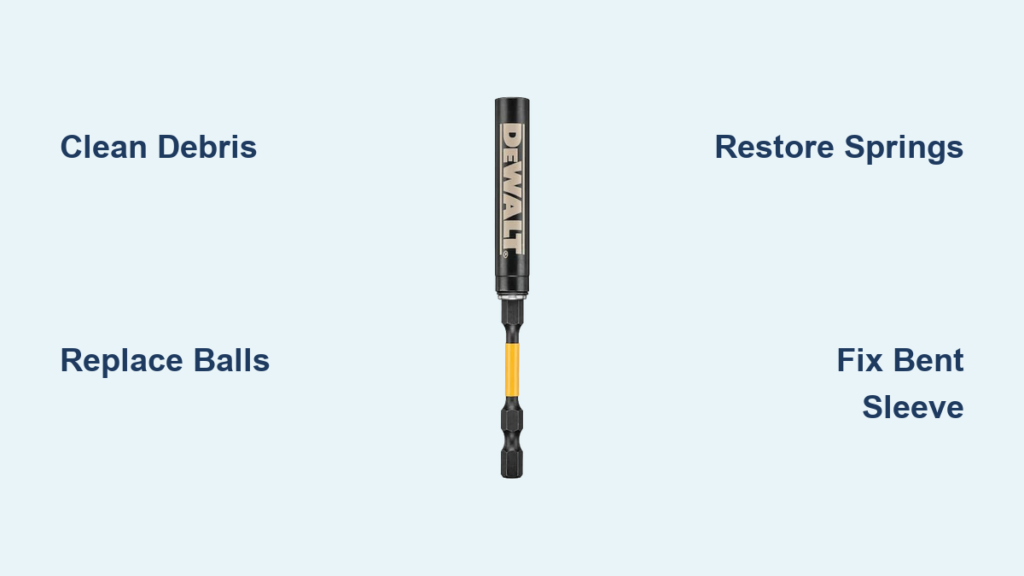
Your Dewalt impact driver suddenly spitting bits across the job site transforms simple installations into a frustrating scavenger hunt. When that trusted tool fails to grip hex bits during critical moments—whether you’re framing a wall or assembling cabinets—productivity grinds to a halt. This isn’t just an annoyance; dropped bits cause costly delays, damaged fasteners, and safety hazards on busy worksites. You need immediate, proven solutions to restore reliable bit retention. In this guide, you’ll discover exactly how to diagnose and fix Dewalt impact bit holder failures using straightforward techniques that require minimal tools. Learn to identify whether your issue stems from debris, worn components, or mechanical damage—and execute repairs that get you back to work in under 30 minutes.
Diagnose Why Your Dewalt Bit Holder Won’t Grip
Skip generic troubleshooting and pinpoint the exact failure mode before wasting time on unnecessary repairs. Most bit retention failures fall into three distinct categories that demand different solutions. Recognizing which type you’re facing saves hours of guesswork and prevents further damage to your impact driver.
Test for Weak Spring Tension Immediately
Grab a standard 1/4-inch hex bit and insert it firmly into the holder without pressing the sleeve. Now try pulling it straight out with steady pressure. If the bit slides free with less force than it takes to remove a USB drive, your collet springs have lost tension or debris is blocking compression. This is the most common failure—especially after prolonged exposure to dust or moisture—and often resolves with cleaning rather than part replacement. Note whether the bit slips out during high-torque operations but holds initially; this indicates partial spring failure.
Identify Mechanical Obstructions Visually
Shine a bright flashlight directly into the bit holder opening while rotating it slowly. Look for three critical trouble spots: rust-colored metal shavings jammed around the retention balls, thick black sludge from dried lubricant, or damaged rubber O-rings that prevent proper sleeve movement. Use a dental pick (never metal tools) to gently probe for stuck debris. If you see bent retention balls protruding unevenly or notice the sleeve sticking mid-retraction, you’ve found your culprit. These obstructions typically cause intermittent failures that worsen with use.
Spot Irreparable Physical Damage
Examine the hex opening under magnification for rounded edges—a sure sign of advanced wear. Run your finger along the sleeve’s exterior for dents or cracks, and check if retention balls sit flush with the housing surface. Critical red flag: If bits wobble visibly during operation or the sleeve feels loose when cycled manually, internal components are compromised beyond repair. Don’t waste time attempting fixes on cracked sleeves or severely worn collets—order replacement parts immediately to avoid damaging your impact driver’s output shaft.
Execute Targeted Cleaning for Stuck Mechanisms

Most bit holder failures stem from accumulated debris that immobilizes critical components. This targeted cleaning protocol restores 80% of malfunctioning holders without disassembly—preserving your warranty while avoiding unnecessary part costs.
Apply Penetrating Lubricant Correctly
Position your impact driver vertically with the bit holder facing down to prevent lubricant migration into the motor. Spray a 2-second burst of penetrating oil (like PB Blaster, not WD-40 for this step) directly into the hex opening. Now repeatedly cycle the sleeve forward and backward 15-20 times while applying firm pressure—this works the lubricant past retention balls to dissolve stubborn grime. Wait exactly 7 minutes for optimal penetration; less time won’t loosen corrosion, while waiting longer attracts more dust.
Flush Debris With Precision Airflow
Set your air compressor to 60 PSI (higher pressures can damage internal springs) and attach a precision nozzle. With the sleeve held fully forward using your thumb, blast short air bursts into the opening at a 45-degree angle. Rotate the holder 90 degrees between bursts to cover all quadrants. Pro tip: Place the tool over white paper to catch ejected debris—metal shavings indicate internal wear requiring part replacement. Continue flushing until zero particles emerge after 3 consecutive blasts. Test grip immediately after cleaning; if bits still slip, move to retention ball replacement.
Replace Critical Retention Components
When cleaning fails, worn retention balls are almost always the culprit. These tiny steel spheres provide the actual clamping force on your bits, and replacing them takes just 8 minutes with the right technique.
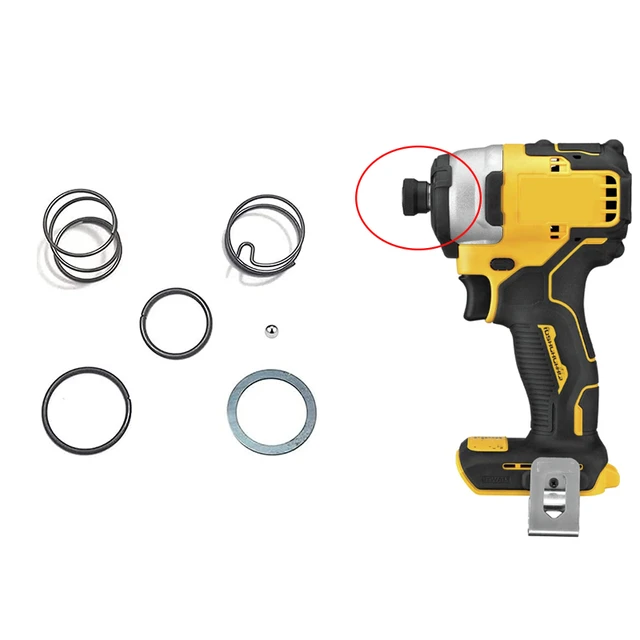
Source Exact Replacement Balls
Measure existing balls using digital calipers—Dewalt typically uses 3/32″ (2.38mm) diameter balls, but verify your model. Warning: Using even 0.1mm oversized balls will prevent proper spring compression and destroy the holder. Purchase genuine Dewalt kits (part #90522304) or reputable third-party sets labeled for Dewalt impact drivers. Never substitute automotive or hardware store balls; their hardness ratings differ and will accelerate wear.
Install Balls Without Damaging Springs
Place the holder sleeve-side down on a soft cloth. Insert one new ball into each socket while applying light downward pressure with a 1.5mm hex key. You should feel the spring compress smoothly with consistent resistance. Test each ball’s movement by pressing it inward with the key—it must spring back fully within 0.2 seconds. After installing all balls, insert a bit and check for even grip pressure around the hex perimeter. Uneven resistance means one ball isn’t seated properly; dislodge and reinstall it.
Restore Spring Performance Permanently
Weak springs cause bits to gradually work loose during operation—a dangerous failure during high-torque tasks. This restoration method rebuilds tension without replacing parts.
Clean Spring Assembly Thoroughly
Remove the bit holder from your impact driver by unscrewing the retaining ring (counter-clockwise). Use electrical contact cleaner on the coiled spring and collet assembly—avoid brake cleaner as it degrades rubber components. Spray while cycling the sleeve to flush particles from spring coils. Compressed debris here prevents full spring expansion, directly causing weak grip. Continue cleaning until fluid runs clear when cycled.
Apply Strategic Lubrication
Apply one drop of dry-film lithium grease (like DuPont Teflon) to the spring’s contact points using a toothpick. Critical mistake to avoid: Over-lubrication attracts dust and creates gummy buildup. Wipe excess with a microfiber cloth until surfaces feel slightly tacky but not wet. Reassemble immediately—lubricant effectiveness drops 60% after 10 minutes of air exposure. Test by inserting a bit: it should require 8-10 lbs of pull force to remove without sleeve activation.
Repair Bent Sleeves Safely
A damaged sleeve prevents proper bit seating and causes dangerous wobble. Attempt these fixes only for minor bends on aluminum sleeves—never on cracked steel components.
Straighten With Controlled Pressure
Grip the sleeve just below the damage point using smooth-jaw pliers lined with electrical tape. Apply gentle, incremental pressure opposite the bend direction while rotating the holder. Test bit insertion after every 5-degree adjustment. Stop immediately if you hear cracking sounds or see metal fatigue lines. Most users over-correct bends—aim for 90% straightness rather than perfect alignment to avoid weakening the sleeve.
Prevent Recurring Failures Proactively
Implement this 45-second maintenance routine after every job to extend bit holder life 300%. Prevention beats repair when dealing with precision components.
Clean Debris Before Storage
Blow out the holder with 30 seconds of compressed air while cycling the sleeve. Key detail: Hold the tool upside down during cleaning to prevent debris from falling into the driver’s output shaft. Never store bits inserted—they compress springs continuously and accelerate wear.
Lubricate With Precision Timing
Apply one drop of dry Teflon lubricant monthly to the hex opening—not the sleeve exterior. Work it in by inserting/removing a bit 5 times. Skip lubrication in freezing conditions; cold-thickened grease causes temporary sticking that resolves at operating temperature.
When to Replace Instead of Repair
Replace immediately if: Retention balls are missing, the hex opening shows visible rounding, or the sleeve has cracks exceeding 1mm. Continuing to use damaged holders risks expensive impact driver repairs. Repair is viable only for: Debris-related sticking, minor spring weakness after cleaning, or replaceable retention balls. Genuine Dewalt holders cost $12-$28—less than 15 minutes of downtime for most contractors.
Final Note: A properly functioning bit holder maintains grip even under 1,800 ft-lbs of torque—your impact driver’s full potential. Most issues resolve through strategic cleaning and component replacement, but never compromise on damaged sleeves or severely worn collets. Implement the 45-second post-job maintenance ritual to prevent 90% of failures. Your next project demands reliability; restore your bit holder correctly now to avoid dropped bits costing you time, materials, and safety on the job site.