
Getting pulled over for a missing front license plate can cost you $200 in fines—and it’s completely preventable. Whether your new car skipped the bracket, you moved to a front-plate state, or your existing mount is rattling loose, how to install a front license plate holder correctly takes less than 30 minutes with the right approach. I’ve seen drivers drill into pristine bumpers only to block parking sensors, or use flimsy adhesive mounts that fail at highway speeds. This guide cuts through the confusion with vehicle-specific solutions, state compliance checks, and pro tricks to avoid $150 dealership visits. You’ll learn exactly where to drill (or not drill), how to silence annoying vibrations, and why European cars require Torx bits instead of screwdrivers.
Most drivers don’t realize that 31 states legally require front plates, and improper installation voids your warranty on luxury vehicles. Skipping this simple task risks failed inspections, traffic stops, and even insurance complications after accidents. But with your license plate bracket, basic tools, and this guide, you’ll achieve a factory-level mount that survives potholes and winter salt. Let’s transform that dangling plate into a secure, legal setup.
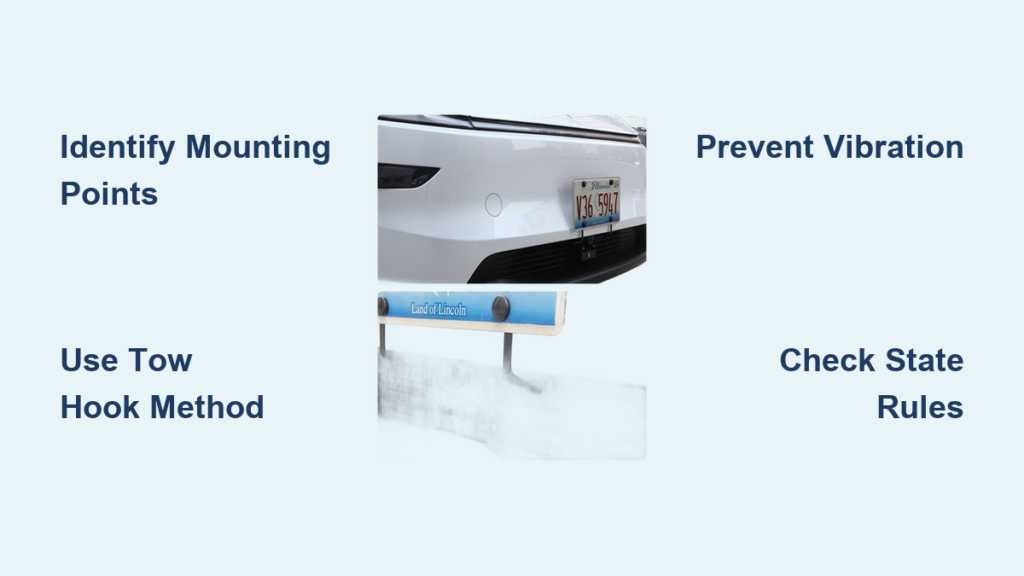
Identify Your Vehicle’s Mounting System Before Drilling
Don’t grab your drill yet—most cars have hidden mounting points. Start by inspecting your bumper for subtle clues: two dimpled indentations (common on Toyota/Honda), small plastic covers hiding threaded inserts (like Ford/Mazda), or existing brackets behind the grille. European models play hide-and-seek: BMWs tuck 5mm hex screws behind the bumper’s lower edge, Mercedes requires popping out the grille insert, and Audis conceal threaded holes inside the plate recess. If you spot a circular plastic cap near the tow hook (common on VWs), unscrew it—this reveals a threaded hole perfect for no-drill adapters. Pro tip: Shine a flashlight upward beneath the bumper; existing mounting bosses often reflect light differently than the surrounding plastic.
When Drilling Becomes Unavoidable
If your bumper has zero pre-drilled holes (common on Teslas or aftermarket bumpers), follow this fail-safe method:
1. Measure 14 inches from the ground to the plate’s center (meets most state height rules)
2. Mark positions with blue painter’s tape to prevent drill slippage
3. Start with a 1/8″ pilot hole, then enlarge to 1/4″ for screw anchors
4. Immediately apply rust inhibitor like Boeshield T-9 to exposed metal
Critical mistake to avoid: Never drill within 2 inches of parking sensors or radar modules—locate these first by checking your owner’s manual under “front collision avoidance.”
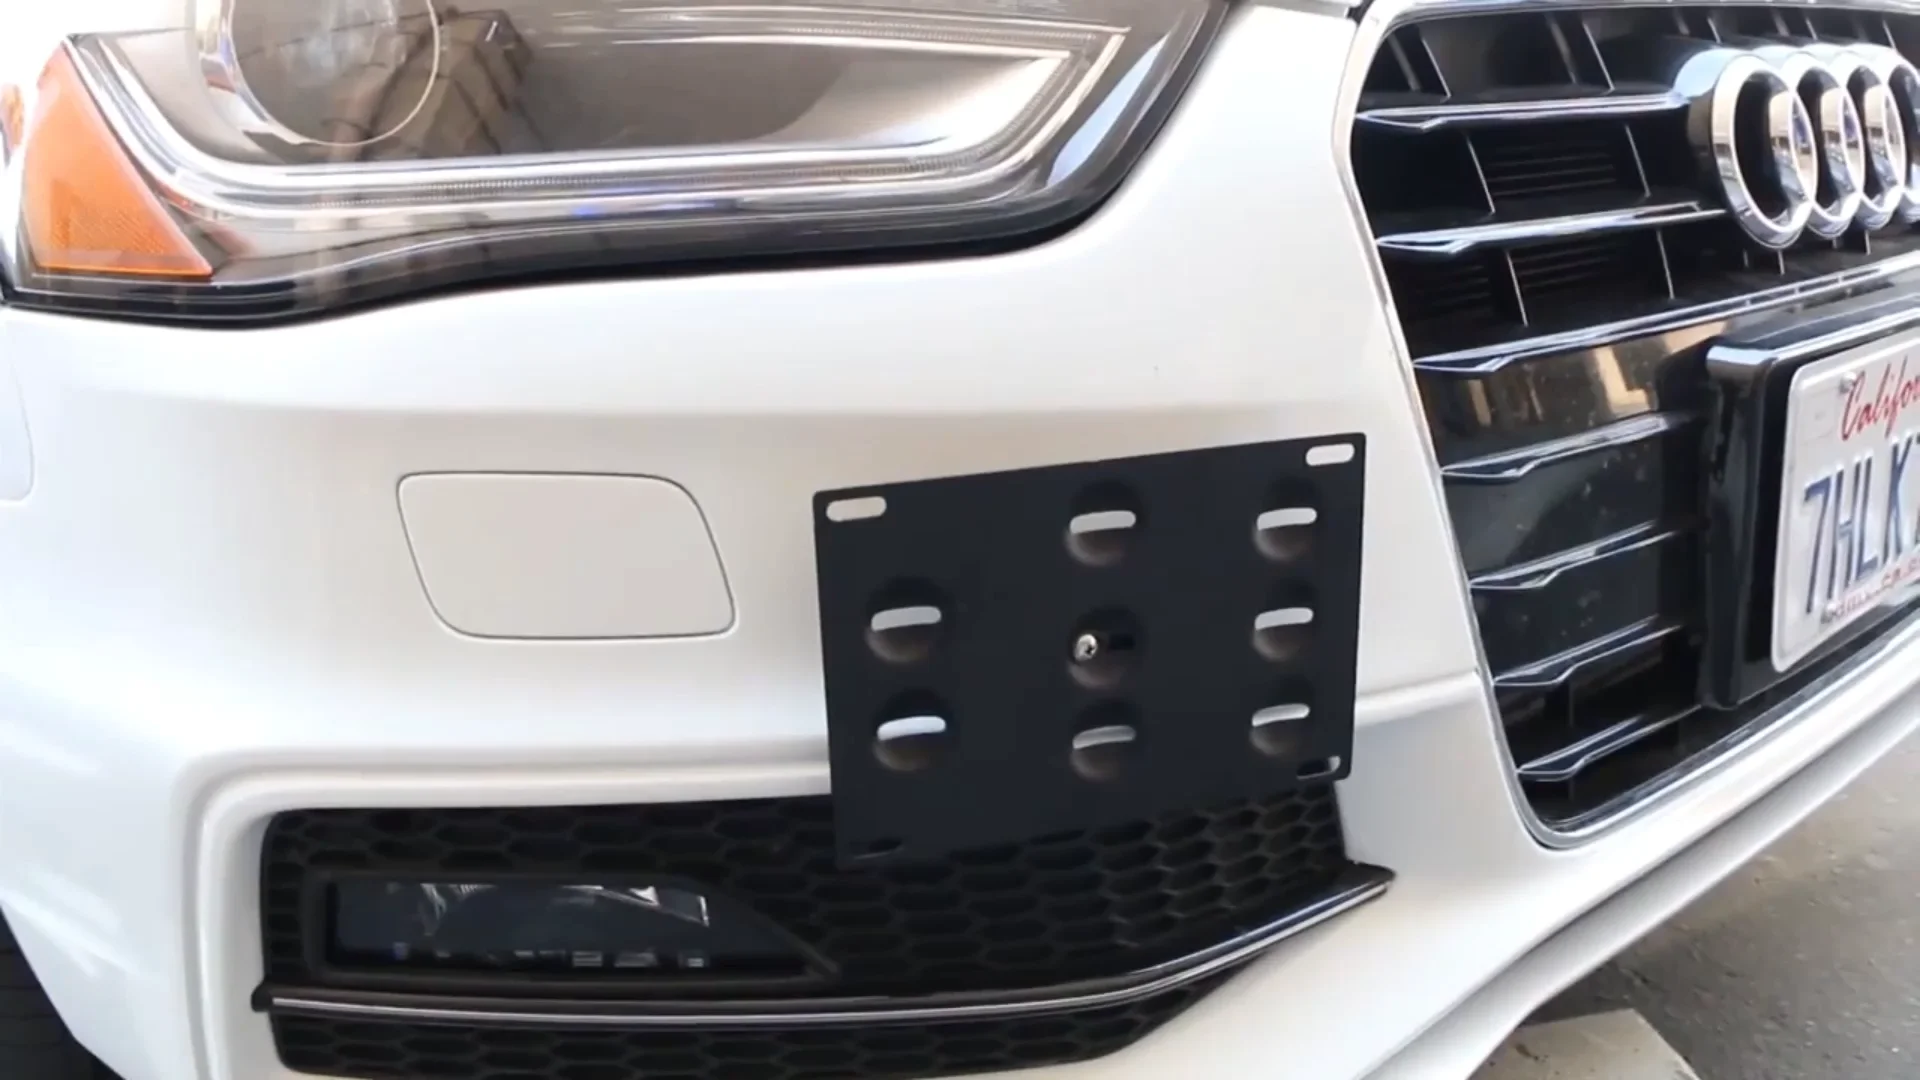
Mount Your Bracket Without Damaging the Bumper
Secure With Existing Hardware
For vehicles with pre-threaded holes (most American/Japanese models):
1. Clean the area with isopropyl alcohol to remove wax/grime
2. Hand-tighten screws to verify alignment—don’t force misaligned holes
3. Torque to 18 ft-lbs using a 10mm socket (overtightening cracks plastic)
4. Place a bubble level across the bracket top before final tightening
No-Drill Tow Hook Method (Works on 90% of Vehicles)
- Remove the tow hook cover (usually a 16mm socket)
- Thread a universal adapter like Rugged Ridge into the tow hook mount
- Attach your plate bracket to the adapter’s top
- Angle the bracket downward slightly for optimal visibility
Why this beats drilling: Uses factory-engineered mounting points, zero risk to bumper integrity, and takes 5 minutes. I’ve used this on my RAM truck for 3 years with zero vibration.
Install the License Plate to Prevent Rattles and Cracks
Skipping washers is the #1 cause of cracked plates. Follow this sequence:
1. Position plate on the bracket with mounting holes aligned
2. Insert self-tapping screws through plate into bracket
3. Slide rubber washers between plate and bracket (absorbs vibration)
4. Add nylon locking nuts—hand-tighten, then 1/4 turn with pliers
5. Press firmly on all four corners to ensure flush contact
Test for vibration: Drive over a speed bump at 5 mph. If you hear buzzing, add closed-cell foam tape (like 3M VHB) to the plate’s backside. Never use silicone—it attracts dirt and degrades in UV light.
State Height Rules That Prevent $200 Tickets
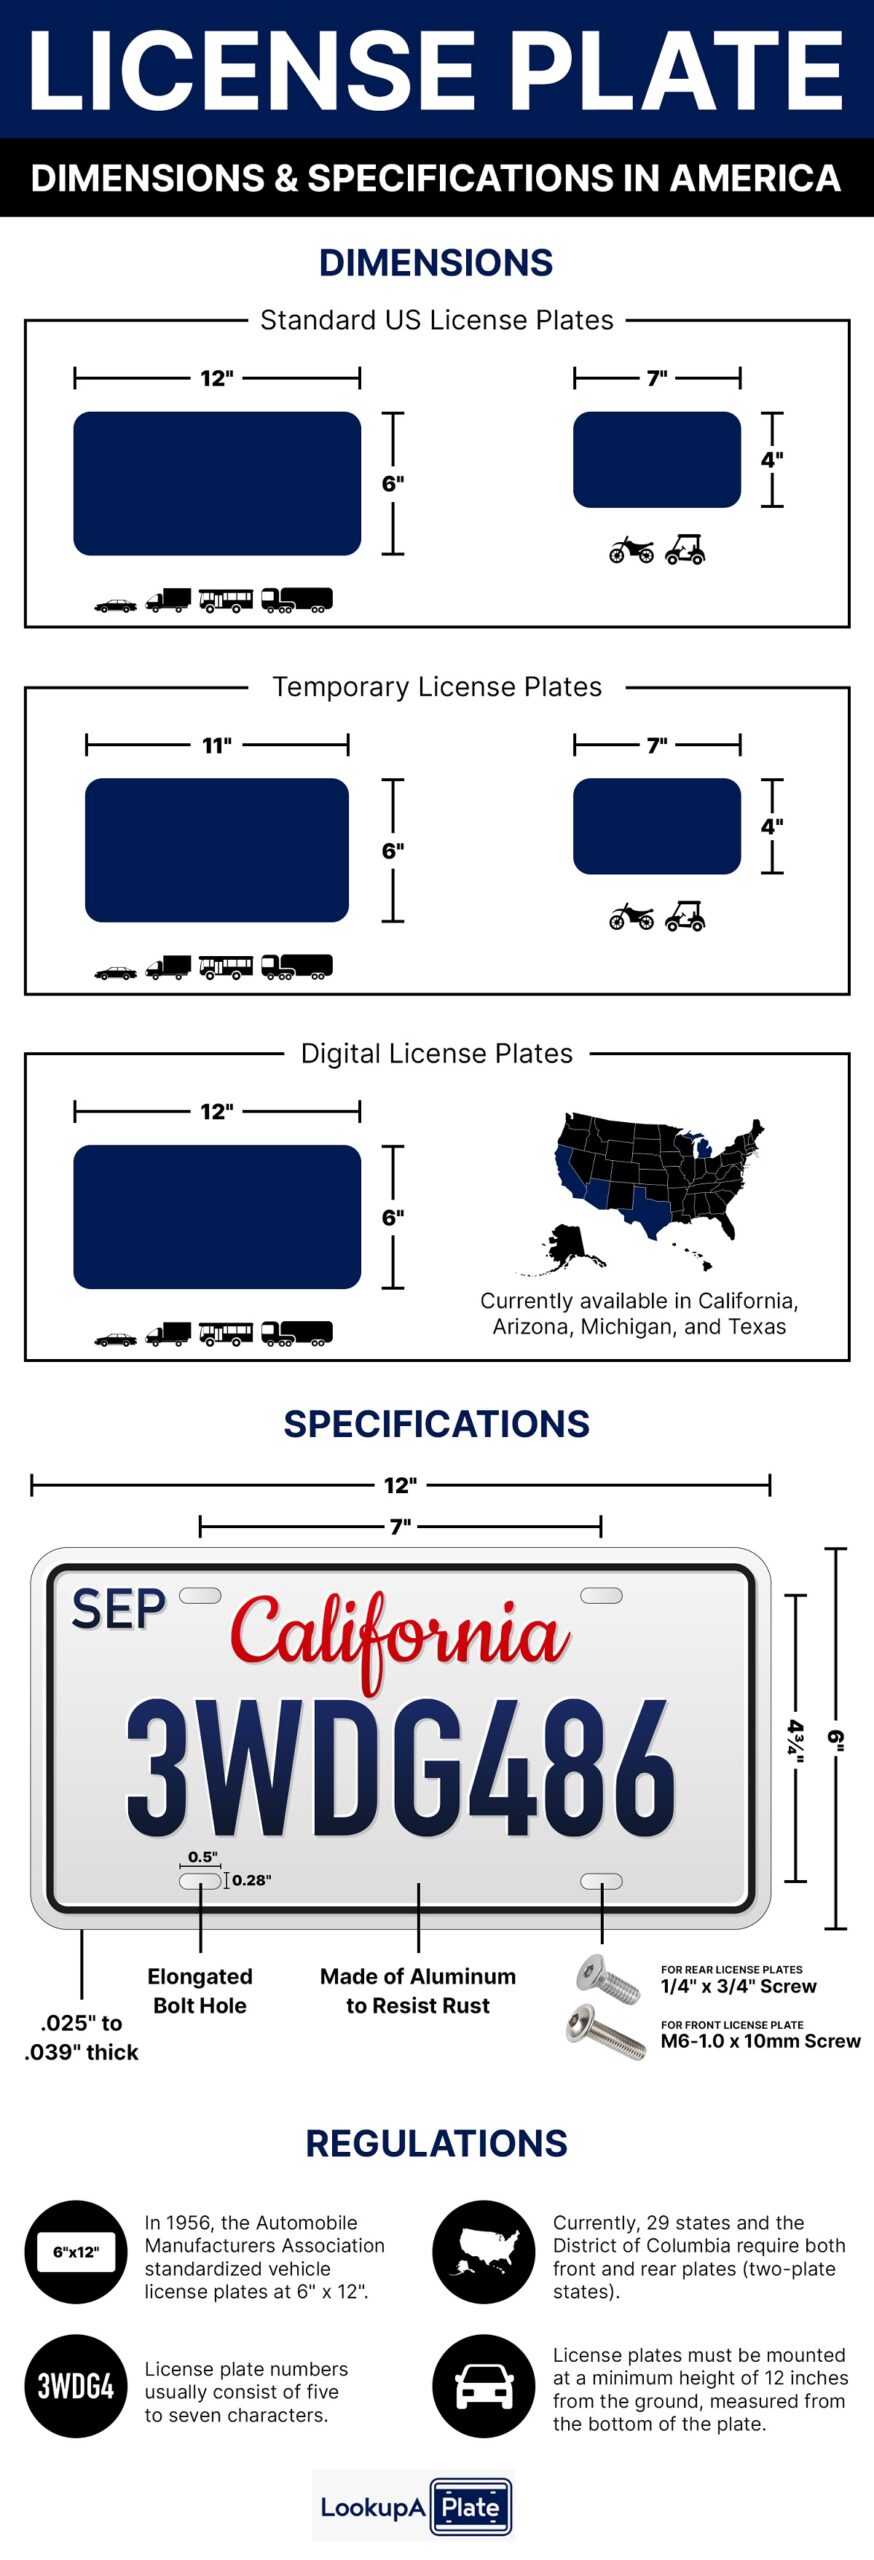
Mounting height varies wildly—here’s what actually gets you pulled over:
| State | Legal Range | Common Ticket Trap |
|——-|————-|———————|
| California | 12-60″ from ground to plate bottom | Plate bottom below bumper edge |
| New York | 12-48″ to plate center | Measuring from top of plate |
| Texas | 12-60″ from ground to plate bottom | Bike racks blocking view |
| Florida | 12-48″ to plate center | Non-illuminated plates at night |
Pro compliance check: Stand 100 feet from your car at dusk. If you can’t read the plate clearly, it’s illegal. Florida drivers: Verify your plate has a front-facing reflector—most aftermarket plates lack this.
Fix European Car Quirks in Under 10 Minutes
German vehicles demand specific approaches:
– BMW: Remove the lower bumper trim with a T25 Torx bit. The mounting screws are hidden behind the fog light housing—don’t overtighten these brittle plastic threads.
– Mercedes: Pop out the central grille insert (no tools needed). You’ll find two threaded posts; use M6 bolts no longer than 15mm to avoid damaging sensors.
– Audi/VW: Peel back the rubber weather strip around the license plate recess. Threaded inserts hide underneath—clean out old plastic shavings first with a toothpick.
Warning for Audi owners: Drilling near the adaptive cruise control radar (center of bumper) causes $1,200 sensor recalibration fees. Always use the factory recessed mounting points.
Stop Vibration and Sensor Interference Immediately

Three Fixes for Rattling Plates
- Rubber washer sandwich: Place washers between bracket/bumper AND plate/bracket
- Foam tape trick: Apply 1/8″ thick neoprene tape to the plate’s back (cut holes for screws)
- Thread locker: Use blue Loctite on screws—red is too permanent for bumper plastic
Critical Sensor Clearance Checks
After mounting, verify:
– Parking sensors have 1.5″ clearance from bracket edges
– Radar modules (center of bumper) have unobstructed “view”
– Radiator airflow isn’t blocked by oversized brackets
Test drive must: Drive at 40+ mph on smooth pavement—any vibration means loose hardware.
DIY vs Professional Installation: When to Call for Backup
Handle it yourself if:
– Your vehicle has pre-drilled holes (most sedans/SUVs)
– You’re using the tow hook method (no drilling)
– No advanced driver-assist systems (ADAS) are nearby
Book a pro ($50-$150) when:
– Dealing with carbon fiber bumpers (Corvette/Porsche)
– ADAS sensors require recalibration post-install (common on Subarus)
– Lease agreements forbid drilling (check Section 8 of your contract)
Cost comparison: Dealerships charge $250+ for bracket installs—most independent shops do it for $65. Avoid “no-drill” adhesive mounts; they fail in 6 months and leave residue.
Maintenance That Prevents Costly Repairs
Monthly:
– Perform the “wiggle test”—grab the plate and shake firmly. Any movement means loose screws.
– Spray mounting area with silicone-free detailer to repel brake dust.
Annually:
– Remove screws and apply dielectric grease to prevent corrosion
– Replace nylon nuts (they harden and lose grip over time)
– Inspect for paint chips around holes—touch up with matching color
Pro upgrade: Swap steel screws for stainless steel (304 grade). I switched to these on my Jeep and haven’t retightened in 18 months despite off-roading.
Final Legal Compliance Checklist
Before hitting the road, verify these state-enforced requirements:
– [ ] Plate bottom sits between 12-60″ from ground (CA/TX) or center at 12-48″ (NY/FL)
– [ ] Clear visibility from 100+ feet with no bike racks blocking view
– [ ] Plate illumination works if your car has front parking lights
– [ ] Zero vibration at highway speeds (test on bumpy road)
– [ ] No sharp bracket edges that could injure pedestrians
Bottom line: Installing a front license plate holder right takes one trip to the hardware store and 20 minutes of your time. Skip the guesswork—use your vehicle’s hidden mounting points, prioritize sensor clearance, and torque screws to 18 ft-lbs. You’ll avoid tickets, keep warranty coverage intact, and drive with confidence knowing your plate won’t fly off on the highway. For European models, that T25 Torx bit is your new best friend—keep it in your glovebox for future tweaks. Now go mount that plate and enjoy the open road, ticket-free.


