
Do you constantly battle doors that slam shut or won’t stay open? Installing a magnetic door holder solves this everyday frustration in under 30 minutes with basic tools. This precise installation guide gives you the exact steps professionals use to mount both floor-mounted and wall-mounted door holders, ensuring your doors stay exactly where you want them.
Whether you’re enhancing your home or maintaining a commercial space, you’ll learn everything from selecting the perfect location to testing your completed installation. No prior experience needed—just follow these steps to create smooth, reliable door operation that lasts for years.
Required Tools and Materials
Essential Tools:
– Power drill with appropriate bits for your surface
– Phillips or flathead screwdriver
– Measuring tape for accurate positioning
– Pencil for marking locations
– Small level to ensure straight installation
– Stud finder (critical for wall-mounted holders)
– Safety glasses to protect your eyes during drilling
What’s in the Box:
– Magnetic base plate (for floor or wall mounting)
– Magnetic catch plate for door attachment
– Mounting screws (type varies by surface)
– Wall anchors (included for drywall installations)
– Installation template (most quality brands provide)
Pro tip: If your kit didn’t include proper anchors, purchase plastic ones for drywall or masonry anchors for tile and concrete surfaces to ensure secure mounting.
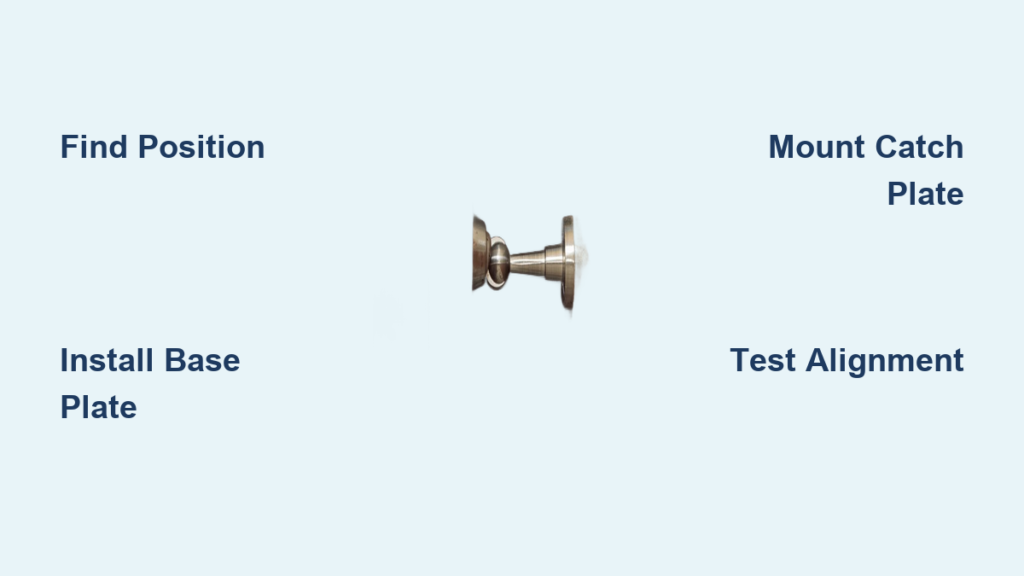
Find Perfect Door Holder Position
Floor vs Wall Mount Decision:
– Floor-mounted: Completely hidden when door opens, works with any door height
– Wall-mounted: Easier installation process, visible hardware, requires precise stud mounting
Position Testing Method:
1. Open your door fully to its natural stopping point
2. Mark this spot with painter’s tape on the floor or wall
3. Check door swing path—ensure 2-3 inches clearance from walls and furniture
4. Verify the base plate won’t interfere with door closure when fully open
Height Guidelines:
– Floor-mounted: Center 3-4 inches from door edge
– Wall-mounted: Align with door handle height (typically 36-42 inches above floor)
Install Base Plate Securely
Floor Installation Process:
1. Position base plate at your marked location
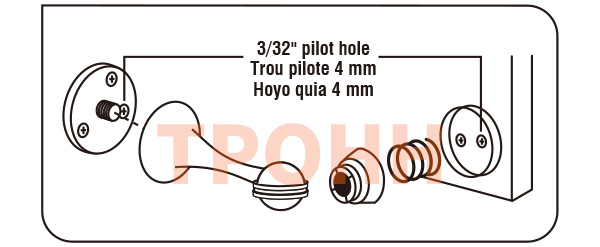
2. Trace inside screw holes with pencil for precise drilling
3. Drill pilot holes using 1/8″ bit for wood, 3/16″ for tile surfaces
4. Remove all dust and debris from holes before mounting
5. Position plate and drive screws until flush with surface
6. Check level—adjust immediately if not perfectly flat
Wall Installation Steps:
1. Locate wall stud using finder—mark center line clearly
2. Hold base plate against wall at desired height
3. Mark through screw holes onto wall surface
4. Drill 1/8″ pilot holes directly into stud
5. Attach plate with 2″ wood screws (not the short screws provided for drywall)
6. Ensure plate sits completely flat against wall surface
Critical Warning: Never mount wall holders solely into drywall—always hit a stud or use heavy-duty toggle bolts to prevent failure.
Mount Catch Plate Precisely

Alignment Technique:
1. Close door until it touches installed base plate
2. Mark door position with light pencil line
3. Open door and position catch plate on marked line
4. Center plate vertically with base plate
5. Trace screw holes, drill pilot holes
6. Attach catch plate using provided screws
Testing Alignment:
– Close door slowly—plates should meet flush without gaps
– Check for any misalignment that creates weak magnetic connection
– Adjust catch plate position if needed (fill old holes with wood filler)
Pro tip: Start with one screw in the catch plate, test alignment thoroughly, then add remaining screws for perfect positioning.
Test and Adjust Door Holder
Initial Testing Protocol:
1. Open door to engage magnets fully
2. Release handle—door should stay firmly in place without sliding
3. Try gentle pull on door—should require deliberate force to release
4. Close door completely—check for any interference or resistance
Adjustment Scenarios:
Door won’t stay open:
– Increase magnet spacing slightly (add thin washer under catch plate)
– Clean magnetic surfaces with rubbing alcohol to remove debris
– Check for metal door reinforcements affecting magnetic field
Too hard to release:
– Decrease magnet engagement (file down catch plate slightly)
– Check door hinges for binding that increases resistance
– Verify plates aren’t misaligned causing excessive pull force
Troubleshoot Common Installation Issues

Problem: Holder pulls out of wall
– Solution: Install into stud or use toggle bolts rated for the weight
– Prevention: Always pre-drill proper-sized holes and use appropriate anchors
Problem: Door won’t close fully
– Cause: Base plate positioned too close to door frame
– Fix: Move base plate 1/2″ toward door center for clearance
Problem: Weak magnetic hold
– Check: Distance between plates (should be 1/16″ maximum gap)
– Clean: Remove paint overspray or debris from magnetic surfaces
– Upgrade: Consider higher strength model if door is particularly heavy
Problem: Squeaking when releasing
– Apply: Small amount of silicone spray to magnetic surfaces
– Avoid: Oil-based lubricants—they attract dust and reduce effectiveness
Maintain Your Door Holder
Monthly Maintenance:
– Wipe magnetic surfaces with damp cloth to remove dust
– Check screw tightness—retighten if any looseness is detected
– Inspect for rust or corrosion (especially in bathrooms or humid areas)
Annual Inspection:
– Test magnetic strength—compare to initial installation
– Look for cracks in plastic components that could fail
– Verify door swing hasn’t changed due to building settling
Replacement Indicators:
– Magnet strength reduced by 50% or more from original
– Visible cracks or chips in plates affecting performance
– Corrosion preventing flush contact between magnetic surfaces
Safety Considerations and Best Practices
Before You Drill:
– Check for electrical wires using stud finder with wire detection
– Look for plumbing lines near floor installations in bathrooms
– Verify door can fully open without hitting base plate or other obstacles
During Installation:
– Always wear safety glasses when drilling into any surface
– Keep drill perpendicular to surface to prevent wandering holes
– Use sharp bits appropriate for your mounting surface
Post-Installation:
– Test door operation 10+ times to ensure consistent performance
– Check that pets/children can’t pinch fingers in magnetic connection
– Ensure emergency egress isn’t compromised by door holder position
Final Installation Checklist
✅ Base plate mounted securely and perfectly level
✅ Catch plate aligned precisely with base plate
✅ Door opens fully without interference or resistance
✅ Magnetic hold strength adequate for door weight
✅ Door releases smoothly with appropriate force
✅ All screws tight and properly countersunk
✅ No gaps between magnetic surfaces when engaged
✅ Safety glasses worn throughout installation process
Success Indicator: Your door should stay open effortlessly yet release with a gentle pull. If it passes the “bump test” (door stays when lightly bumped), your installation is complete and secure.
A properly installed door holder transforms frustrating door control into effortless operation. Take those extra 5 minutes during alignment testing—this prevents 90% of post-installation issues. Your doors will thank you every time they stay exactly where you position them, eliminating annoying slams and keeping pathways safely open.


