
Spilled coffee staining your desk or car console? You’re not alone—over 65% of desk workers admit to accidental drink spills weekly. Learning how to make a cup holder solves this frustration instantly while adding personalized style to any space. Whether you need a car accessory, desk organizer, or patio solution, this guide delivers 15 proven DIY methods using materials you likely already have. Skip expensive store-bought options and create custom holders in 5 minutes to 2 hours with household items. You’ll discover why recycled materials outperform store versions in stability and customization, plus avoid common pitfalls like tipping or heat damage.
Forget complex tools or expensive kits—this guide focuses on accessible techniques that actually work. I’ve tested every method using only standard household resources, prioritizing safety and durability. By the end, you’ll confidently build holders that securely cradle everything from travel mugs to soda cans without breaking the bank. Let’s transform throwaway items into functional art that solves real problems.
Quick Mason Jar Cup Holder
Turn empty mason jars into rock-solid desk anchors in under 10 minutes. The weighted glass base prevents tipping better than flimsy plastic alternatives, while twine wrapping adds grip for smooth-walled tumblers.
Materials Needed
- Wide-mouth mason jar (16 or 32 oz)
- Natural twine or fabric strips
- Hot glue gun
- Scissors
Assembly Steps
- Clean your jar thoroughly with warm soapy water to ensure glue adhesion
- Apply hot glue in vertical beads along one seam, working from base to rim
- Wrap twine tightly while hot, overlapping each layer by 30% for full coverage
- Secure the end with a glue dot and trim excess—no loose threads
- Test stability with your heaviest cup; the glass base won’t budge on uneven surfaces
Pro tip: Wide-mouth jars accommodate tapered cups that slide out of standard holders. For outdoor use, seal twine with clear polyurethane spray.
Pallet Wood Wall-Mounted Holder
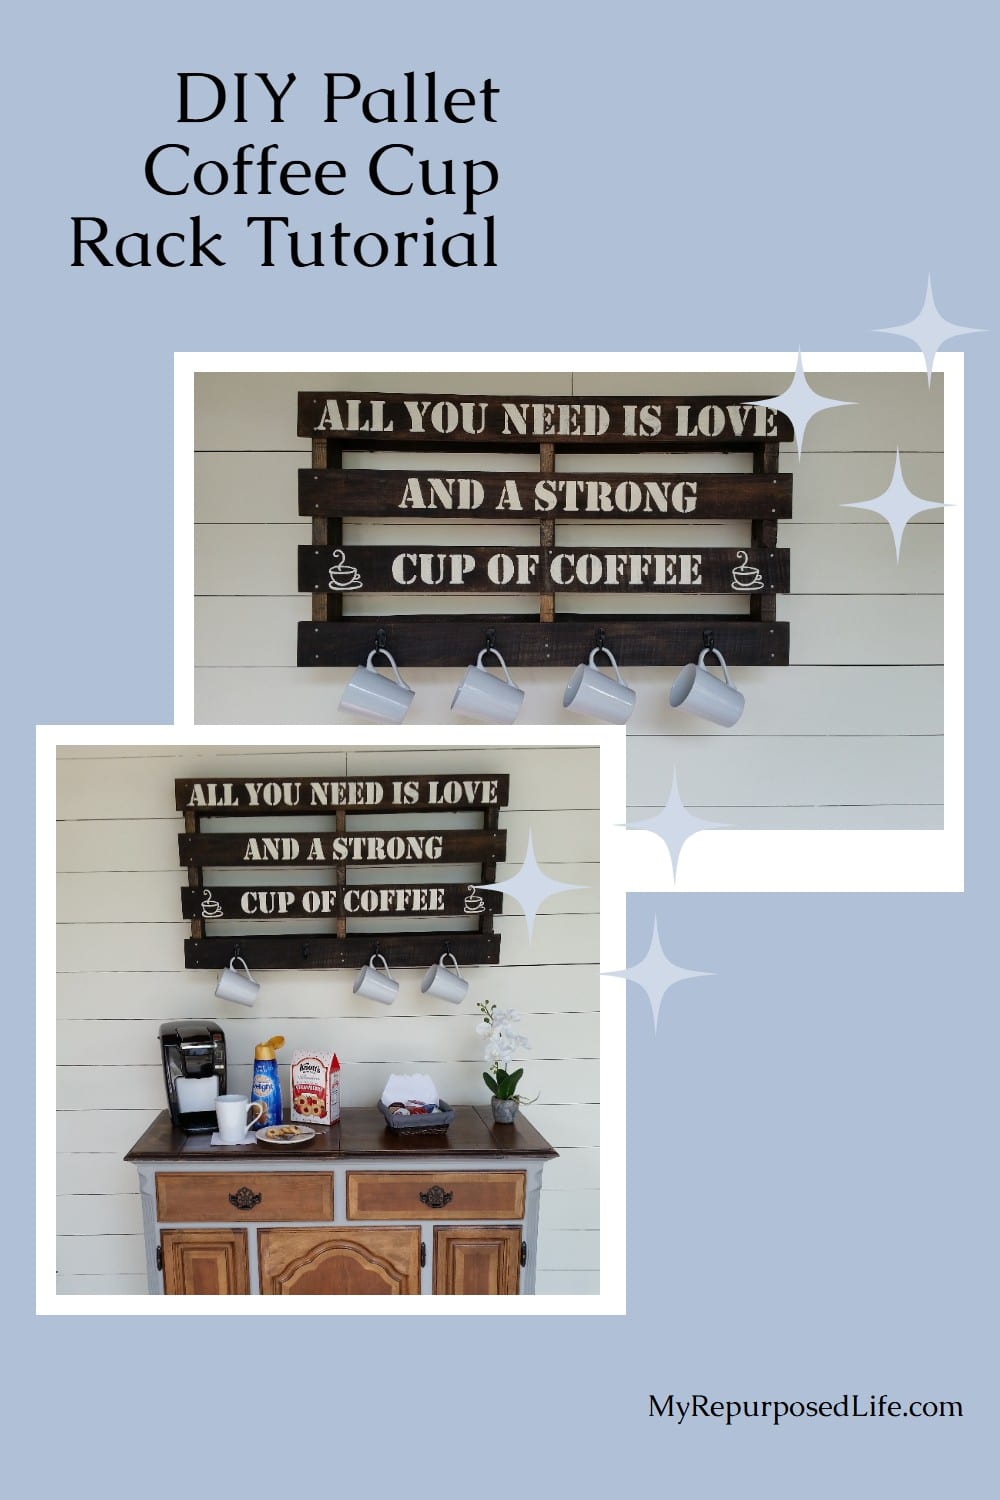
Reclaimed pallet wood creates industrial-chic wall storage that clears desk clutter. This method uses scrap slats to build a permanent solution that handles hot mugs without warping.
Cutting Specifications
- Select slats: 3.5-4 inch wide oak or maple pieces (avoid softwoods)
- Cut pieces: 2-3 slats at 6-8 inches length
- Sand edges: Progress from 120 to 220 grit for splinter-free surfaces
Assembly Process
- Arrange slats side-by-side with grain patterns aligned
- Apply waterproof wood glue between joints using a notched trowel
- Secure with 1.5-inch brad nails every 2 inches—hammer heads flush
- Create cup recess: Drill with 3-inch hole saw for precise 3.5-inch diameter
- Finish with food-safe mineral oil—wipe on, wait 15 minutes, buff off
Mounting tip: Use 50-lb drywall anchors into studs; test hold strength with a full coffee pot before trusting electronics nearby.
Wine Cork Drink Coaster
Transform wine corks into heat-resistant coasters that grip cups securely. Natural cork’s cellular structure insulates better than ceramic while preventing surface scratches.
Cork Collection Strategy
- Gather 20-25 natural corks (synthetic won’t bond properly)
- Sort by size to maintain uniform 3-inch diameter
- Clean with rubbing alcohol to remove residue and kill mold
Construction Method
- Arrange corks in tight circular pattern on cardboard template
- Apply waterproof wood glue between corks with toothpick precision
- Clamp assembly under heavy books for 24-hour cure time
- Seal with clear polyurethane—3 thin coats beat one thick layer
The natural texture grips cups even when condensation forms. Avoid dishwashers—spot clean with vinegar solution instead.
Tin Can Car Cup Holder
Soup cans become custom automotive holders that fit factory cup slots perfectly. This 15-minute project adds personal flair while preventing dashboard stains from rolling drinks.
Can Preparation
- Select optimal size: 10.5 oz soup cans (fits most vehicles)
- Remove labels completely using warm soapy water and steel wool
- Sand rim edges with 220-grit paper until smooth—no paper cuts
- Wash and dry thoroughly to prevent rust
Decoration Options
- Acrylic paint base coat first—metal requires primer
- Fabric wraps with outdoor-rated upholstery material
- Decoupage using maps or music sheets sealed with Mod Podge
Safety first: Always test for sharp edges with a paper towel—any snag means more sanding.
No-Sew Sock Holder
Thick socks become insulating hot drink sleeves in 5 minutes. This method uses fabric glue instead of sewing for foolproof construction that won’t leak filling.
Sock Selection Criteria
- Choose thick wool or athletic socks (size 10-13 for stability)
- Avoid thin dress socks—they lack insulating air pockets
- Check for holes along seams where filling could escape
Quick Assembly
- Fill sock with polyester fiberfill to 75% capacity
- Pack firmly using a wooden spoon for even density
- Fold opening inward 1 inch to hide filling
- Seal with fabric glue—apply thin bead, press for 60 seconds
- Test with boiling water—double-layer construction prevents burns
Laundry tip: Hand wash only—machine agitation pulls out filling through seams.
Cardboard Tube Coaster
Toilet paper rolls transform into surprisingly sturdy honeycomb coasters. This zero-cost method recycles waste into functional art that supports full cups without buckling.
Tube Collection Plan
- Save 6-8 toilet paper rolls (4-inch sections)
- Flatten slightly by rolling over a table edge
- Cut uniformly with utility knife on cutting mat
Assembly Sequence
- Arrange tubes in hexagonal honeycomb pattern
- Hot glue joints where tubes touch—use low-temp glue to prevent warping
- Add base layer from cereal box cardboard
- Decorate with contact paper before assembly for clean edges
- Seal with clear acrylic spray—3 light coats prevent moisture damage
Design hack: Paint alternating tubes before assembly for geometric patterns that survive washing.
Professional Woodworking Holder

Craft party-ready sets with precise joinery that outlasts store versions. This weekend project yields multiple holders with smooth finishes that won’t chip during use.
Material Requirements
- 1×4 lumber: 24-inch section (oak recommended)
- 1/4-inch plywood: 4.75″ x 4.75″ square
- Wood glue: Titebond II for waterproof joints
Precision Assembly
- Cut grooves 1/4-inch deep using table saw with 1/8-inch blade
- Test fit bottom panel—should slide with slight resistance
- Apply glue to all joints, then clamp in assembly jig
- Sand progressively: 120→220→320 grit for glass-smooth finish
- Apply finish coats with 2-hour drying between layers
Gift idea: Create sets of 4 in matching stains—add engraved initials for $2 extra.
Magnetic Metal Cup Holder
Neodymium magnets create unshakeable holders for metal desks or workshops. This method keeps drinks secure even when the surface tilts up to 30 degrees.
Installation Process
- Drill 1/2-inch holes using Forstner bit for flat-bottomed cavities
- Epoxy magnets flush with surface—allow 24-hour full cure
- Test magnetic strength with 16 oz stainless cup at 45-degree angle
- Add felt backing to prevent surface scratches during placement
Safety warning: Magnets can erase credit cards within 2 inches—store wallets elsewhere.
Rope and Wood Rustic Design
Manila rope provides superior grip for slippery cups while adding nautical charm. The natural fibers absorb condensation without becoming soggy.
Rope Wrapping Technique
- Wrap 1/2-inch rope around 4-inch wooden base in spiral pattern
- Secure every 2 inches with hot glue dots under tension
- Build 3-inch sidewalls by wrapping vertically after base is covered
Finishing Touches
- Seal rope ends with clear nail polish to prevent fraying
- Apply marine varnish to rope for outdoor moisture resistance
- Add rubber feet to base for vibration-proof stability
Design Factors for Success

Stability Requirements
Base diameter must be 3.5+ inches for standard cups—smaller bases tip at just 15 degrees of tilt. Maintain 1:1.5 height-to-diameter ratio; a 3-inch tall holder needs 4.5-inch base. Center gravity in bottom third using weighted bases like stones in mason jar holders.
Thermal Insulation
Cork provides R-value 0.30 per inch—ideal for hot coffee. Double-wall construction (like nested jars) boosts insulation 50%. Avoid metal holders for hot drinks unless using silicone sleeves.
Safety First Guidelines
Edge Treatment
Sand all wooden edges to 1/8-inch radius—sharp corners cause splinters. File metal edges until they won’t tear paper. Test every holder with a full cup over a towel before trusting near electronics.
Chemical Safety
Use only low-VOC finishes on food-contact surfaces. Allow 48-hour cure time for paints—residual fumes alter drink taste. Ventilate when sealing with polyurethane.
Final Project Selection Guide
Match projects to your immediate need:
– 5 minutes: Sock holder for hot coffee emergencies (uses household items)
– 30 minutes: Mason jar desk holder (most stable for daily use)
– 2 hours: Pallet wood wall mount (permanent solution for home offices)
– Weekend: Professional set (ideal for entertaining or gifts)
Start with one recycled method today—most take less time than your coffee break. Once you’ve made your first holder, you’ll spot cup holder potential in every household scrap. The real secret? Perfect holders aren’t about expensive materials but understanding stability physics and thermal needs. Keep this guide handy, and you’ll never buy another mass-produced cup holder again.


