
You’ve just landed your dream fishing spot when you realize your rods are a tangled nightmare—reel handles jammed against rod tips, guides bent from careless storage. This frustrating reality costs anglers hundreds in damaged gear annually. Learning how to make a fishing pole holder transforms chaotic storage into organized efficiency while protecting your $300 spinning rod from costly scratches. Whether you need garage storage for weekend trips or a portable bank solution for river adventures, this guide delivers proven methods using materials you already own. Discover exactly which PVC schedule works for saltwater use, why cedar outperforms pine for dock mounts, and the critical 4-inch spacing rule that stops tangles before they start.
Stop wasting time untangling lines or replacing broken rod tips. Within 90 minutes, you’ll build custom holders tailored to your exact rod collection—no fancy tools required. We’ll cover wall mounts for 6 rods, portable spike systems for shore fishing, and truck-bed solutions that survive highway speeds. Every step uses budget-friendly materials from your local hardware store, with precise measurements to avoid common mistakes like wood splitting or rod slippage.
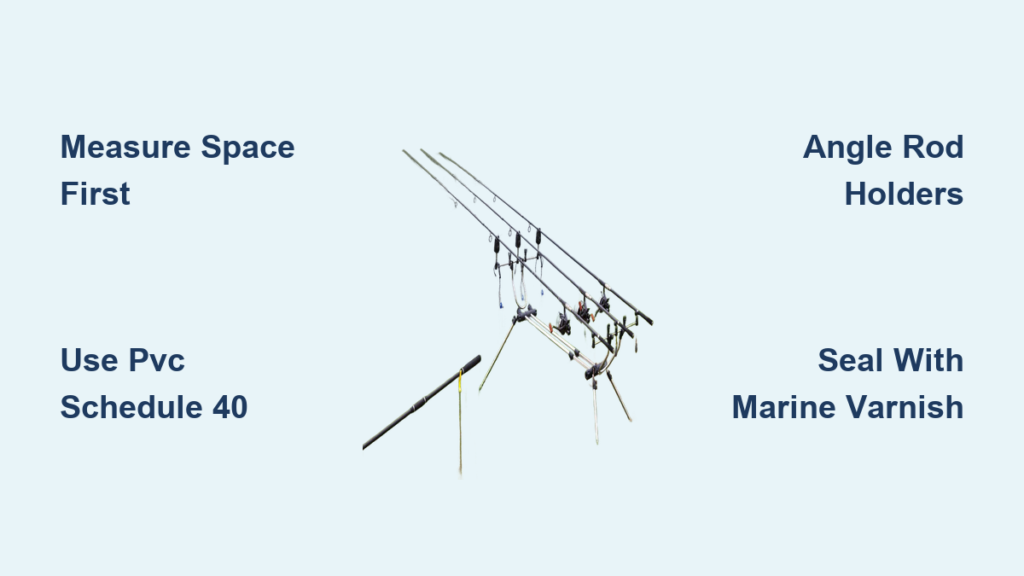
Plan Your Rod Holder Design Before Cutting Materials
Measure Space and Rod Dimensions First
Grab your tape measure before buying supplies—most failed projects ignore critical spatial constraints. Vertical wall holders need 6-8 feet of clearance for 7-foot rods, while horizontal cradles require 3-4 feet of wall width. Account for reel overhang: spinning reels extend 4-6 inches beyond the rod blank, and surf rods need extra tip room. Check door swings if mounting in garages, and measure truck bed widths for vehicle systems. Skipping this step causes rods to tip over or scrape walls during use.
Calculate Exact Rod Capacity Needs
Count current rods, then add 20% for future gear—underestimating capacity forces rebuilds later. Weekend anglers typically need 4-6 slots, while tournament fishers require 12+. Crucially, space holders 4-6 inches apart vertically or 12-18 inches horizontally to prevent guide collisions. Ultralight rods need tighter spacing than 14-foot surf casters; mismatched spacing causes line snags during storage. Always test-fit your longest rod before final assembly—nothing ruins a project like discovering your 10-foot fly rod won’t clear adjacent holders.
Choose Weather-Resistant Materials for Longevity

PVC Pipe Systems
– Schedule 40 PVC: Ideal for most builds (1-1.5″ diameter), withstands 200 PSI
– Schedule 80 PVC: Use for charter boats or saltwater exposure (50% thicker walls)
– CPVC Variants: Essential for hot climates where standard PVC warps
Wood Options
– Cedar: Naturally repels insects and moisture—skip sealing for garage use
– Pressure-Treated Lumber: Only choice for dock or boat mounts (resists rot)
– Avoid Pine: Requires triple-coating with marine varnish to prevent warping
Metal Components
– Aluminum Tubing: Corrosion-proof for truck racks (1.5″ diameter standard)
– Stainless Steel Hardware: Mandatory for marine environments (grade 316)
Build Wall-Mounted Vertical Holder in 4 Steps
Cut and Prepare Backing Board to Prevent Splitting
Cut a 1×6 cedar board to 24″ (fits 4 rods) or 36″ (6 rods) using a circular saw. Critical step: Sand all edges with 120-grit paper, rounding corners to eliminate line-snag points. Apply two coats of marine spar varnish, sanding lightly with 220-grit between coats. Never skip sealing—unprotected wood absorbs moisture, causing holders to loosen within months.
Create Angled PVC Rod Holders for Smooth Insertion
Cut 1.5″ Schedule 40 PVC into 5″ segments with a miter saw. Angle the top edge 8 degrees using a 10-degree miter setting—this subtle slope guides rods into place without guide damage. Deburr cut edges thoroughly with sandpaper; rough PVC shreds fishing line on contact. Test-fit your rod handle first—PVC must grip firmly without forcing.
Assemble with Construction Adhesive for Maximum Hold
Mark hole positions every 5 inches along the board’s centerline. Drill 1.5″ holes completely through using a spade bit. Insert PVC segments from the back, applying heavy-duty construction adhesive around the rim. Pro tip: Clamp segments overnight—never rely on glue alone. For heavy reels, add 2.5″ stainless screws through the board front into PVC for earthquake-level security.
Mount to Wall Studs at Optimal Fishing Height
Position the holder 54″ from the floor (eye-level for most adults). Locate studs with a magnetic finder—never mount to drywall only. Pre-drill holes, then secure with 3″ deck screws driven deep into studs. Check alignment with a level; a 2-degree tilt causes rods to slide toward the wall. Wait 72 hours before loading rods to let adhesive cure fully.
Construct Portable Bank Fishing Holder for Shore Trips
Drill Ground Spike Tube at Precise Angles
Use 1.5″ aluminum tubing (28″ long) for the main body. Drill rod holder holes at 17-degree downward angles spaced 7″ apart—this prevents rods from toppling in wind. Deburr holes with a round file until smooth as glass; rough edges fray lines within minutes. Insert PVC tees into holes, securing with PVC cement for permanent builds or spring pins for collapsible designs.
Fabricate Removable Ground Spike for Stability
Cut 16″ steel conduit rod, grinding one end to a sharp 45-degree point. Thread the top end to screw into the main tube—this allows quick disassembly for transport. Add a 6″ T-handle welded to the top for effortless ground insertion. Warning: Skip the T-handle and you’ll struggle to remove the spike from clay soil after rain.
Add Height Adjustment for Uneven Terrain
Slide a 1.25″ diameter tube inside the main body for telescoping action. Drill 1/4″ adjustment holes every 2.5″ along both tubes. Insert spring pins to lock heights—from 24″ for rocky shores to 32″ for tall grass banks. Test stability by hanging two rods before your trip; wobbling means insufficient spike depth.
Weatherproof Holders Against Saltwater and Sun
Seal Wood with Marine Varnish in Thin Coats
Apply spar urethane in three thin coats rather than one thick layer. Wait 24 hours between coats, lightly sanding with 220-grit to remove dust nibs. For dock mounts, add epoxy encapsulation: pour West System epoxy over wood until it beads up, creating a waterproof plastic shell. Reapply varnish annually—bubbling finish means water intrusion has started.
Protect Metal Components from Corrosion
Wipe aluminum tubing monthly with vinegar to remove salt residue. For steel spikes, apply cold-galvanizing spray at the first sign of rust (gray spots). Critical maintenance: Lubricate telescoping tubes with silicone spray every 3 months—never use WD-40, which attracts dirt and washes away.
Install Rod-Safe Padding on All Contact Points
Slice pool noodles lengthwise and press over PVC holders—this $2 fix prevents finish scratches. Ensure padding extends 1″ beyond PVC edges to cover transition points where lines snag. Replace foam annually; hardened padding loses shock absorption. For premium protection, wrap rods in silicone tubing where they contact holders—it stays grippy when wet.
Troubleshoot Common Rod Holder Failures
Fix Rod Slippage With Angled Inserts
If rods slide out, cut 1/4″ foam strips and wedge them inside PVC holders at the bottom. Angle the insert 5 degrees upward to create a gentle cradle—not so steep that rods tip forward. Test with your heaviest reel; if it still slips, sand the PVC interior with 80-grit paper to remove slippery gloss.
Stop Line Tangling With Strategic Spacing
When guides collide, increase vertical spacing to 6 inches or horizontal to 18 inches. Angle rods 10 degrees away from neighbors using adjustable PVC tees. For truck-bed systems, add 4″ foam dividers between holders—this blocks wind-induced sway that causes tangles at highway speeds.
Reinforce Loose Wall Mounts With Backing Plates
If holders pull away from walls, remove the board and attach a 1/4″ steel backing plate across the top edge. Re-mount using 3″ screws through plate holes into studs. For drywall-only situations (no studs), use toggle bolts rated for 50 lbs each—never plastic anchors.
Budget Your Build With Cost-Saving Hacks
Wall Holder for Under $60
- Cedar board (36″): $18
- Schedule 40 PVC (6 holders): $12
- Marine varnish: $15
- Stainless screws: $8
Total: $53 (saves $120 vs. commercial 6-rod rack)
Pro Tip: Repurpose PVC Fittings
Visit plumbing supply yards for “seconds” bins—damaged PVC tees cost 70% less but work perfectly for rod holders. One cracked tee becomes two functional halves when cut vertically.
Your custom fishing pole holder pays for itself after preventing one broken rod tip. Start with the wall-mounted design—it solves garage chaos in 3 hours with basic tools. As you gain confidence, build the portable spike system for river adventures. Remember: precise spacing prevents tangles, angled holders stop slippage, and marine-grade sealing ensures decade-long use. The moment you grab a ready-to-fish rod without untangling lines, you’ll realize how to make a fishing pole holder was the smartest upgrade to your angling life.


