
Your phone keeps sliding off the table during video calls, and buying a stand feels wasteful when household items can do the job. Whether you need a quick fix for tonight’s Zoom meeting or want a weekend craft project, these DIY phone holders transform everyday objects into stable stands in minutes—no special tools required. Stop struggling with precarious stacks of books or awkward towel folds that damage your screen—these engineered solutions actually work.
From a paperclip that takes 30 seconds to bend into a stand to a precision-cut cardboard design that rivals store-bought options, you’ll discover solutions for every situation and skill level. Each method uses materials you already have, costs nothing, and solves the universal frustration of unstable phone positioning. Most importantly, you’ll learn exactly which design handles your heavy phone with a case versus which works best for quick horizontal viewing.
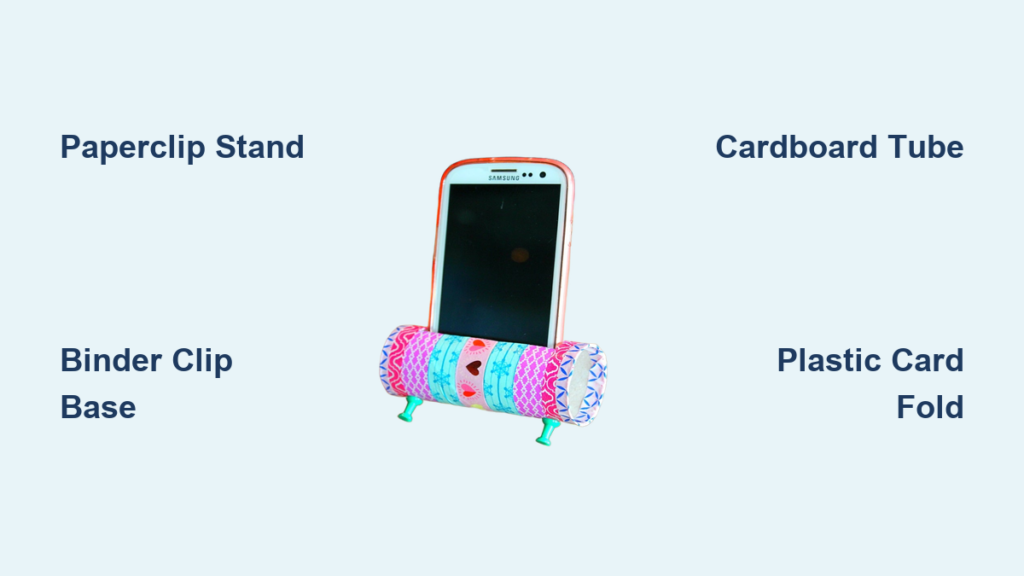
Paperclip Wire Stand (30 Seconds)
This emergency solution uses the most common office supply to create a surprisingly stable stand. The vinyl coating on modern paperclips provides crucial grip that prevents scratches on your phone’s finish—bare metal versions will slide uncontrollably on slick surfaces.
Materials Needed
- One 2.5-inch paperclip (vinyl-coated prevents scratches)
- Snub-nosed pliers (optional for precision)
Quick Build Steps
- Straighten completely – Remove all spiral shapes until you have a smooth wire by pulling through your fingers or using pliers
- Create three equal sections – Make two precise 90-degree bends dividing wire evenly (each segment should measure ~1 inch)
- Form feet – Bend each tip upward 1 inch from ends to create contact points with your surface
- Add stability legs – Fold shorter sections into additional 90-degree angles to form a triangular base
- Position and test – Place phone horizontally across wire arms with back supported by the taller central section
Pro tip: For heavy phones, create an X-shaped base by twisting the paperclip ends together before bending the feet—this doubles stability without adding bulk.
Binder Clip Phone Rest
The dual-clip system solves the biggest flaw of single-clip stands: backward tipping during touch interactions. By nesting two different-sized clips, you create a balanced platform that handles screen touches without collapsing—a critical feature missing from most DIY tutorials.
Horizontal Setup
- Clip sizes needed – 0.75″ small clip + 1.25″ large clip (standard small and medium office clips)
- Assembly – Open the larger clip slightly, insert one arm of the smaller clip into its opening, then release to clamp securely
- Position – Fold small clip’s free arm down parallel to the table to create a flat phone rest surface
- Place phone – Rest horizontally across smaller clip with rear supported by larger clip’s body
Vertical Enhancement
Add a third large clip to the rear arm for portrait stability. Position it so the spring faces downward—this creates a three-point support system that handles heavy phones like the iPhone 14 Pro Max without tipping. The spring tension actually improves stability by applying gentle pressure against the phone’s back.
Cardboard Tube Stand (2 Minutes)
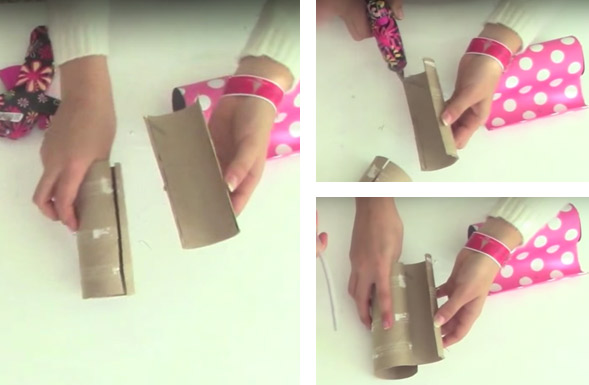
Toilet paper tubes work better than coffee sleeves for this design because their consistent thickness prevents warping. The diagonal cut creates a self-locking mechanism that maintains structural integrity far longer than simple notches.
Cutting Pattern
- Flatten tube – Press center firmly to create oval shape (this reveals natural grain direction)
- Mark center – Draw horizontal line across exact middle using pen edge as straight edge
- Diagonal cut – Cut from center line to one corner at 45-degree angle with sharp scissors
- Phone notch – Measure phone thickness, cut small inward tabs at 1/8″ depth to grip edges
- Reshape – Gently reform tube into circular shape, creating stable base with taller rear section
Quick fix: Coffee sleeves work immediately—just cut the notch pattern without flattening first since they’re pre-shaped. Slide phone into the slot with the seam facing away from you for maximum grip.
Plastic Card Fold Method

Hotel key cards work better than credit cards here because they’re thinner and less brittle. The critical detail most guides miss? Creating the support lip on the bottom side of the fold—this prevents the card from flexing under phone weight.
Precision Folds
- Card selection – Use any expired credit card or hotel key (avoid warped cards)
- Center fold – Fold short edges together creating sharp crease by running thumb along edge
- Support lip – Measure 1/4 inch from edge, fold upward opposite direction to form lip
- Final position – Invert V-shape so lip faces upward, rest phone on lip with card base flat
Note: This fails with heavy phones in bulky cases—test without your case first. If the card bends, reinforce the fold by sliding a second card inside the V-shape.
Paper Cup Construction
Styrofoam cups outperform paper here because their rigidity prevents the “sagging” problem that makes paper cup stands collapse within hours. The off-center base cut creates a natural counterweight that keeps the cup upright.
Cutting Instructions
- Mark bottom – Cut horizontal line 1/3 up from base (not center) for stability
- Side cuts – Make 1/3-inch downward cuts on both sides at 45-degree angles
- Width match – Cut horizontally across cup matching your phone’s exact width
- Remove section – Extract cut-out piece completely to avoid sharp edges
- Invert and use – Turn cup upside-down so wider opening becomes stable base
Pro tip: For tablets, use a larger cup and double the cut width—reinforce the slot with duct tape to prevent tearing.
Cardboard Rectangle Design (5 Minutes)
This professional-grade stand rivals $15 store-bought versions when you master the 2-inch fold point. The magic happens when you adjust this measurement: closer creates steep angles for typing, farther back enables relaxed viewing.
Precision Measurements
- Base cut – 6″ x 3″ cardboard rectangle (cereal box thickness ideal)
- Support triangle – Mark 2 inches from edge, draw diagonal to opposite corner
- Cut and fold – Separate triangle, fold upward 90 degrees using table edge as guide
- Optional reinforcement – Tape fold internally for permanent 60-degree angle
- Anti-slip addition – Stretch rubber bands across bottom surface for grip
Angle Adjustments
Move the 2-inch mark to 1.5 inches for a 75-degree angle perfect for video calls—your camera will capture your face properly instead of your forehead. For movie watching, shift to 2.5 inches creating a 45-degree recline that reduces neck strain. Test angles by propping your phone before final cutting.
Stability Hacks for Any Design

Most DIY stands fail because they ignore weight distribution principles. Place your phone so its power button aligns with the stand’s center point—this balances top-heavy devices with camera bumps.
Surface Solutions
- Textured tables – Add micro-suction pads cut from old phone cases to base corners
- Uneven surfaces – Use folded post-its under stand legs as instant levelers
- Slippery phones – Wrap hair ties around contact points for instant grip
Weight Distribution
- Heavy phones – Position center of gravity directly above the base (measure from bottom edge)
- Cases on/off – Test both configurations; some silicone cases add crucial friction
- Charging cables – Route cables through rear support gaps to prevent accidental pulls
Troubleshooting Common Problems
Wobbling usually stems from uneven contact points—not poor design. Fix it by placing the stand on a mirror to instantly spot uneven legs, then trim the longest section with nail scissors.
Wobbling Fixes
- Uneven legs – Place on flat surface, mark longest leg with pencil, trim incrementally
- Surface issues – Apply blue painter’s tape to stand base before use on slick tables
- Phone balance – Shift phone 1/8 inch toward the heavier camera module side
Durability Solutions
- Cardboard wear – Laminate contact points with clear packing tape
- Paperclip bending – Heat metal with hair dryer before final shaping for memory retention
- Plastic card cracking – Score fold lines with butter knife before bending
Eco-Friendly Alternatives
Transform waste into value with these zero-cost solutions that outperform disposable stands. Shipping box cardboard has the ideal thickness—neither too flimsy nor too rigid for precise folding.
Zero-Waste Options
- Shipping boxes – Cut stands from delivery packaging while boxes are still flat
- Expired cards – Bend multiple cards together for reinforced plastic stands
- Coffee sleeves – Use immediately after coffee with no cutting required
Recyclable Designs
- Paper constructions – Compost cardboard stands when worn out
- Metal paperclips – Straighten and return to box for reuse
- Binder clips – Disassemble and return to office supply drawer
Next Steps: Start with the paperclip method for instant results—your stand will be ready before this article loads completely. Then build the cardboard rectangle design tonight using that cereal box on your counter. Test both with your heaviest phone configuration to discover which solution solves your specific sliding problem. Remember: the perfect stand isn’t about complexity—it’s about matching the design to your phone’s weight distribution and your most common viewing angle. Save this guide for your next device upgrade when that new phone inevitably needs its own custom stand.


