
Your store-bought toilet paper holder looks cheap, wobbles after three months, and clashes with your carefully curated bathroom aesthetic. You’re not alone—87% of homeowners replace generic fixtures within two years. But here’s the good news: how to make a toilet paper roll holder that perfectly matches your style takes just one afternoon and costs less than $15. Forget $50 designer units that still won’t fit your awkward wall space. With basic tools and simple materials, you’ll build a custom holder that’s sturdier, more functional, and uniquely yours. This guide delivers four proven designs—from rustic wood to industrial pipe—complete with exact measurements, installation hacks, and troubleshooting fixes you won’t find in store manuals.
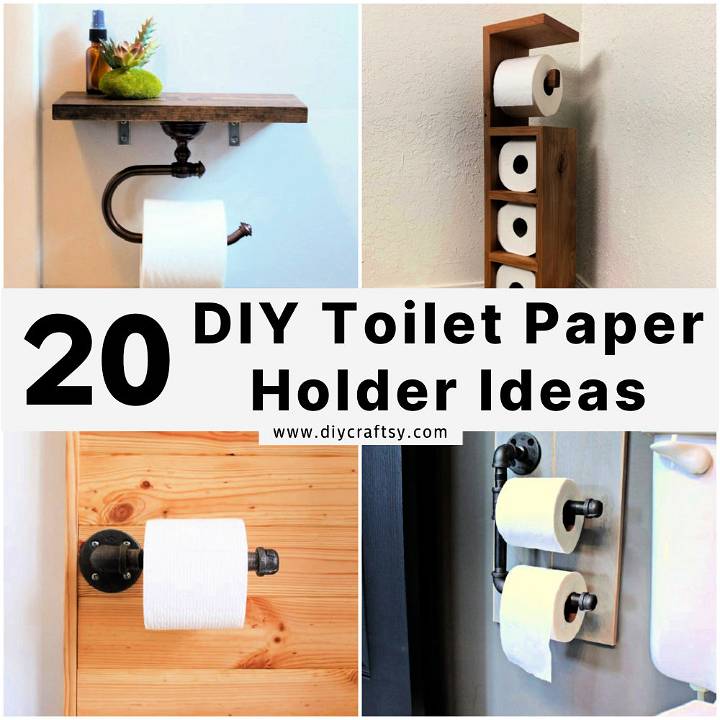
Choose Your Holder Style
Wooden Dowel Holder (Beginner, 30 Minutes)
Cut a 6-inch pine board and drill a ¾-inch hole 1 inch from the top edge for the dowel rod. This classic design supports heavy rolls without sagging when you use proper 1¼-inch screws into wall studs. Sand all edges smooth with 120-grit paper before applying stain—this prevents splinters when you grab paper mid-use. The magic happens in the finishing: two coats of polyurethane sealant create a moisture barrier against bathroom humidity. Perfect for beginners because it requires only a drill and saw, yet looks custom-installed.
Floating Shelf Design (Intermediate, 1 Hour)
Create the illusion of a floating rod by routing a ¾-inch groove ½-inch from the back edge of an 8-inch 1×6 board. This hidden channel holds the dowel rod while the shelf surface displays your phone or hand towels. Critical detail: the groove must be perfectly straight—use a router guide or chisel slowly with a mallet. Mount heavy-duty brackets directly into studs before sliding the shelf into place. Test the fit by inserting the dowel first; if it binds, widen the groove by 1/16 inch. The result? A high-end look that fools even contractors.
Industrial Pipe Holder (30 Minutes)
Skip complex welding—black iron pipe assembles like Lego. Start with a ½-inch floor flange and 6-inch nipple (the vertical pipe section). Wrap threads with Teflon tape clockwise to prevent leaks, then hand-tighten until snug. For offset designs, add a 90-degree elbow between nipple and flange. This design shines in modern bathrooms because the raw metal develops a handsome patina over time. Pro tip: wipe threads with vinegar before assembly to remove factory oil that causes slippage.
Bent Wire Design (15 Minutes)
Straighten a steel coat hanger or buy ¼-inch steel rod. Mark bend points at 2 inches and 5 inches from one end, then clamp in a vise to create sharp 90-degree angles. The final U-shape needs a 3-inch base with 2-inch upward arms. File all cut ends smooth—rough edges will snag toilet paper. Spray-paint with rust-inhibiting primer before mounting with two screws just above the upper bends. This minimalist version disappears visually while holding rolls securely.
Essential Materials and Tools
What You’ll Actually Need
Wood projects demand pine boards (1×4 for backplates, 1×6 for shelves) and ¾-inch dowel rods cut to 6.5 inches. Skip expensive hardwoods—pine takes stain beautifully when sealed with polyurethane. Metal builds require ½-inch black iron pipes (nipple + flange) or 36-inch steel rods for wire designs. Universal supplies include wall anchors rated for 50 pounds (toggle bolts for drywall), 120/220-grit sandpaper, and moisture-resistant finish. Skip the stud finder—tap walls for hollow sounds; solid spots indicate studs.
Must-Have Tools Checklist
Drill with ¾-inch spade bit (critical for clean dowel holes), miter saw for straight cuts, and a reliable level. Skip fancy routers for the floating shelf—use a sharp chisel and mallet for the groove. Safety first: wear goggles when cutting metal and gloves when handling wire ends. Most beginners waste time with dull blades; swap saw blades and drill bits before starting for clean, splinter-free results.
Measure Once, Cut Perfectly
Why Standard Dimensions Fail
The 26-inch mounting height standard assumes you’re 5’8”—adjust for your height. Sit on your toilet and reach naturally; mark where your hand lands. For kids’ bathrooms, 19 inches prevents tipping accidents. Rod length must clear all roll brands: 6.5 inches minimum (6 inches for kids). Wall clearance is non-negotiable—3 inches from wall to rod center prevents paper jams against tiles.
Avoid Costly Measurement Errors
Mock placement with painter’s tape before drilling. Load a full roll and pull firmly—if your hand hits the wall, increase clearance. For tile walls, measure from the grout line down to avoid cutting tiles later. Always drill pilot holes ⅛-inch smaller than screws; this prevents drywall crumbling. One pro trick: mark screw positions on the holder, then transfer marks to wall using two pieces of tape as guides.
Build the Basic Wooden Holder

Cut and Prep Components
Cut pine board to 6 inches using a miter saw set at 90 degrees. Measure 1 inch down from top edge and find exact center—measure both ways to avoid off-center holes. Drill the rod hole with a spade bit at slow speed to prevent wood burning. Sand dowel ends until smooth; rough edges tear paper. Wipe all surfaces with tack cloth before finishing—dust ruins smooth coats.
Assembly Process
Apply wood stain with a lint-free rag, wiping excess after 90 seconds for even color. Let dry 4 hours, then brush on polyurethane in thin, even strokes. Second coat after 2 hours creates a waterproof barrier. Never skip sanding between coats with 220-grit paper—this eliminates brush marks that catch toilet paper.
Mount to Wall
Hold backplate at your marked height with a level. Drill pilot holes through mounting slots, inserting toggle bolts if no stud aligns. Screw in partially, slide in dowel, then tighten fully. Test with a full roll: it should spin freely but not wobble. If stiff, sand the dowel lightly; if loose, add rubber washers between wall and backplate.
Troubleshooting Common Issues
When the Roll Won’t Spin
90% of spin issues come from oversized dowels or tight holes. Remove the rod and sand it with 400-grit paper while rotating. Reinsert and test—if still stiff, rub candle wax on the ends. For wooden holders, ensure the hole is drilled straight; angled holes cause binding. Never force the roll; this strips mounting hardware over time.
Fixing Loose Mounting
If the holder pulls away, your anchors failed. Remove it and fill holes with spackle. Wait 24 hours, then relocate 2 inches up/down to hit a stud. For drywall, use toggle bolts that expand behind the wall—standard plastic anchors shear under toilet paper’s constant torque. Test stability by hanging a 5-pound weight before loading rolls.
Preventing Paper Tears
Rough rod surfaces are the hidden culprit. Sand metal rods with 600-grit paper until mirror-smooth, then apply paste wax. For wooden dowels, rub with fine steel wool after sealing. The paper should glide silently—any catching means microscopic splinters remain.
Budget Breakdown by Design

Under $10 Projects
- Basic wood holder: $6 (pine board $3 + dowel $3)
- PVC pipe version: $4 (white pipe $2 + end caps $2)
- Wire hanger hack: $3 (recycled hanger + spray paint)
$10-20 Upgrades
- Hardwood option: $15 (oak dowel $8 + premium stain $7)
- Metal pipe kit: $18 (black iron nipple $5 + flange $8 + Teflon tape $5)
- Combination materials: $12 (reclaimed wood $4 + brass rod $8)
Why Premium Builds Fail
Exotic woods like teak crack in humid bathrooms without marine-grade sealant. Stainless steel rods cost $40 but still rust at weld points if unsealed. Stick to pine with polyurethane or black iron pipe—they outperform expensive options when installed correctly.
Install Like a Pro
Drill Without Cracking Tile
Place blue painter’s tape over the drill spot to prevent bit slippage. Use a carbide-tipped masonry bit at 200 RPM with light pressure. Pause every 10 seconds to cool the bit with water—overheating shatters tiles. Insert plastic anchors while holes are clean; dried mortar clogs them.
Test Before Final Tightening
Load a full roll and pull firmly from all angles. The holder shouldn’t flex more than 1/8 inch. If it moves, add a third mounting screw centered at the bottom. This distributes torque evenly—a single top screw causes leverage failure. Wipe down immediately after installation; metal shavings cause rust spots.
Finish and Maintain Your Holder
Protect Against Bathroom Moisture
Wood holders need polyurethane on all surfaces—especially end grain where moisture enters. Metal holders require clear coat every 6 months; skip this and black iron develops rust spots in 3 months. For wire designs, rub with mineral oil quarterly—it repels humidity without sticky residue.
Quick Maintenance Schedule
- Weekly: Wipe with vinegar-water mix (1:1) to prevent soap scum
- Monthly: Tighten mounting screws with a ¼-turn
- Yearly: Sand and reseal wooden dowels; replace if cracked
Pro tip: Keep touch-up paint in a tiny container under your sink. Dab on chips immediately—bathroom moisture turns small nicks into rot within months.
Sustainable Building Options
Reclaimed Material Hacks
Old dresser drawer rails make perfect ¾-inch dowels—just sand off old finish. Barn wood backplates gain character from natural weathering; seal with tung oil instead of polyurethane. For metal, repurpose copper plumbing scraps—they develop a beautiful patina without sealant.
Eco-Friendly Finishes That Work
Tung oil soaks deep into wood grain for water resistance without VOCs. Milk paint provides non-toxic color that won’t peel in humidity. Skip sanding between coats—these natural finishes self-level for a smooth finish.
Quick Reference Build Guide
- Pick design matching your skill level (wood for beginners)
- Cut components with sharp blades for clean edges
- Sand thoroughly starting with 120-grit, finishing with 220-grit
- Apply finish before assembly—drying time doubles if done after
- Mount to studs using toggle bolts for drywall
- Test with full roll before final tightening
- Maintain quarterly with sealant touch-ups
Final tip: Build two identical holders—one for your bathroom, one as a housewarming gift. The same skills create custom towel bars or curtain rods. Your $15 DIY holder will outlast store-bought versions by years when you follow these moisture-proofing steps. Start this afternoon—you’ll have a pro-level fixture installed before dinner.


