
You’re late for work, frantically digging through your bag as keys vanish under crumpled receipts and forgotten coffee cups. That moment of panic ends the second you grab your vibrant bead key holder—bright enough to spot instantly, sturdy enough to handle daily chaos, and uniquely yours. Whether you’re creating personalized gifts or launching a craft business, mastering this skill transforms clutter into confidence. In this guide, you’ll learn exactly how to make bead key holder designs that withstand years of use, with professional techniques for flawless execution every time. Forget flimsy store-bought versions; we’re building key holders that become cherished companions.
Non-Negotiable Materials for a Bulletproof Bead Key Holder

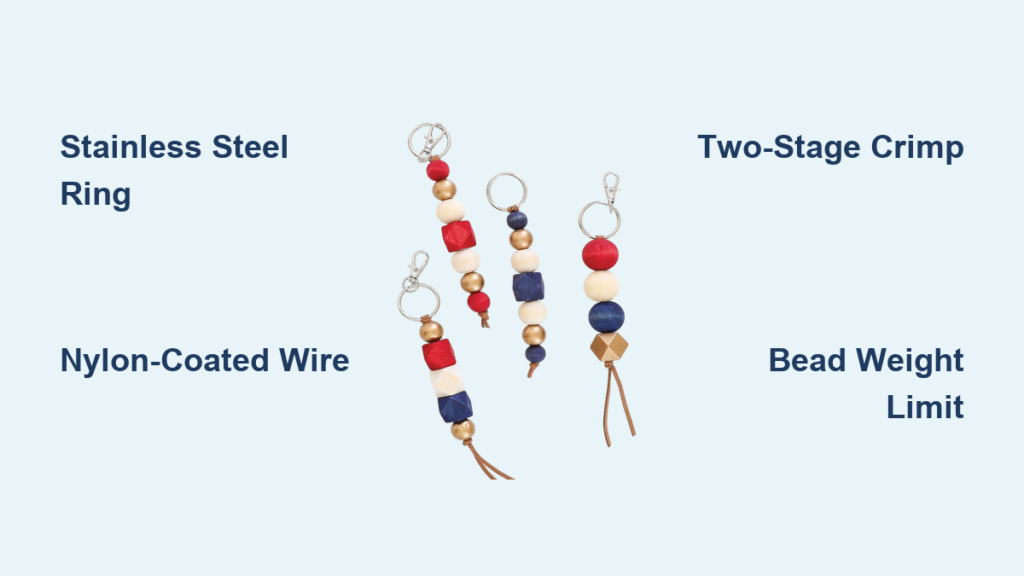
Skip cheap plastic beads or undersized key rings—they guarantee early failure. Your foundation demands a 25 mm stainless steel split ring (not brass, which corrodes) and 0.38 mm nylon-coated beading wire. This specific thickness handles tension without snapping, while the nylon coating prevents metal-on-metal friction. Crucially, invest in 2 mm silver-plated crimp beads—they create seamless connections regular pliers can’t achieve.
Why Your Tool Choice Makes or Breaks the Project
Flush-cut pliers must be your first tool purchase: dull cutters leave jagged wire ends that snag fabrics and weaken structural integrity. Pair them with professional crimping pliers—their dual grooves flatten crimps without crushing them, eliminating the #1 cause of bead slippage. Measure twice with a flexible beading tape (not rigid rulers) to account for wire stretch during stringing. Skipping any tool invites frustration—this isn’t a craft where “good enough” tools suffice.
Bead Selection Secrets Pro Crafters Swear By
Choose 6-12 mm glass or crystal beads as your workhorses—they resist scratches from daily key jangling. Avoid wood for high-use holders; it chips when keys scrape against it. Follow the 60-30-10 color rule: 60% dominant color (like deep blue), 30% secondary (teal), and 10% metallic accents. Mix textures strategically: smooth rondelles for elegance, faceted beads for light reflection, and matte finishes to prevent visual overload. Never exceed 15 grams total bead weight—heavy designs strain the key ring attachment point.
Precision Design Planning: Avoid Length and Pattern Disasters
Most beginners fail by guessing measurements. Standard key holders must be 10-12 cm (4-4.5 inches) from ring to final bead—long enough for easy grabbing but short enough to pocket neatly. Calculate your exact length with this formula: Bead diameter × bead count + 1 cm for crimp allowances. Sketch patterns at 1:1 scale on graph paper first; this catches spacing errors before you string a single bead.
Pattern Testing Tactics That Save Hours
Lay beads on a bead board before threading wire to spot imbalances. If your design exceeds target length by more than 5%, adjust spacing immediately—forcing compression during stringing causes uneven tension. For symmetrical designs, mirror your pattern around the central focal bead (like an 8 mm crystal sphere). Test flexibility by gently bending the layout; stiff sections indicate insufficient seed bead spacers.
Build Your Bead Key Holder in 3 Foolproof Phases
Phase 1: Wire Setup for Maximum Strength
Cut wire at 2.5× your target length (e.g., 30 cm for a 12 cm holder). Create a 5 mm loop at one end using round-nose pliers—smooth curves prevent weak points. Thread this loop through your key ring, pulling wire until centered. Critical move: Slide a crimp bead 1 cm from the loop, then pass the wire tail back through the crimp to form an anchor knot. This double-strand base handles 3× more stress than single-wire starts.
Phase 2: Bead Stringing Sequence That Prevents Tangles
Begin with your largest focal bead (e.g., 10 mm) as the centerpiece. Build outward symmetrically, adding 2 mm seed beads between larger elements—this 1-2 mm spacing allows natural movement without bunching. Maintain consistent tension: beads should slide slightly when pressed but not rotate freely. Pro tip: String all beads of one color at once when working in batches to avoid mid-pattern errors.
Phase 3: Crimping Secrets for Permanent Security
Position the final crimp bead 5 mm from your last decorative bead. Thread the wire through the key ring opposite your starting loop, ensuring both loops sit parallel. Now the two-stage crimp: First, squeeze the crimp bead in the pliers’ first groove to indent it, then fold the flattened bead in the second groove. Trim excess wire to 3 mm and tuck the end inward with chain-nose pliers—never leave sharp points that could scratch skin or fabrics.
Fix These 3 Common Bead Key Holder Problems Immediately

Bead Slippage That Ruins Your Pattern
Symptom: Beads rotate independently, scrambling your design. Cause: Oversized bead holes or loose wire tension. Solution: Apply one drop of G-S Hypo cement inside the problem bead’s hole using a toothpick. Let dry 10 minutes before handling. Prevent this by always using 0.38 mm wire with standard 0.8-1.0 mm bead holes.
Wire Breakage at Connection Points
Symptom: Snapped wire right at the crimp. Cause: Over-crimping or sharp 90-degree bends. Solution: Replace the crimp bead and recreate the loop with a gentle 150-degree curve—never sharp angles. Add 2 mm crimp covers over flattened crimps for abrasion protection. Test by bending the loop 20 times; quality connections won’t weaken.
Faded Beads After Sun Exposure
Symptom: Bright red beads turning pink after summer use. Cause: UV degradation of dyed glass. Solution: Spray with Jeweler’s Protect spray every 6 months, holding 15 cm from beads. For new projects, choose furnace-fired glass beads (like Czech glass)—their color permeates the entire bead, not just the surface.
Cost-Saving Sourcing Strategies for Profitable Crafting

Bulk Material Hacks That Slash Costs
Order 100+ key rings from Stainless Steel Keyrings Co. ($0.18 each vs. $0.40 at craft stores). Buy 49-strand beading wire by the 100-foot spool (Fire Mountain Gems: $8.95) instead of pre-cut strands—saves 65% per project. Crimp beads become nearly free when purchased in 1000-packs ($2.99). Never use craft store “assorted bead tubes”; buy specific color lots online to ensure consistency across batches.
Pricing Your Creations for Maximum Profit
Apply the 4× materials cost rule: If materials total $3.50, sell for $14. Basic designs (8-10 beads) retail for $12-18; premium versions with Swarovski crystals command $35-45. Add $7 for personalization (names/dates)—this requires only 3 extra alphabet beads but feels highly customized. At craft fairs, bundle sets of 3 for $40 to increase average transaction value.
Professional Maintenance Routine for 5+ Year Lifespan
Daily Care Habits That Prevent Damage
Wipe beads immediately after beach trips or rain—saltwater corrodes wire in hours. Store holders hanging vertically on a pegboard to prevent kinking. Never toss them into wet purses; moisture trapped against metal accelerates tarnishing. Check total weight weekly: If keys exceed 200 grams (about 5 standard keys), remove non-essentials—excess weight strains crimps.
Quarterly Deep Maintenance
Perform ultrasonic cleaning for stubborn grime: 2-minute cycles in jewelry cleaner solution restore shine without scrubbing. Inspect wire at connection points for fraying—if you see thinning strands, replace the wire before it snaps. Refresh UV protection with a light coat of Renaissance Wax on dyed beads. This 10-minute routine prevents 90% of premature failures.
Your bead key holder should become the item you never leave home without—reliable, beautiful, and unmistakably yours. Start with the 10-12 cm standard design using glass beads and stainless components, master the two-stage crimp technique, and implement the weekly weight check. Within weeks, you’ll craft holders that outlast cheap alternatives while reflecting your personal style. Remember: the difference between a disposable craft and a cherished heirloom lies in wire thickness, crimp precision, and proactive maintenance. Grab your pliers today and turn key chaos into confident convenience—one bead at a time.


