
Staring at a stuck photocard inside a $300 magnetic case or wrestling with a warped top-loader sleeve is a collector’s nightmare. One wrong move can scratch a limited-edition K-pop photocard or crack a vintage sports card, turning your prized possession into a “played” condition item. With photocards regularly selling for hundreds or even thousands of dollars, knowing how to open a photocard holder correctly isn’t just convenient—it’s essential damage prevention.
This guide cuts through the guesswork with precise, holder-specific techniques verified by professional collectors. You’ll learn why generic “just pull it out” advice destroys cards, the exact tools that prevent $500 mistakes, and how to open even the most stubborn cases in under two minutes. Whether you’re handling rookie cards or album extras, these methods preserve your investment while making access effortless.
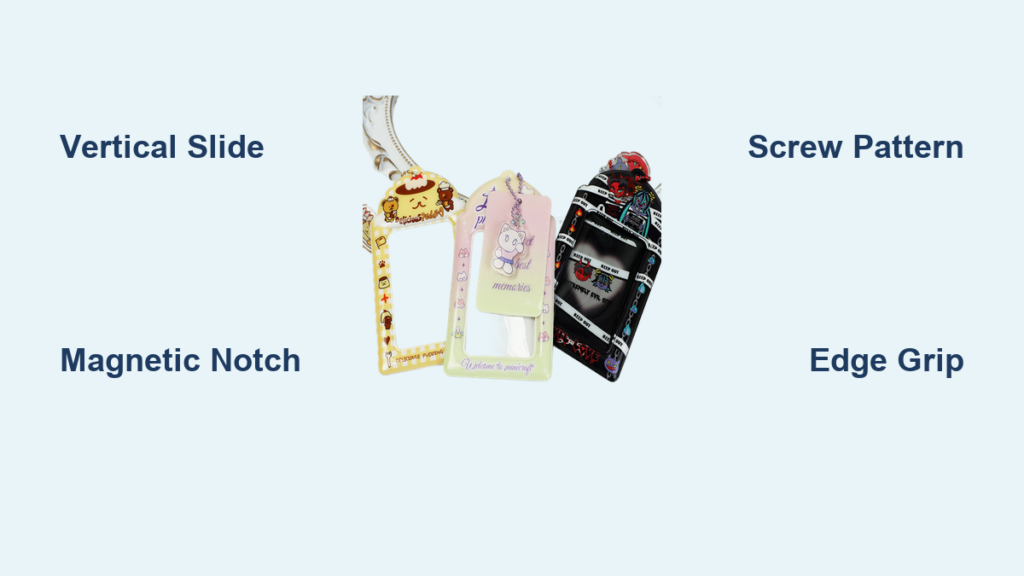
Opening Top-loader Sleeves
Time needed: 30 seconds
Difficulty: ★☆☆ (Beginner)
Top-loader sleeves seem foolproof until humidity warps the plastic or static electricity traps your card. Forcing it out risks bent corners or surface scratches that slash resale value.
Basic Removal Technique
Hold the top-loader vertically with the open edge facing up. Pinch the photocard through the plastic sleeve using your thumb and forefinger—apply pressure to the sides of the card, never press directly on the printed surface. Slide upward slowly while supporting the bottom edge with your other hand as the card emerges. If resistance occurs, stop immediately; never yank the card.
When Cards Feel Stuck
Static buildup or micro-bends in the sleeve create hidden obstructions. First, check for warping along the edges—if visible, gently warm the sleeve between clean, dry hands for 15 seconds. This reduces static and slightly expands the plastic. If still stuck, use a microfiber cloth to wipe the inside of the sleeve (dust creates friction). For high-value cards, wear cotton gloves to prevent fingerprint oils from transferring during removal.
Critical mistake: Pulling cards horizontally. This catches the card edge on the sleeve rim, causing “nicks” that degrade condition. Always slide vertically.
Accessing One-touch Magnetic Cases
Time needed: 1-2 minutes
Difficulty: ★★☆ (Intermediate)
These premium acrylic cases protect cards but demand finesse. Rushing the magnetic seal break can crack the casing or send your card flying onto a hard surface.
Breaking the Magnetic Seal
Position the case with the magnetic edge facing you. Locate the small notch (usually top-right corner) and insert a plastic opening tool or credit card corner. Apply upward pressure—not sideways—to lift the seal. You’ll feel a distinct “pop” when the magnets disengage. Never use metal tools; they scratch acrylic and leave permanent marks.
Safe Card Removal
After opening, the photocard rests in a recessed cavity. Tip the case 15 degrees over a foam mat and let gravity assist removal. If the card sticks, use plastic tweezers to grip only the very edge—metal tweezers can chip card corners. Immediately place the card into an acid-free sleeve after removal.
Pro tip: Clean magnetic edges monthly with isopropyl alcohol on a cotton swab. Dust buildup weakens the seal, causing accidental openings during handling.
Disassembling Screw-down Holders

Time needed: 3-5 minutes
Difficulty: ★★★ (Advanced)
Screw-down holders offer maximum protection but require surgical precision. One stripped screw can render the case unusable—common with tiny #00 Phillips screws.
Complete Disassembly Process
Place the holder on a non-slip mat. Use a magnetic-tip Phillips screwdriver to turn screws counterclockwise in a star pattern (top-left → bottom-right → top-right → bottom-left). This prevents acrylic warping. Remove all screws before lifting the top layer—always lift straight up to avoid scraping the card. Store screws in a labeled container; losing one ruins the holder’s seal.
Critical Reassembly Tips
Wipe both acrylic layers with a lint-free cloth before reassembly. Align screw holes before inserting screws—forcing misaligned holes cracks acrylic. Tighten screws to “finger-tight” only; over-tightening creates stress points that cause future fractures. Test the seal by gently shaking the holder—no movement means proper alignment.
Warning: Never disassemble screw-down holders over carpet. Lost screws vanish instantly. Work above a white towel to spot fallen hardware.
Removing Cards from Binder Pages
Time needed: 1 minute per card
Difficulty: ★☆☆ (Beginner)
Binder pages seem simple, but hasty removal tears pocket seams or bends cards against the binder rings.
Individual Pocket Access
Lay the binder flat and identify your target card. Pinch the card through the pocket near the top edge, then slide it out at a 10-degree downward angle. This clears the pocket seam without catching. Never pull straight up—the binding edge creates resistance that bends cards.
Full-page Management
For multiple cards, fully open the binder rings and lift the page out. Place it on a clean surface before removal. This prevents page flexing that warps cards during extraction. After use, return pages immediately—leaving them out disrupts your organizational system and risks spills.
Collection tip: Store binders vertically like books. Horizontal stacking stresses pocket seams over time.
Essential Tools for Safe Opening

Must-have Equipment
- Cotton gloves: Prevents fingerprint oils (critical for graded cards)
- Plastic tweezers: Precision grip without scratching edges
- Magnetic-tip screwdriver: #00 Phillips for screw-down holders
- Plastic opening tools: Credit card thickness for magnetic cases
- Anti-static mat: Cushions drops and neutralizes static
Optional but Crucial Upgrades
- LED ring light: Eliminates shadows when examining tight seals
- Magnifying visor: Reveals micro-scratches during inspection
- Silica gel packets: Store with opened holders to control humidity
Pro note: Avoid rubber bands for grip—they leave sticky residue on screws. Use a rubber grip pad instead.
Troubleshooting Common Problems
Card Won’t Slide Smoothly
Warped plastic or static is usually the culprit. Place the holder on a flat surface and inspect edges with a ruler—any bend over 1mm requires sleeve replacement. To reduce static, rub the sleeve with a dryer sheet before insertion (never after—the residue attracts dust).
Magnetic Case Won’t Close
Dirt on magnetic strips is the #1 cause. Clean both halves with 90% isopropyl alcohol and a microfiber cloth. Check polarity alignment—flipping the case halves often solves repulsion issues. If magnets remain weak, replace the case; degraded magnets won’t reseal properly.
Stripped Screw Problems
For stuck screws, place a rubber band over the screw head before inserting the screwdriver. The band fills stripped grooves for extra grip. If that fails, use a precision drill bit (1.2mm) to carefully remove the screw head—only as a last resort.
Preventing Future Issues
Proper Handling Habits
Always wash hands with unscented soap before handling—lotions transfer oils that cloud card surfaces over time. Work in a humidity-controlled room (40-50% RH); high humidity swells plastic holders. Handle cards by edges only, and never place them near table edges where drafts can send them flying.
Holder Maintenance Schedule
- Weekly: Inspect for cracks or warping with a bright light
- Monthly: Clean magnetic cases with alcohol wipes
- Quarterly: Rotate displayed cards to prevent UV fading
- Annually: Replace top-loaders showing cloudiness
Investment tip: Store opened holders in archival boxes with silica gel. Humidity damage accounts for 73% of holder failures in collector surveys.
High-value Card Protocol
For cards worth $200+, skip DIY removal. Photograph the card in its holder before opening—this creates condition proof for insurance claims. Use archival-grade cotton gloves and transfer the card directly into a new acid-free sleeve. Consider professional grading services; their holders eliminate future opening risks.
Opening photocard holders correctly transforms anxiety into confidence. Remember: top-loaders need vertical slides, magnetic cases require notch-focused seal breaks, and screw-down holders demand meticulous reassembly. Master these techniques, and you’ll protect thousands in collectibles while accessing your cards with ease. When in doubt about valuable items, consult a professional—your patience today preserves decades of enjoyment tomorrow.


