

You’ve finally decided to examine that old coin collection, but those plastic holders seem impossible to open without risking damage. Whether you’re dealing with snap-together capsules, sealed flips, or stubborn screw holders, the fear of scratching a valuable coin is real. This guide walks you through proven techniques for opening every type of plastic coin holder safely, protecting both your coins and your sanity in the process. With the right approach, you can access your coins without compromising their condition or value—no more wrestling with uncooperative plastic!
Snap-Together Capsule Technique
These frustrating two-piece plastic capsules require precise pressure application to separate without damaging your coin. Most collectors make the mistake of trying to pry them apart from one spot, which often leads to scratches or broken holders.
Locate the Seam Line
Place your capsule on a soft, clean surface with good lighting and rotate it slowly until you spot the thin seam where the halves connect. This line typically runs around the entire circumference but may be slightly off-center. Never attempt to open without first identifying this seam—you’ll waste time and risk damaging the holder.
Apply Opposite Pressure Method
Position both thumbs on opposite sides of the seam with fingers supporting the bottom half. Push down firmly while simultaneously pulling the halves apart in a controlled motion. Think of opening a stubborn jar—steady, consistent pressure works better than sudden force. If the holder doesn’t separate immediately, rotate it slightly and repeat the motion at a new point around the seam.
Grip Enhancement Tricks
When your fingers slip on smooth plastic, grab rubber gloves or a rubber jar opener for better traction. For extremely tight capsules, run warm (not hot) water over the seam for 30 seconds to cause microscopic expansion. Warning: Avoid using sharp tools like screwdrivers—these can slip and gouge your coin’s surface. Work patiently around the entire seam until the capsule releases.
Heat-Sealed Flip Opening
Mylar and vinyl flips protect coins with sealed edges, but accessing the coin requires precision cutting to avoid damage. Many collectors ruin their flips by cutting too aggressively or in the wrong location.
Identify the Opening Edge
Hold the flip up to a bright light and examine all four edges carefully. Three sides will show a sealed ridge, while one edge remains unsealed—this is your entry point. The unsealed edge typically sits opposite the identification pocket. Pro tip: Look for tiny manufacturing marks that indicate where the seal begins and ends.
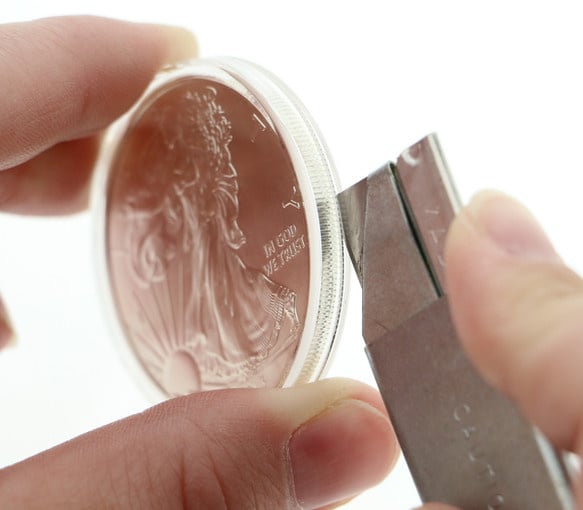
Clean Cutting Technique
Position the flip with the sealed edge facing up on a padded surface. Using sharp scissors, make a tiny snip at one corner of the sealed edge. Cut along the ridge, staying within 1-2mm of the seal to preserve the flip’s integrity. Support the coin with your free hand as it slides out to prevent accidental drops. Time estimate: This process takes 30-60 seconds with practice.
Razor Blade Alternative
For collectors wanting to preserve the flip, slide a sharp razor blade along the sealed edge instead of cutting. Hold the blade at a 15-degree angle and work slowly from one corner to the other. This method separates the seal cleanly, allowing you to potentially reseal with archival tape if needed. Critical mistake to avoid: Never force the blade—let the sharp edge do the work.
Screw-Together Holder Method

Threaded holders seem straightforward until corrosion or over-tightening makes them immovable. The key to success lies in proper orientation and gentle techniques rather than brute force.
Proper Grip Position
Hold the holder vertically with the threaded end pointing up—this prevents the coin from dropping when the threads finally release. Identify the counterclockwise loosening direction (most holders use standard threading). Grip the bottom section firmly against your palm while using your other hand to twist the top section. Visual cue: Look for tiny arrows or markings that indicate the opening direction.
Heat Application Strategy
When threads seize, apply gentle heat using a hairdryer on low for 15-30 seconds, rotating the holder to distribute heat evenly. The subtle expansion breaks the microscopic bond between threads. Immediately attempt turning while the plastic remains warm—work in short bursts to avoid overheating. Never use boiling water or direct flame—this can warp the plastic permanently.
Stuck Thread Solutions
For stubborn threads, wrap a rubber band around the holder for enhanced grip. Tap the rim gently with a wooden spoon to vibrate the threads loose through micro-vibrations. Absolute rule: Never use metal pliers directly on the holder—they’ll create permanent marks that devalue your collection. If resistance persists, stop and reassess rather than forcing it.
Adhesive-Sealed Holder Removal
Tape and glue-sealed holders require patience and the right solvent approach. Rushing this process often leads to torn holders or damaged coins.
Tape Type Identification
Examine the sealed edge closely to determine the adhesive type. Clear plastic tape requires different handling than paper-based tape or glue lines. Key indicator: Clear tape typically has a slight sheen, while paper tape shows visible fibers. This identification guides your opening strategy and prevents unnecessary damage.
Controlled Peeling Method
Start by lifting one corner of the tape with a craft knife held parallel to the surface. Peel slowly at a 45-degree angle, keeping the blade flat to avoid gouging the plastic. For paper tape, score along the edge with scissors first to create a clean separation point. Time estimate: Allow 2-3 minutes for careful removal—rushing increases risk.
Residue Management
Stubborn adhesive responds to low heat from a hairdryer held 6 inches away for 10-15 seconds. For remaining residue, dab isopropyl alcohol with a cotton swab using minimal pressure. Work gradually from edge to center—aggressive solvent use can cloud the plastic permanently. Warning: Never use acetone or stronger solvents—they’ll melt most coin holders.
Essential Safety Protocol
Work Area Setup
Create your opening station by placing a thick towel or felt pad on a stable table. Remove all loose items that could scratch coins, including jewelry and watches. Position a bright lamp to illuminate the holder clearly from multiple angles. Pro tip: Place a small dish nearby to catch any accidentally dropped coins.
Coin Handling Rules
Wash hands thoroughly with unscented soap or wear cotton gloves before starting. Have a new holder or flip ready for immediate coin storage—never leave coins exposed. Critical rule: Never open holders over hard surfaces where dropped coins could sustain damage. Hold the coin by its edges only when handling.
Holder Inspection Check
Before opening, examine the holder for cracks or stress marks that might indicate weakness. Identify any labels or documentation worth preserving for provenance. Note the holder’s orientation if it displays important information about the coin—this helps maintain historical context.
Universal Opening Protocol
Phase 1: Holder Assessment
Identify your holder type through visual inspection—look for manufacturer’s markings that might indicate proprietary opening methods. Check for any damage that might require special handling. Pro tip: Take photos of the sealed holder from multiple angles before starting.
Phase 2: Preparation
Set up your padded workspace with proper lighting and gather tools specific to your holder type. Clean your hands and position the holder optimally. Have replacement storage materials within arm’s reach—this prevents rushed handling after opening.
Phase 3: Controlled Opening
Apply the specific technique for your holder type while supporting the coin throughout. Work methodically—if you encounter unexpected resistance, stop immediately and reassess rather than forcing the issue. Time estimate: Allow 2-5 minutes per holder depending on type and condition.
Phase 4: Safe Removal
Once opened, remove the coin using plastic-tipped tweezers or by sliding it onto a clean surface. Inspect immediately for any issues and transfer to appropriate storage. Critical step: Never set the coin down on hard surfaces—even a brief moment can cause damage.
Troubleshooting Common Problems
When Holders Won’t Separate
Apply gentle, consistent pressure rather than sudden force. Check for hidden locking tabs that might require specific release techniques. Allow the holder to reach room temperature—cold plastic contracts and tightens significantly. Pro tip: Try placing the holder in a sealed plastic bag with warm rice for 10 minutes to gently warm it.
Stuck Coin Solutions
Gently tap the holder on a padded surface while holding it vertically. Let gravity assist the coin’s movement by tilting the holder at different angles. Never use metal tools to push coins out—they’ll scratch both coin and holder. If the coin remains stuck, reseal and consult a professional.
Post-Opening Storage
Transfer coins immediately to new holders appropriate for their type. Avoid touching surfaces directly—handle only by edges. Consider professional grading for valuable pieces that deserve permanent protection. Critical mistake: Never store coins in opened holders—they lose protective value.
Opening plastic coin holders safely requires understanding their specific design and applying the right technique. Whether you’re working with snap capsules, sealed flips, or threaded holders, patience and proper preparation prevent damage to your valuable coins. Remember—when in doubt about valuable specimens, professional services provide the safest removal option. Keep this guide handy for your next coin examination session and protect your collection with confidence.


