
Ever watched a teacher write flawless equations on a chalkboard while your own attempts leave crooked lines and dusty fingerprints? The secret weapon isn’t magic—it’s knowing how to use chalk holder properly. This simple tool transforms shaky, messy writing into precise, professional results while saving your hands from chalk burns and cramps. For educators, artists, or anyone using chalkboards regularly, mastering the chalk holder means cleaner hands, sharper lines, and dramatically less wasted chalk. In this guide, you’ll discover exactly how to use chalk holder to achieve consistent, controlled writing every time—no more broken chalk or uneven pressure ruining your work.
Select Your Ideal Chalk Holder Match
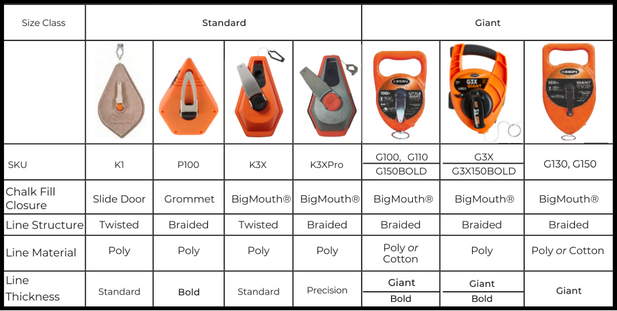
Identify Clamp-Style vs Twist-Style Mechanics
Clamp-style chalk holders use spring-loaded metal prongs that grip chalk when you squeeze the barrel—perfect for classroom teachers needing quick chalk changes during lessons. Twist-style mechanisms advance chalk through rotation, ideal for artists requiring precise line control with thinner art chalk. If you frequently switch between thick classroom chalk and fine drawing chalk, opt for a clamp-style holder with adjustable tension screws for universal compatibility.
Verify Exact Size Compatibility
Standard classroom chalk measures 3/8-inch in diameter, but specialty holders accommodate everything from 1/4-inch pastel chalk to 1/2-inch sidewalk chalk. Before purchasing, measure your chalk with calipers—forcing oversized pieces cracks the holder, while undersized chalk wobbles and breaks mid-stroke. Holders with rubberized interiors provide better grip for slightly smaller chalk without slippage.
Choose Long-Lasting Construction Materials
Plastic holders shatter after months of heavy classroom use, while brass or aluminum barrels withstand daily stress for decades. Avoid painted metal holders—the coating chips during use, contaminating your chalk lines with flecks of paint. For outdoor use, select stainless steel holders that resist moisture corrosion. The extra investment pays off when your holder survives years of student handling versus cheap alternatives that fail in weeks.
Load Chalk Holder Without Breaking Chalk
Snap Chalk to Optimal 2-Inch Length
Break standard chalk sticks by snapping them over your thumbnail—this creates clean fracture points without jagged edges. Discard pieces shorter than 1.5 inches (they rattle inside the holder) or longer than 2.5 inches (they become unstable). For art chalk, use a utility knife to cut precise 2-inch segments. Always load fresh breaks rather than using pre-broken ends, which often have weak spots.
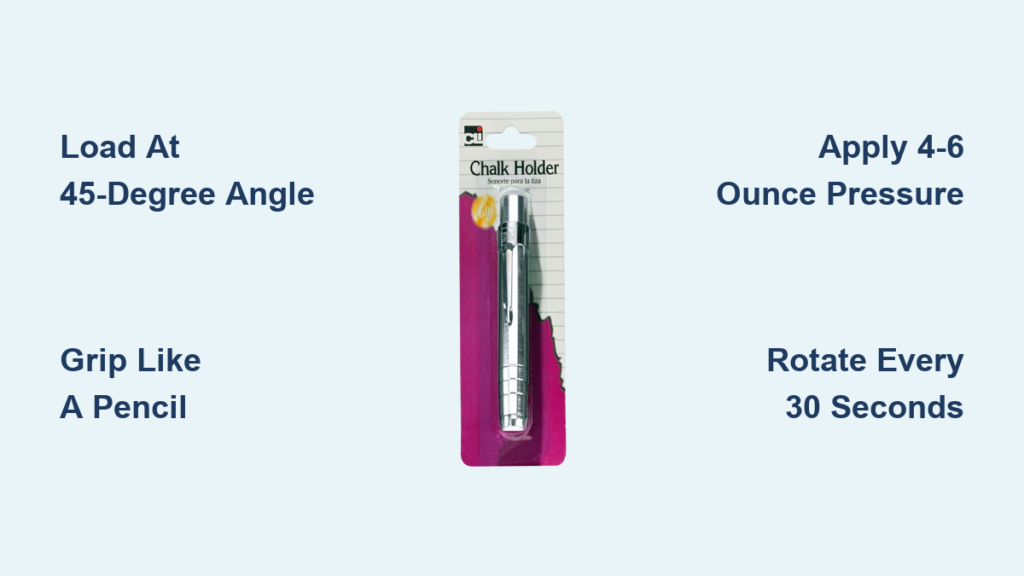
Insert Chalk at Precise 45-Degree Angle
Hold the empty holder tilted at 45 degrees and slide chalk tip-first into the mechanism. For clamp-style holders, apply light barrel pressure while inserting to open the jaws slightly. Twist-style holders require clockwise rotation during insertion to engage the threading. Stop immediately when you feel firm resistance—forcing it further cracks the chalk at the stress point. Test seating by gently twisting the chalk; it should rotate smoothly without slipping.
Confirm Secure Seating Through Pressure Test
After loading, write a short test line on scrap paper. If chalk retracts into the holder, remove it and reinsert with 10% more insertion force. If the chalk tip protrudes more than 1/4 inch, push it back slightly—excessive exposure causes breakage during writing. Properly seated chalk should extend exactly 3/16 inch beyond the holder’s tip for optimal control. Recheck seating after every 5 minutes of continuous writing.
Execute Perfect Grip Technique
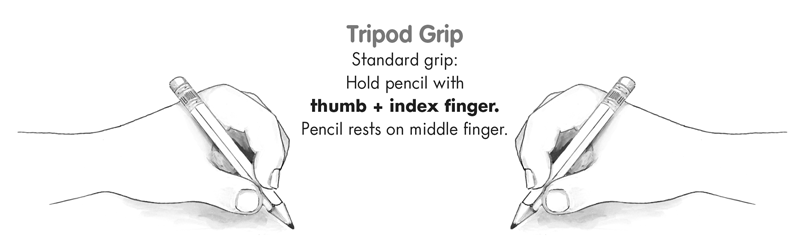
Position Fingers for Maximum Control
Grip the holder like a pencil—thumb and index finger forming a “V” while resting the barrel on your middle finger’s knuckle. Keep your ring and pinky fingers relaxed against the holder’s base for stability. This position prevents white-knuckling that causes hand fatigue during 20+ minute writing sessions. For vertical boards, angle your wrist downward to maintain consistent pressure from shoulder to fingertip.
Apply Consistent 4-6 Ounce Writing Pressure
Use a kitchen scale to practice applying exactly 4-6 ounces of pressure—the sweet spot where chalk creates opaque lines without breaking. Start with light pressure (2 ounces) on downstrokes, increasing to 6 ounces on horizontal lines. When you hear chalk “squeaking,” you’re applying too much force. Save your wrist by letting your arm’s weight provide pressure rather than finger strength.
Maintain 30-45 Degree Board Angle at All Times
Hold the holder at a consistent 35-degree angle to the board surface—this prevents dust from falling onto your hand while creating crisp lines. Lower angles (under 25 degrees) produce thick, dusty smears; steeper angles (over 50 degrees) cause skipping and scratching. During vertical writing, rotate your entire arm—not just the wrist—to maintain this critical angle as you move up the board.
Achieve Professional Writing Control
Initiate Strokes with Feather-Light Contact
Begin every line with near-zero pressure for the first inch, gradually increasing to your target force. This “pressure ramp” prevents chalk from catching on board texture and snapping. Practice on scrap board by writing the letter “i” repeatedly—focus on creating consistent dots without breaks. Your initial contact point should leave almost no visible mark before building opacity.
Drive Movement From Shoulder, Not Wrist
Lock your wrist and move the holder using your entire arm—this creates smoother lines and prevents carpal tunnel strain during extended writing. Stand with feet shoulder-width apart and pivot at the hips for vertical boards. Practice by drawing 3-foot horizontal lines across a board; if your lines waver, you’re moving from the wrist. Proper technique produces ruler-straight lines with zero tremors.
Vary Line Thickness Mid-Stroke with Pressure Control
Create artistic effects by modulating pressure: apply 2 ounces for hairline details, then smoothly increase to 6 ounces for bold strokes within a single continuous line. For tapered effects (like calligraphy), start heavy and lighten pressure toward the stroke’s end. Rotate the holder 90 degrees every 15 seconds to use fresh chalk edges and prevent flat spots that cause breaks.
Maintain Holder for Peak Performance
Clear Dust Buildup After Every 3 Uses
Unscrew the holder over a trash can and tap the barrel gently to dislodge compacted dust. Use a dry pipe cleaner to remove stubborn residue from clamp jaws or twist mechanisms. Weekly, disassemble completely (if possible) and blow compressed air through all channels. Neglected dust buildup causes chalk to stick and jam mechanisms within weeks.
Clean Contact Points with Dry Microfiber
Wipe the interior gripping surfaces with a dry microfiber cloth after each use—oil from fingers attracts dust and causes chalk to swell. Never use water or solvents; moisture makes chalk sticky and corrodes metal parts. For metal holders, apply a rice-grain-sized drop of graphite powder to twist mechanisms quarterly to maintain smooth operation.
Store Chalk Separately During Downtime
Remove chalk when not using the holder for more than 48 hours—chalk absorbs ambient humidity and expands, potentially jamming the mechanism. Store chalk upright in a sealed container with silica gel packets. Keep holders in protective cases to prevent dents that misalign gripping mechanisms. Never leave loaded holders exposed to direct sunlight.
Solve Common Chalk Holder Issues
Fix Persistent Chalk Breakage in 30 Seconds
If chalk keeps snapping, disassemble the holder and run a cotton swab through the interior channel. Any rough edges (burrs) will catch the swab—smooth them with 600-grit sandpaper. Verify chalk diameter matches holder specs; 1/64-inch oversizing causes breakage under pressure. Load chalk with the fracture point facing upward to distribute stress evenly.
Restore Weak Grip with Two-Step Repair
For clamp-style holders with loose grip, gently squeeze the metal prongs inward using needle-nose pliers (1/16-inch adjustment at a time). For twist mechanisms, apply graphite powder to the threading and work it in with 10 rapid rotations. If grip remains weak, replace worn rubber inserts—most holders have user-replaceable parts available online.
Stop Chalk Slippage During Critical Writing
Insert a 1/8-inch paper shim behind the chalk to create instant tension. For immediate classroom fixes, wrap the chalk base with one layer of masking tape. During artistic work, rotate the holder clockwise slightly while writing to engage the gripping mechanism tighter. If slippage continues, your chalk is undersized—switch to thicker diameter pieces.
Maximize Chalk Efficiency and Lifespan
Utilize Every Millimeter of Chalk
Keep writing until chalk stubs measure just 1/2 inch—most holders grip these remnants securely. Combine broken pieces by inserting the largest fragment first, then stacking smaller pieces behind it. The holder’s internal pressure holds these fragments together, turning waste into usable chalk. Track your chalk savings; teachers typically extend chalk life by 40% using this method.
Prevent Drop-Related Breakage Automatically
The holder’s barrel absorbs impact when dropped, preventing the chalk from shattering on hard surfaces. This feature alone saves 30% more chalk in classroom environments where drops are frequent. Always hold the holder near its center of gravity (not the tip) to minimize drop force. For outdoor use, select holders with rubberized end caps for extra shock absorption.
Rotate Chalk Every 30 Seconds for Even Wear
Turn the holder 90 degrees clockwise every 30 seconds of writing to prevent flat spots that cause breakage. This rotation distributes wear across the entire chalk circumference, extending usable life by 25%. Set a timer during long writing sessions until the habit becomes automatic. Uneven wear is the #1 cause of premature chalk failure.
Apply Advanced Holder Techniques
Create Professional Gradient Effects
Master tapered lines by starting strokes at 45 degrees for thick beginnings, then gradually lowering the angle to 20 degrees during the stroke. This technique produces calligraphy-style lines that thin naturally—ideal for headers and artistic accents. Practice by writing the word “gradient” repeatedly, focusing on smooth angle transitions without lifting the holder.
Sharpen Chalk Directly in Holder for Precision Work
Mount fine-grit sandpaper on a flat surface and rotate the loaded holder against it to shape the tip. Create chisel points for crisp straight lines or rounded tips for broad strokes. The holder provides perfect stability during sharpening—no more crumbling fragile chalk points. Artists use this method to achieve pen-like precision with standard classroom chalk.
Execute Instant Color Changes for Multi-Hued Work
Pre-load multiple holders with different chalk colors and store them in a dedicated caddy. During presentations or artwork, simply swap holders for seamless color transitions—no more dusty finger stains between colors. Label each holder with colored tape for instant identification. This technique cuts multi-color project time by 50% while keeping hands clean.
Mastering how to use chalk holder properly transforms a simple writing tool into a precision instrument. Start by perfecting your loading technique and grip pressure—these fundamentals prevent 90% of common frustrations. Within three practice sessions, you’ll write with newfound confidence and control. Remember to clean your holder weekly and store chalk separately to maintain peak performance. Whether you’re teaching calculus or creating sidewalk art, the chalk holder becomes an extension of your hand when used correctly. Stop wasting time and chalk on avoidable mistakes—implement these techniques today and experience the professional difference immediately. Your next flawless chalkboard creation starts with proper holder mastery.


