Tired of stepping on rogue bricks or digging through chaotic bins for that one 1×4 plate? Whether you’re a parent managing your kid’s multiplying collection or an AFOL (Adult Fan of LEGO) with thousands of pieces, finding the right storage system transforms building from frustrating to fun. These LEGO holder ideas range from playful character heads to sophisticated display cases, with solutions for every budget and collection size. You’ll discover how to turn scattered bricks into an organized workspace where creativity flows freely—without the headache of lost pieces or tripping hazards.
The best LEGO holder ideas solve three critical problems: quick cleanup during play, instant access to specific parts, and dust-free display of prized creations. Forget generic plastic bins that hide your collection—modern solutions integrate storage with your room’s aesthetics while scaling as your bricks multiply. In this guide, you’ll get actionable strategies tested by serious builders, from $5 zipper pouch hacks to modular systems that handle 100,000+ pieces. Let’s turn your LEGO chaos into organized inspiration.
LEGO Storage Heads That Speed Up Cleanup
Skip the bin-digging with LEGO’s oversized minifigure heads—functional containers doubling as room decor. Available in winking, skeleton, and pumpkin expressions, these stackable plastic holders come in mini ($10), small ($17), and large ($35) sizes. A single large head swallows 500 bricks, perfect for “toss-and-go” cleanup when playtime ends. During holiday sales, snag them for 40% off to build a color-coordinated tower that stores bricks while looking intentional.
Why Stackable Heads Beat Standard Bins
These aren’t just cute—they solve real pain points. Nesting same-size heads vertically creates space-saving towers that won’t topple during play. The wide openings prevent brick jams when dumping pieces, while the sturdy plastic resists cracks from dropped bricks. For families, label each head’s front with a color-coded sticker (e.g., red for red bricks) so kids instinctively sort during cleanup. Avoid the common mistake of overfilling—the large head maxes out at 500 bricks before lids won’t seal properly.
KALLAX Cube Systems for Modular Growth
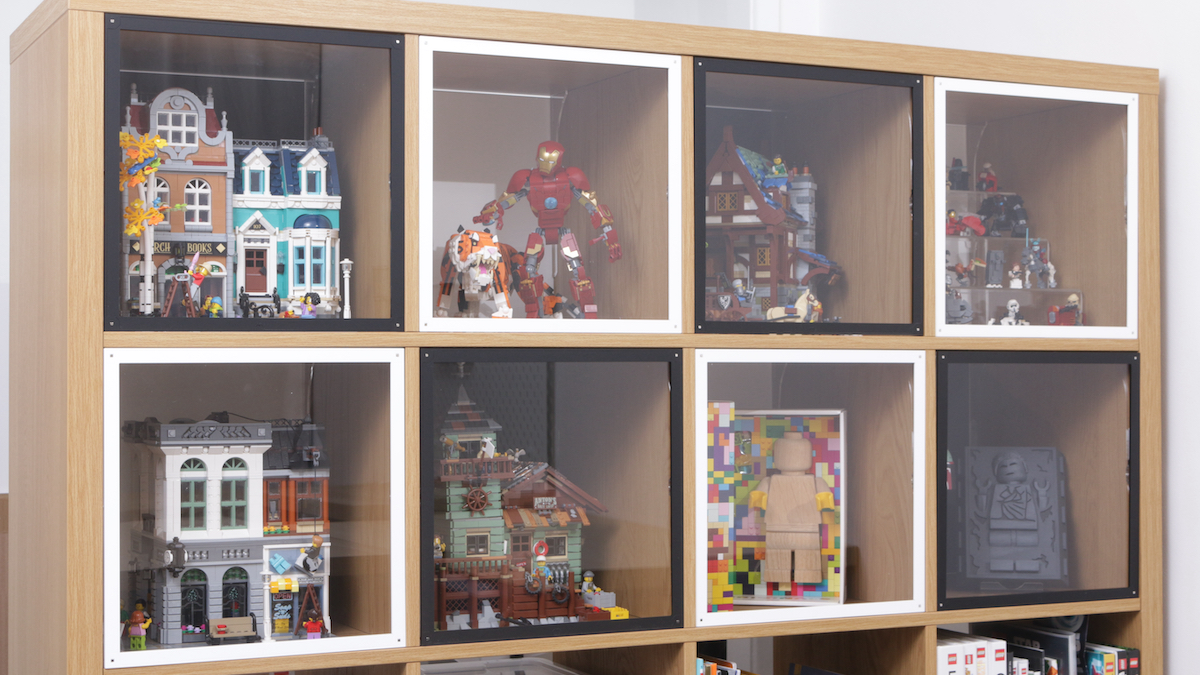
Transform IKEA’s $40 KALLAX shelving into a LEGO command center by pairing it with TROFAST bins or acrylic display stands. Each 13″×13″ cubby perfectly fits Wicked Brick’s 32×32 baseplates for showcasing completed sets, while removable bins keep sorted bricks visible. This system scales from a starter 2-cube unit ($40) to a room-dominating 5×5 wall ($200), adapting as your collection grows.
Lighting Hacks That Elevate Your Display
Install LED strips inside cubbies to make Star Wars UCS sets glow like they’re in hyperspace—no electrician needed. Peel-and-stick tape lights cost under $15 and snap into place along the top edge. For heavy builds like the Millennium Falcon, reinforce shelves with hidden brackets rated for 22+ pounds. Never place sets directly on raw wood; always use acrylic risers to prevent scratches and allow easy rotation of displays.
Budget-Friendly Zipper Pouch Sorting
Stop losing set-specific pieces forever with a $25 mesh zipper pouch system. Cut the front panel from LEGO boxes, tape it to colored pouches, and store every set’s bricks, instructions, and stickers together. Slide these labeled pouches upright into TROFAST bins for instant visual identification—no more opening 20 cardboard boxes searching for Harry Potter pieces.
Color-Coding for Under 20,000 Pieces
For manageable collections, sorting by color keeps kids engaged and parents sane. Use rainbow zipper pouches ($15 for 30) in 8 sizes to separate 1×1 plates from 6×8 bricks. Toddlers can help cleanup by matching brick colors to pouch labels. If you’re an AFOL, graduate to Akro-Mils’ 64-drawer cabinet ($35) where each compartment holds specific elements like “dark red 1×2 slopes.” Avoid mixing part types—this creates “sorting paralysis” when building complex MOCs.
DIY Activity Tables Under $120

Create a dedicated building station by modifying an IKEA LINNMON tabletop ($25). Route a 10mm recess, glue a 48×48 baseplate center, and add T-molding edges to prevent rolls. Slide TROFAST bins ($8 each) underneath for storage that’s out of sight but within reach. Total cost: $80–120—less than half retail for LEGO’s branded desks.
Temporary Walls for Renters
Not ready to commit? Peel-and-stick baseplates ($20 for 10-pack) create 40″×30″ building zones that remove cleanly. Position them at kid-height for play areas, then reposition for conventions. Test adhesion on inconspicuous wall spots first—older drywall may need primer. When removing, warm the edges with a hairdryer to prevent residue.
Toolbox Organizers for On-the-Go Building
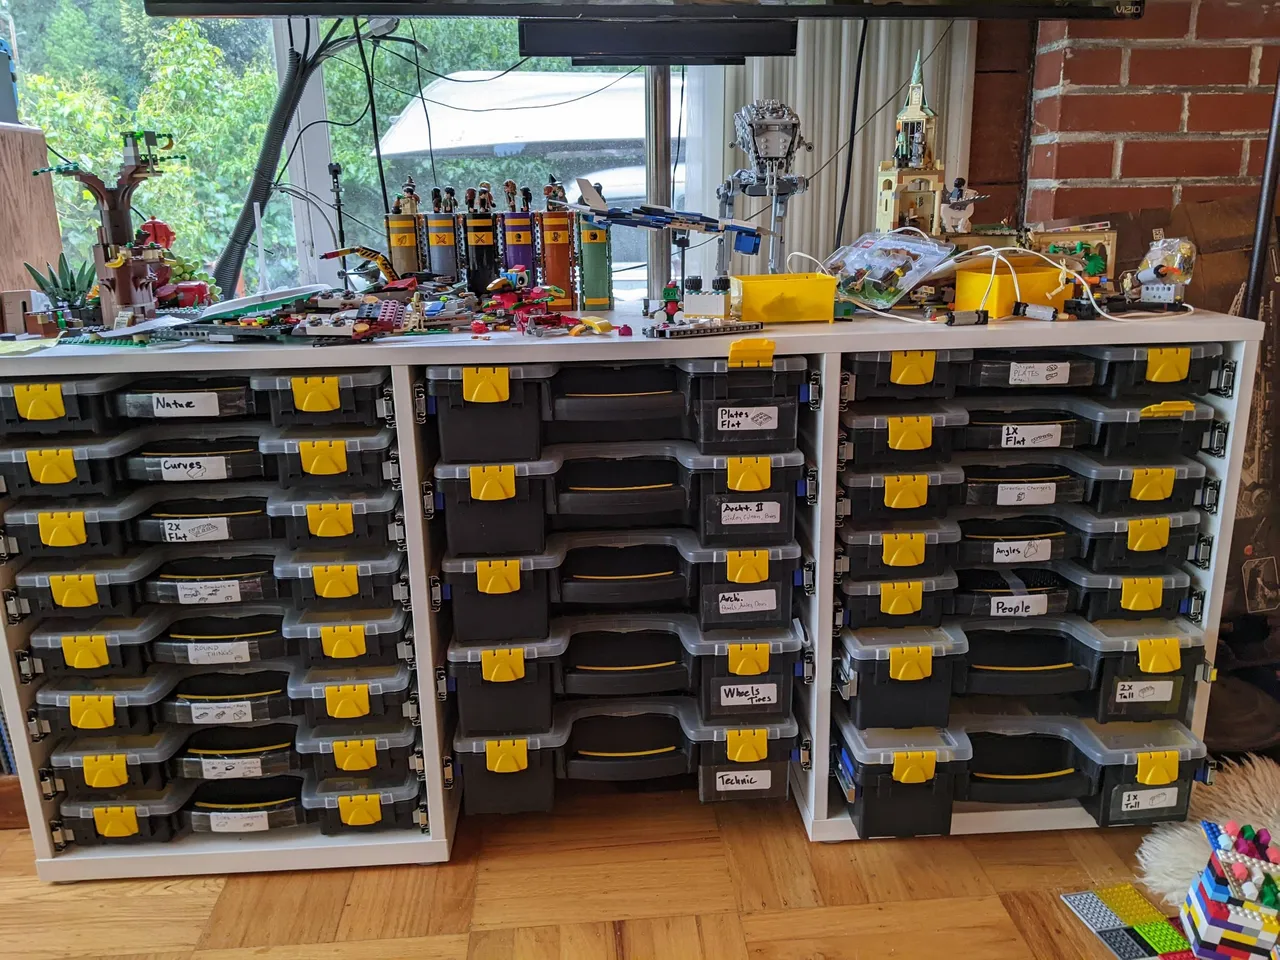
Repurpose a $15 Harbor Freight cantilever toolbox into portable LEGO storage. Its removable bins perfectly hold minifigure accessories or specialty pieces like TECHNIC pins. The built-in handle lets you transport sorted collections to conventions without mixing parts en route. Label bins with Brother P-touch laminated tags ($15 starter kit) that resist moisture during travel.
Why This Beats Tackle Boxes
Toolboxes beat tackle boxes for daily access—their wider bins prevent brick jams when grabbing pieces mid-build. Tackle boxes (like Plano’s $12 model) work for conventions but frustrate during regular use with narrow compartments. Always leave 20% empty space in bins; overfilling causes bricks to wedge and lids to jam.
Acrylic Display Cases That Prevent Yellowing
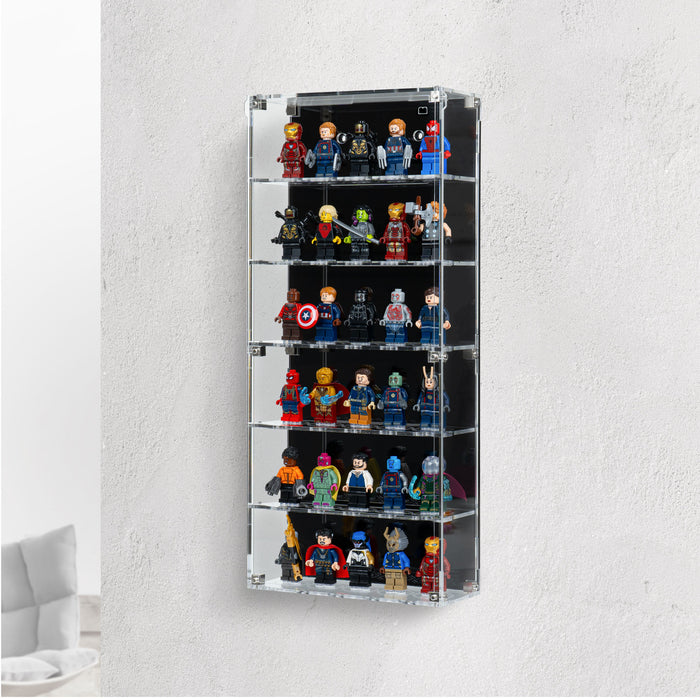
Protect prized sets from UV damage with Wicked Brick’s modular acrylic cases ($40–150). Their UV-filtering material blocks 90% of harmful rays, stopping white bricks from yellowing within months. Cases stack like transparent LEGO bricks, creating display towers for minifigure armies or rotating seasonal sets.
Floating Shelf Displays on a Budget
IKEA’s $6 LACK shelves create “floating” displays by hiding brackets behind sets. The 2″ depth perfectly fits 32×32 baseplates, making UCS Star Destroyers appear suspended mid-battle. For heavier builds, upgrade to solid wood shelves stained to match your furniture—these support 50+ pounds without sagging. Never place displays in direct sunlight; even UV-filtered cases can’t compensate for all-day window exposure.
Future-Proofing Your LEGO Storage System
Choose modular solutions like TROFAST or KALLAX that expand horizontally and vertically. Start with two TROFAST bins ($20) for current needs, knowing you can add matching frames later without redesigning your entire system. This avoids the “storage shuffle” when your collection outgrows initial setups.
Labeling That Survives Years of Use
Ditch masking tape—laminated Brother P-touch labels resist peeling and smearing. Download free Brick Architect templates for drawer-perfect sizing. For kids’ rooms, use picture labels (e.g., a spaceship icon for space bricks) so non-readers can help sort. Update labels quarterly as your collection evolves; stale labels create more chaos than no labels.
Quarterly Maintenance Routine
Schedule display rotations every 3 months to prevent dust buildup and keep your space feeling fresh. Once yearly, empty every bin for a “deep clean”: vacuum shelves first, then wipe plastic with microfiber cloths (never paper towels—they generate static that attracts dust). Photograph drawer contents for cloud-based inventory checks before major builds.
Start small with two LEGO storage heads ($35) for quick kid cleanup—this solves 80% of daily frustration. As your collection grows, add KALLAX cubes or zipper pouches using the budget tiers in this guide. The key isn’t expensive gear; it’s creating a LEGO holder system so intuitive that finding the right piece becomes part of the fun, not a barrier to building. Your next masterpiece shouldn’t wait on lost bricks—implement one idea today and build in peace tomorrow.