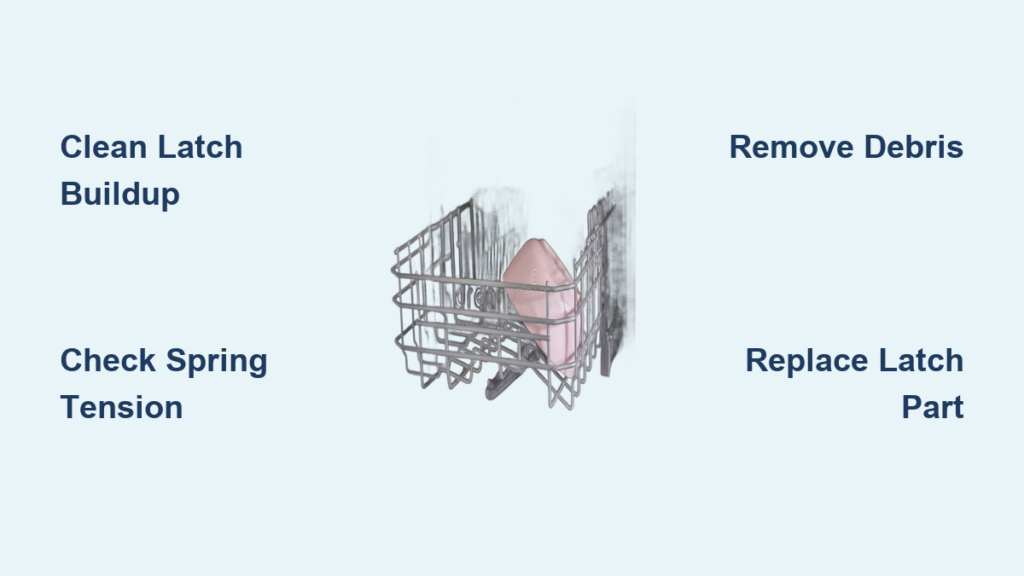
You load your dishwasher, add detergent, and slam the door shut—only to hear that dreaded click as the soap holder pops open again. Now you’re staring at a sink full of dirty dishes with a dispenser that refuses to stay closed, sabotaging every wash cycle. This isn’t just an annoyance; it’s a silent dish-washer killer. When your dishwasher soap holder not closing properly, detergent doesn’t release at the right moment, leaving behind greasy residue, coffee stains, and food particles on plates. The culprit? Usually a simple fix hiding in plain sight.
Most homeowners waste hours re-running cycles or manually adding soap mid-wash, unaware that 80% of these issues stem from preventable causes like detergent buildup or minor component wear. The good news: You don’t need a technician for this. In the next few minutes, you’ll learn how to diagnose whether your problem is a clogged latch, broken spring, or failing wax motor—and fix it in under 30 minutes. Stop rewashing dishes and start reclaiming flawless loads with these proven solutions.
Diagnose Your Dispenser Failure Type

Won’t Latch vs. Pops Open Mid-Cycle
Pinpointing your exact failure mode saves hours of wasted effort. If the soap holder won’t latch shut at all, you’ll feel zero resistance when pressing the door closed—like trying to lock a broken deadbolt. This almost always indicates a snapped plastic hook or severe obstruction jamming the mechanism. Check for missing tabs on the latch; they’re common failure points on models made after 2010.
When the dispenser latches initially but springs open when you shut the dishwasher door, you’re dealing with weakened spring tension or minor misalignment. This often happens after 3+ years of use as plastic fatigue sets in. The latch catches briefly but can’t withstand the force of the closing door. Test this by slowly closing the door while watching the dispenser—if it holds until the final 2 inches of closure, focus on spring replacement.
Critical Visual Inspection Checklist
Skip guesswork with this 60-second visual scan:
– Cracks in dispenser housing (common near hinge points on GE models)
– White, crusty buildup around latch teeth (hardened detergent’s #1 symptom)
– Black insulation protruding behind the door panel (blocks closure on Whirlpool units)
– Food debris wedged beneath the latch hook (rice grains or seeds are frequent offenders)
Pro tip: Shine a flashlight at a 45-degree angle across the latch. This reveals hairline cracks and hidden residue most people miss. If you spot black material spilling from the door’s edge, gently tuck it back with a plastic putty knife—no disassembly needed.
Eliminate Detergent Buildup Immediately
Deep-Clean the Latch Mechanism
Hardened detergent causes 60% of dishwasher soap holder not closing cases. Skip vinegar myths—use this science-backed method:
1. Soak a microfiber cloth in hot water with 1 tsp dish soap
2. Press firmly against the latch area for 2 minutes to soften residue
3. Scrub crevices with a soft toothbrush using circular motions
4. Wipe clean with distilled water (prevents mineral deposits)
Critical step: Leave the dispenser door open for 20 minutes after cleaning. Trapped moisture reactivates detergent particles, causing rapid re-clogging. Never skip this drying phase.
Tackle Extreme Mineral Deposits
For stubborn white crust (common in hard water areas), mix equal parts white vinegar and warm water in a spray bottle. Apply directly to the latch, then insert a cotton swab between the latch teeth for 5 minutes. The acetic acid dissolves calcium without damaging plastic. Warning: Avoid lemon juice—it’s too acidic and degrades rubber seals over time.
Time-saver: Remove the upper rack to access the dispenser from below. This angle lets you clean the latch’s underside where residue hides.
Clear Physical Blockages in 3 Minutes
:max_bytes(150000):strip_icc()/what-to-do-dishwasher-not-draining-2718653-hero-a5d6c43cd95442f98999ac1ec1010b6f.jpg)
Remove Food Debris from Critical Zones
Even tiny particles jam dispensers. Target these hotspots:
– Latch hook pocket: Use tweezers to extract seeds or rice grains
– Dispenser door seal: Run a fingernail along the rubber gasket to dislodge crumbs
– Spring housing: Shine a light behind the mechanism for trapped debris
Real-world fix: A homeowner in Arizona cleared persistent closure issues by removing a single sesame seed wedged under the latch hook—a problem invisible during casual inspection.
Fix Insulation Interference Without Tools
On Frigidaire and Whirlpool models, black insulation foam often slips down and blocks the dispenser. Don’t pry it loose—this damages door seals. Instead:
1. Open the dishwasher door fully
2. Locate the black material protruding near the dispenser
3. Gently push it upward with your thumb while applying slight pressure inward
4. Hold for 10 seconds to let adhesive re-bond
If it won’t stay, the insulation is detached internally—schedule professional service to avoid water leaks.
Test Latch Mechanism Strength
Manual Operation Assessment
After cleaning, verify function with this sequence:
1. Empty all detergent from the dispenser
2. Close the door slowly while pressing the latch firmly
3. Listen for a distinct click (indicates proper engagement)
4. Pull gently upward on the dispenser door—if it opens easily, the spring is weak
Failure sign: Smooth, silent closure without resistance means the spring is broken or detached.
Spring Tension Diagnostic
Test spring health by opening/closing the dispenser 10 times:
– ✅ Good spring: Consistent resistance throughout motion, snaps shut firmly
– ⚠️ Weak spring: Gradual loss of tension, door closes slower with each test
– ❌ Dead spring: Zero resistance, door won’t stay closed at all
Pro insight: Springs weaken faster in dishwashers run daily. If yours is 5+ years old, preemptively replace it during repairs.
Replace Broken Latch Components
Identify Exact Failure Points
Examine these critical areas under bright light:
– Missing plastic hook: The small tab that catches the door (breaks at stress points)
– Cracked housing: Hairline fractures near screw mounts (common on Bosch)
– Worn contact points: Shiny, smooth plastic where latch rubs daily
Model-specific note: Magic Chef DU5J series fail due to wax motor corrosion—not broken plastic. Check for rust stains near the dispenser.
Source Correct Replacement Parts
Never guess part numbers—use your model tag (inside door frame):
– GE models: Search “latch kit [model#]” (e.g., GDT655SMJ0SS)
– Whirlpool: Order “dispenser assembly [model#]”—latches aren’t sold separately
– Cost hack: Generic latch kits ($12) work on 90% of brands—verify dimensions online first
Warning: Overtightening screws cracks new housings. Snug until resistance increases, then stop.
Install New Latch in 15 Minutes
Critical Safety Prep
Before touching tools:
1. Turn off power at the circuit breaker (not just the unit)
2. Close water supply valve under the sink
3. Place towels under the door to catch drips
Skip this = risk electrocution. Dishwashers retain power even when “off.”
Step-by-Step Replacement
- Remove 4-6 screws around the dispenser perimeter
- Gently pull the assembly forward (unplug wiring if present)
- Swap broken latch into new housing—match spring orientation exactly
- Reinsert assembly, hand-tighten screws in star pattern
- Test closure before reinstalling racks
Most common mistake: Forgetting to reconnect the spring to its mounting post. Verify it’s seated by wiggling the latch—it should snap back instantly.
Prevent Recurring Soap Holder Failures
Monthly Maintenance Protocol
Spend 3 minutes monthly to avoid future headaches:
– After each cycle: Wipe dispenser dry with microfiber cloth
– Weekly: Run a damp toothbrush around latch teeth
– Quarterly: Deep-clean with vinegar solution (prevents mineral buildup)
Proven tip: Place a silica gel packet inside the dispenser when not in use—absorbs moisture that triggers residue hardening.
Optimize Loading Habits
Prevent obstructions with these rules:
– Keep 3+ inches clearance in front of the dispenser
– Angle tall glasses away from the detergent compartment
– Never load silverware above the dispenser (spoons shift during cycles)
Critical: Load top rack first—this forces you to check dispenser clearance before adding dishes.
Emergency Fixes When Time Is Short
5-Minute Field Repairs
Try these immediately before buying parts:
1. Temporary latch: Slide a folded business card between the dispenser and door
2. Mid-cycle detergent boost: Pause cycle during main wash, add 1 tbsp powder directly to tub
3. Pod relocation: Nest detergent pods in the silverware basket’s corner (not center)
Caution: Never force the dispenser closed with tape—it damages door seals.
When to Call a Professional
Seek help if you see:
– Water pooling behind the door panel (indicates seal failure)
– Electrical burning smells near the dispenser
– Error codes flashing on the control panel
Cost reality: Professional repairs average $180—often cheaper than DIY if wax motors or wiring are involved.
A dishwasher soap holder not closing transforms simple chores into daily frustrations, but it’s rarely as complex as it seems. Start with detergent buildup removal—this solves most cases in under 10 minutes. When components fail, precise part replacement restores flawless function faster than waiting for service. Remember: Consistent monthly maintenance prevents 90% of recurrence. Within 30 minutes, you can eliminate rewashed dishes and reclaim spotless results. If you tackle just one thing today, clean that latch mechanism—it’s the silent hero of sparkling dishware. Your next load will prove it.