
Your soap shouldn’t become a slippery, shapeless blob every time you shower. That frustrating slide into a puddle of water isn’t just annoying—it wastes your favorite bar and creates messy residue on your shower floor. Installing a soap holder solves this daily nuisance with minimal effort, transforming your shower experience from chaotic to streamlined. Whether you’re working with ceramic tile, fiberglass, or a corner shower stall, this guide delivers precise techniques for permanent installation. You’ll learn exactly where to position your holder, which adhesive prevents future loosening, and how to achieve a professional finish in under two hours.
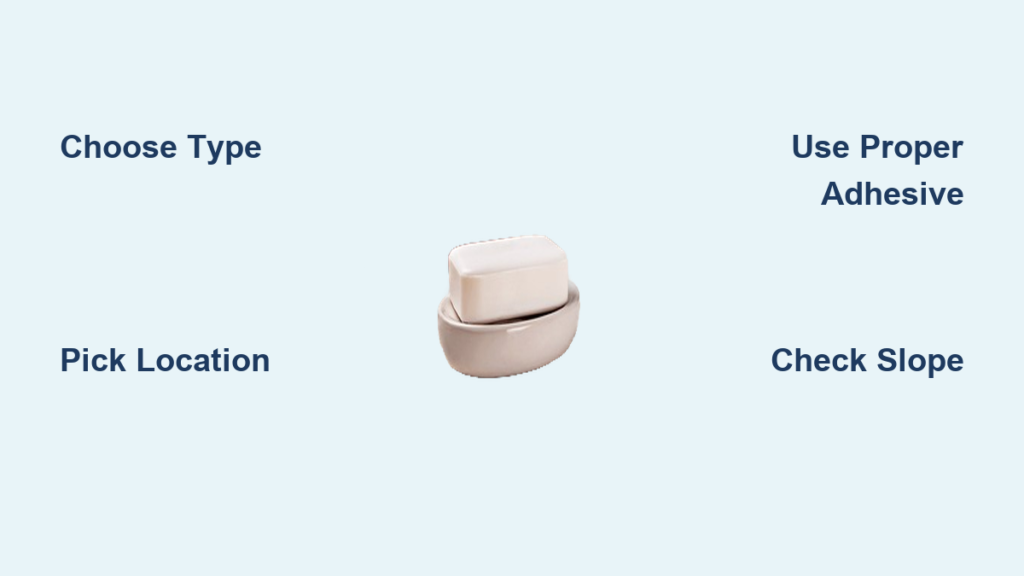
Choose Your Soap Holder Type for Your Shower Wall
Ceramic soap dishes create seamless, built-in storage that matches your existing tile pattern. These require removing one or two tiles to recess the dish flush with your wall surface, ideal for long-term durability in high-moisture areas. Corner tile shelves maximize unused space by converting 12×12 tiles into custom storage—cut diagonally for perfect drainage and positioned where water exposure is minimal. Surface-mounted dishes offer the fastest solution, bonding directly to tile or fiberglass with heavy-duty epoxy. Skip suction cups entirely; they fail within weeks due to soap scum buildup and constant moisture. For fiberglass showers, only surface-mounted options work since tile removal isn’t possible.
Pick the Exact Location to Avoid Water Damage
Height placement depends on your shower configuration. In tub-shower combos, mount 8–12 inches above the tub deck—high enough to avoid standing water but low enough for easy reach. For walk-in showers, position the holder 48–60 inches from the floor, ensuring it’s within natural arm’s reach while avoiding direct spray zones. Corner shelves need higher placement—aim for 6–8 inches below the ceiling line—to minimize water exposure while keeping soap accessible. Stand in your shower, close your eyes, and reach for where your hand naturally falls; mark this spot with a pencil to confirm before drilling.
Distance from the showerhead is critical. Position your holder 2–3 tiles away from the main water stream, using your tile grid as a measurement guide. Water pressure creates invisible spray patterns that pool in unexpected spots—test potential locations by running your shower for 30 seconds and observing where water collects. Never place holders directly under showerheads or in corners where water naturally drains, as this guarantees constant saturation and soap mush.
Gather Shower-Specific Tools Before Starting
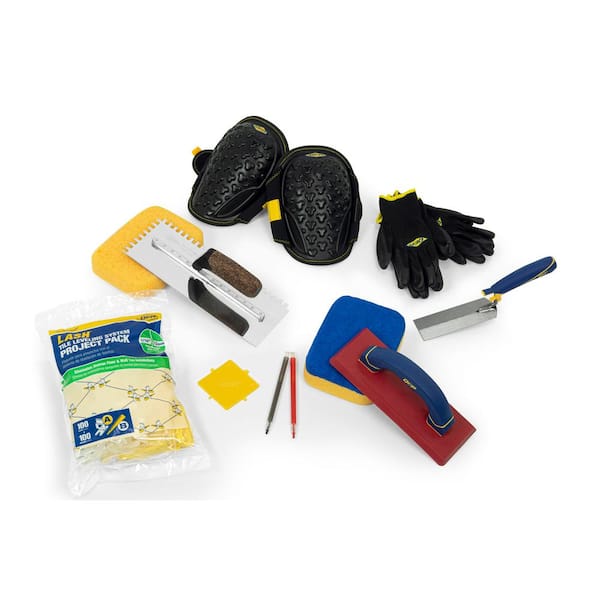
Essential safety gear includes ANSI-rated eye protection—tile fragments fly unpredictably during removal—and a damp microfiber sponge for immediate grout cleanup. Required tools: A grout saw for scoring joints, hammer and nail set for tile divots, 1/4-inch masonry bit (wrap masking tape 1/4-inch from tip as a depth guide), cold chisel, putty knife, small torpedo level, and alcohol wipes for surface prep. Materials vary by method: Thinset mortar with latex modifier for tile installations, Gorilla epoxy for surface mounts, sanded caulk matching your grout color, and wedge-shaped tile spacers that lock dishes at the perfect drainage angle.
Pro tip: Buy two extra wedge spacers—they prevent accidental shifting during adhesive cure time and ensure your soap dish slopes forward 5–10 degrees for optimal drainage.
Install Ceramic Soap Dish in Tile Wall
Remove Tiles Without Damaging Adjacent Surfaces
Start by wearing eye protection and clearing the work area. Score grout lines around your target tile with a grout saw to prevent cracks spreading to neighboring tiles. Create X-shaped divots across the tile face using a hammer and nail set—these weak points guide clean breaks. Drill through each divot point with your taped masonry bit, stopping 1/4-inch from the tile’s back to avoid puncturing pipes or wiring behind the wall. Tap your cold chisel at a 45-degree angle along the X-lines with light hammer strikes until the tile fractures. Pry out fragments with a putty knife, scraping the substrate clean of old mortar.
Repair Substrate for Maximum Holding Power
Inspect the exposed wall for crumbling backer board or damaged drywall. If compromised, cut a new cement backer board patch to size and secure it with construction adhesive or corrosion-resistant screws. For extra strength in heavy ceramic installations, add wood backing behind the board—this prevents future loosening from soap dish weight. Never skip this step; weak substrate guarantees adhesive failure within months.
Bond Dish with Complete Adhesive Coverage
Mix thinset mortar with latex modifier to a peanut butter consistency. Spread a uniform 1/8-inch layer on both the wall substrate and the soap dish back using a putty knife—gaps cause air pockets that weaken the bond. Press the dish firmly into place, checking with your torpedo level to maintain the built-in forward slope. Hold steady for two minutes to prevent slippage, then secure with crisscrossed masking tape. Allow 24 hours of undisturbed curing before grouting.
Achieve Seamless Tile Integration
Cut replacement tiles to fit around the dish using your tile saw, leaving 1/8-inch gaps for grout. Apply thinset to the wall and tile backs, pressing pieces into place with wedge spacers to maintain consistent slope. After 24 hours, fill joints with matching sanded grout or caulk, wiping excess with a damp sponge using circular motions. This “locking” technique where tiles overlap the dish edges prevents water seepage behind the unit.
Create Corner Tile Shelf Storage

Cut Tiles for Perfect Drainage Angle
Use a 12×12 tile for optimal surface area—mark a diagonal line corner-to-corner and cut with a wet tile saw for a clean 45-degree angle. This creates two identical shelves with natural drainage; the angled edge directs water away from soap while maximizing contact area. Sand sharp edges lightly with 100-grit sandpaper to prevent cuts during use.
Position Shelf in Strongest Structural Zone
Mount your shelf either on top of an existing tile course or integrated within the middle of tiles—never in grout lines alone. For maximum strength, cut the next tile row above to fit over the shelf’s top edge, creating a mechanical “lock” that distributes weight. Apply thinset to both shelf edges and wall contact points, ensuring the shelf slopes downward 5 degrees toward the shower interior. Press firmly for two minutes, then tape in place until cured.
Surface-Mount Installation for Fiberglass or Tile
Prepare the surface meticulously—clean the area with isopropyl alcohol wipes and let dry completely; any soap residue or moisture ruins epoxy adhesion. Apply Gorilla epoxy in zigzag patterns across the dish’s mounting surface, covering 100% of the contact area. Press the dish firmly against the wall with steady pressure for two full minutes—this eliminates air bubbles that cause detachment. Secure with masking tape straps and allow 24 hours of curing time before placing soap inside.
Critical Installation Details Most DIYers Miss

Drainage slope is non-negotiable—even holders with built-in holes fail if level. Verify your dish slopes forward using a torpedo level; if not, add thinset under the back edge during installation. Adhesive selection makes or breaks longevity: Thinset with latex modifier handles standard tile walls, but Gorilla epoxy provides 3,000 PSI strength for heavy ceramic dishes on fiberglass. Corner joints require flexible caulk instead of rigid grout—sanded caulk matching your grout color accommodates natural expansion without cracking while maintaining waterproof seals.
Maintain Your Holder for Long-Term Function
Weekly cleaning prevents permanent damage—wipe the holder with a vinegar-soaked cloth during your regular shower scrub to dissolve soap scum buildup. Monthly, clear drainage holes with a toothpick to maintain water flow. Annual maintenance is crucial: Inspect caulk lines for gaps and reapply matching sanded caulk if needed; check dish stability by gently wiggling it—any movement means immediate re-adhesion is required. Never use abrasive cleaners that scratch surfaces and trap residue.
Troubleshoot Immediate Installation Failures
Loose dishes almost always stem from incomplete adhesive coverage—remove the unit, clean both surfaces with alcohol, and reinstall with 100% thinset or epoxy contact. Water pooling indicates incorrect slope—reposition the dish or add adhesive under the back edge to create a 5-degree angle. Cracked grout in corners signals movement—scrape out damaged grout and replace with flexible sanded caulk; this absorbs shower vibrations without failing. If your dish detaches within a week, you skipped the 24-hour cure time—patience prevents costly rework.
Safety Steps That Prevent Costly Mistakes
Wear safety glasses during tile removal—flying shards cause 40% of DIY shower injuries. Use masking tape as a drill depth guide to avoid penetrating pipes behind walls. Ensure bathroom ventilation is active when applying adhesives to disperse fumes. Never test your installation by placing soap inside before 24 hours—epoxy needs full cure time to reach maximum strength. Pro tip: Tape a cardboard mockup in your chosen location for three showers to confirm height and accessibility before permanent installation.
Your properly installed soap holder will keep bars dry, accessible, and intact for years. By following these precise techniques—especially the adhesive selection and slope verification—you eliminate a daily frustration with professional results. The next time you reach for your soap, it’ll be exactly where you left it: clean, solid, and ready for use.


