
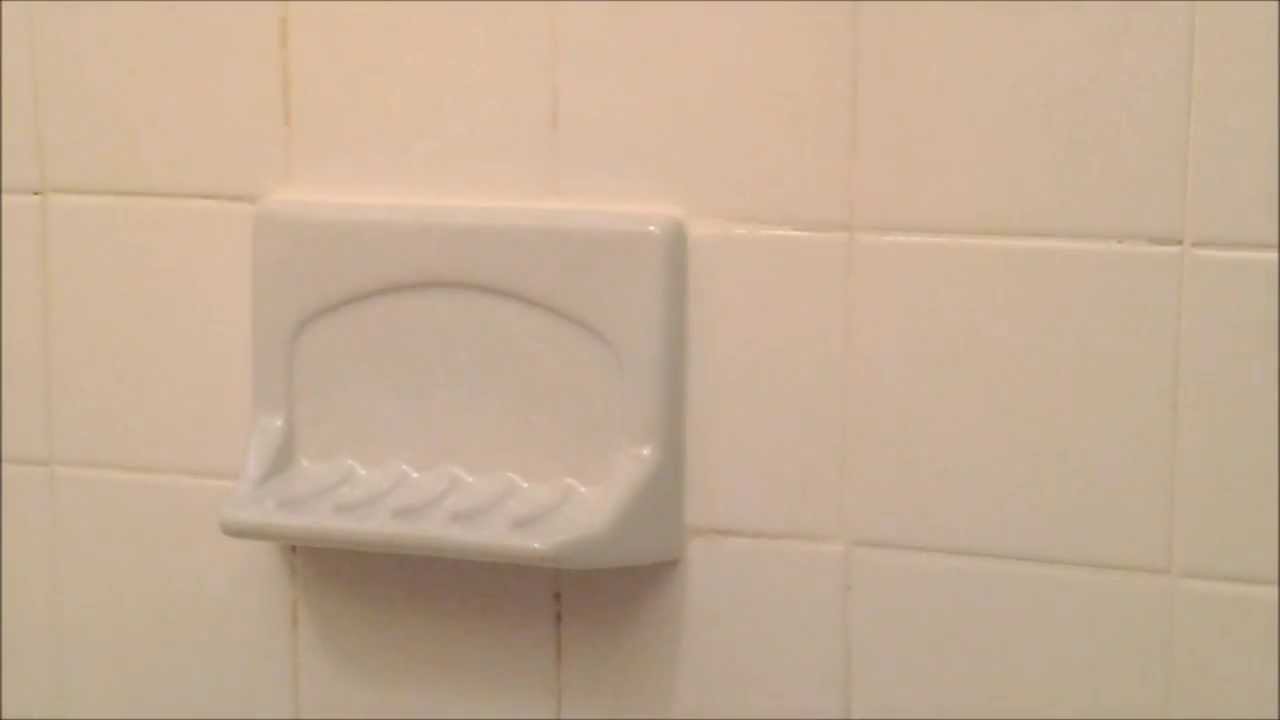
That moment when your ceramic soap dish cracks under a dropped bar of soap leaves you scrambling for a solution. Suddenly, you’re dealing with jagged tile edges, slippery soap sliding across the shower floor, and the urgent need to fix your shower’s functionality without triggering costly water damage. Replacing a broken or outdated soap holder seems simple until you realize one wrong move could compromise your shower’s waterproofing—leading to mold growth, tile failure, or even structural damage. This guide cuts through the guesswork by revealing three field-tested replacement methods that protect your shower’s integrity while delivering professional results. You’ll learn exactly how to remove broken dishes safely, test for hidden moisture, and install new holders without risking $2,000+ in water damage repairs.
Remove Broken Tile Soap Dishes Without Damaging Surrounding Tiles
Gear Up With Critical Safety Equipment First
Never skip protective gear when handling shattered ceramic. Safety goggles shield your eyes from flying shards during removal, while thick work gloves prevent deep cuts from sharp tile edges. Add a disposable dust mask to avoid inhaling tile dust that can irritate your lungs for hours. Lay old bath towels across your shower floor to cushion falling debris and protect the surface below. This 60-second safety setup prevents injuries that could derail your entire project.
Score and Break the Dish Using Controlled Techniques
Start by scoring around the dish’s perimeter with a razor blade to separate grout from the tile edges—this prevents accidental damage to adjacent tiles. For dishes still clinging to the wall, drill two dime-sized holes with a fine drill bit to weaken the structure. Wrap the dish in a thick towel and tap gently with a hammer, beginning at the outer lip and working inward in circular motions. This controlled breaking technique keeps fragments contained while avoiding cracks in neighboring tiles. If the dish has already fallen out, skip straight to surface cleaning but inspect surrounding tiles for hidden damage.
Clean the Opening Down to Bare Substrate
Scrape away every trace of old adhesive and grout using a putty knife, working until you expose clean, solid backer board. Pay special attention to corners where residue hides—any leftover material prevents proper adhesion of your new dish. Check for crumbling drywall or exposed waterproofing membrane; if you spot damaged substrate, stop immediately. Proceeding with compromised backing guarantees your new soap holder will loosen within months, requiring complete rework.
Test for Hidden Moisture Before Installing Anything New
Conduct the 48-Hour Paper Towel Moisture Test
This non-negotiable step prevents future mold disasters. Crumple dry paper towels and pack them tightly into the cleaned opening, then seal the area completely with plastic sheeting taped around all edges. Wait 24-48 hours before checking—if towels feel damp or show condensation, moisture is actively penetrating behind your tiles. Never skip this test: installing over hidden water guarantees your new soap dish will fail prematurely.
Interpret Test Results and Take Action
Wet paper towels indicate serious waterproofing failure behind your tiles. If moisture appears, extend the drying period by 3-5 days and retest. Persistent dampness means you need professional assessment—attempting DIY installation over active leaks risks $5,000+ in hidden water damage. Only proceed when towels remain bone-dry, confirming your shower walls are ready for reconstruction.
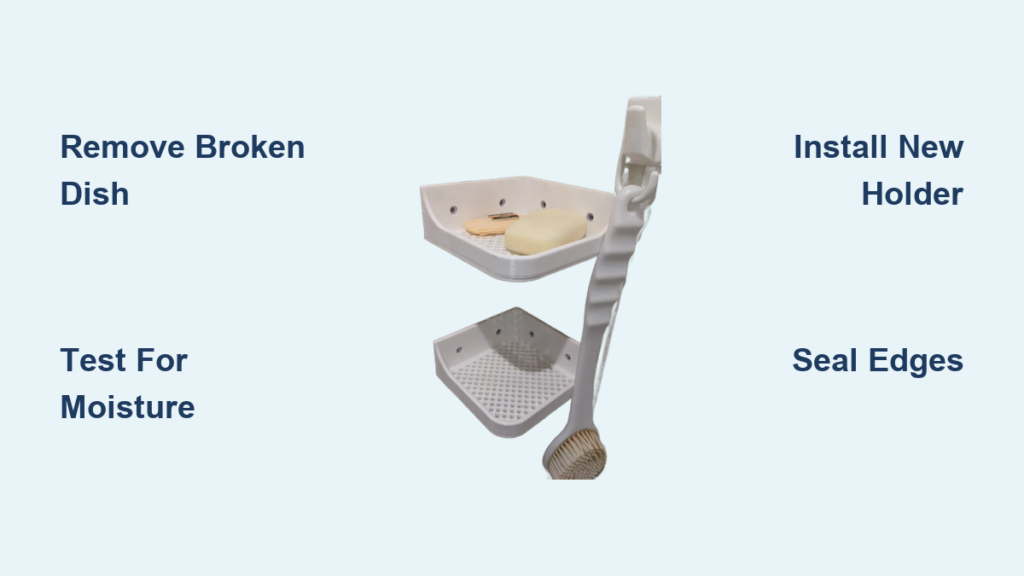
Install a New Soap Dish Tile in Under 30 Minutes
Perfect Your Dry Fit Before Adding Adhesive
Measure your opening precisely (length, width, and depth), then test-fit replacement dishes without adhesive. The new dish should sit flush against tiles with no rocking or gaps—press firmly to check stability. If it binds, remove tiny debris bits with a utility knife rather than forcing placement. Keep your grout sample nearby to match color; slight variations often work better as intentional contrasts than imperfect matches.
Apply Mortar for Maximum Waterproof Adhesion
Spread ceramic tile mortar around the dish’s outer edges with a putty knife, leaving the center 1 inch clear. This creates a suction seal that locks the dish securely while preventing water traps. Press the dish firmly into place and hold steady for 3-4 minutes as the adhesive sets. Immediately wipe excess mortar with a damp sponge before it hardens—delaying causes difficult cleanup that risks dislodging your new fixture.
Seal and Cure for Long-Term Durability
After positioning, reinforce with painter’s tape across all four corners to prevent shifting during curing. Wait 24 hours before removing tape or using the shower. Finally, apply a 1/8-inch bead of mildew-resistant silicone caulk around the dish’s perimeter, smoothing with a wet finger for a watertight seal. Avoid grout here—it cracks over time where dish meets tile, creating leak paths.
Handle Vintage Shower Openings With Non-Destructive Fixes
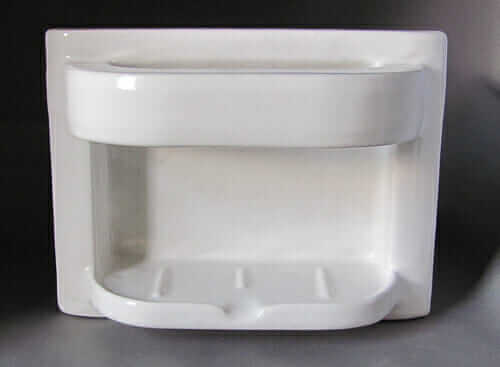
Identify Your Opening Size Before Panicking
Most modern recessed soap dishes require 5¼” x 5¼” openings, but pre-1980s showers often have smaller 4¼” x 4¼” cavities. Don’t reach for the grinder yet—enlarging vintage openings risks cracking surrounding tiles and breaching waterproofing. Instead, verify your dimensions with a tape measure before exploring solutions.
Source Period-Appropriate Replacements Safely
Visit architectural salvage yards specializing in mid-century fixtures—they often stock exact-match ceramic dishes from the 1960s-1970s era. Plumbing supply stores with vintage lines (like Kohler’s Heritage Collection) offer compatible modern reproductions. For custom needs, commission ceramic artists through Etsy for hand-thrown dishes matching your opening size—typically $40-$120 versus $200+ for invasive tile modification.
Apply Critical Waterproofing After Any Installation
Seal Vulnerable Entry Points Immediately
Every soap dish installation creates potential water pathways at the tile-dish junction. Run your finger along caulk lines monthly to detect hairline cracks or separation. Address gaps wider than 1/8 inch within 48 hours by removing old caulk and reapplying fresh silicone—delaying allows moisture penetration that softens backer board over time.
Pressure-Test New Installations Before Regular Use
Simulate heavy shower use by directing a handheld spray nozzle directly onto your new soap dish for 10 full minutes. Immediately check surrounding tiles and grout lines for dampness or discoloration. Any moisture appearance means your seal failed—remove the dish, clean thoroughly, and reinstall with extra mortar at stress points.
Choose Smart Alternatives When Tile Work Feels Too Risky
Install Surface-Mounted Holders in 5 Minutes
When tile modification seems daunting, use heavy-duty adhesive strips designed for shower use (like Command Outdoor Hooks). Clean tiles with rubbing alcohol, press strips firmly for 30 seconds, and attach corner-mounted soap shelves. These hold 2+ pounds securely without drilling—ideal for renters or vintage tile preservation. For heavier use, screw small stainless steel brackets into grout lines (not tiles) using ceramic drill bits.
Implement Temporary Suction Solutions
During part sourcing, suction-cup holders work surprisingly well on smooth tiles. Thoroughly clean both tile and cup with vinegar, press firmly while squeezing air out, and test with light pressure before adding soap. Replace cups every 6 months as seals degrade—this buys time for perfect permanent solutions.
Maintain Your New Soap Holder to Prevent Future Failures
Adopt a 60-Second Monthly Inspection Routine
After showering, press gently on your soap dish while checking for movement. Look for grout discoloration (yellowing indicates moisture) or caulk separation at corners. Catching minor issues early lets you reseal cracks with a $3 caulk tube instead of facing full replacement.
Avoid These 3 Common Maintenance Mistakes
Never overload dishes with multiple soap bars plus razors—that extra weight accelerates loosening. Skip harsh cleaners like bleach that degrade caulk seals; use vinegar-water solutions instead. Never scrub with metal pads that scratch tile surfaces, creating micro-cracks for water intrusion. Stick to soft microfiber cloths for cleaning.
Know When to Call a Tile Professional Immediately
Recognize These 4 Danger Signs
Stop your DIY project if you notice: water stains on ceilings below the shower, multiple loose tiles surrounding the soap dish, musty odors after showering, or electrical outlets near the affected area. These signal catastrophic waterproofing failure requiring $300-$800 professional repairs—far cheaper than the $5,000+ mold remediation that follows ignored leaks.
Calculate True DIY vs. Professional Costs
Factor in hidden risks: a $15 DIY soap dish could trigger $2,000 in water damage if waterproofing fails. Professionals charge $150-$400 for complete replacement with warranty, including membrane testing. Unless you’ve successfully handled tile repairs before, hire a pro when moisture tests fail or vintage openings require modification.
Your shower soap holder replacement should last 10+ years when installed correctly. Never rush moisture testing or skip safety gear—even “simple” fixes become expensive disasters when waterproofing fails. By following these precise methods, you’ll restore functionality while protecting your home’s structural integrity. For vintage shower owners, prioritize non-invasive solutions that honor your tilework’s history. When in doubt about moisture or membrane integrity, consult a tile specialist—their assessment fee pays for itself in avoided water damage claims.


