
Nothing ruins reading immersion like cramped hands from holding open heavy textbooks or cookbooks. A custom book holder solves this instantly by cradling pages at the perfect angle while freeing your hands for note-taking or stirring a simmering sauce. Whether you’re tackling dense academic material or following complex recipes, learning how to build a book holder transforms reading from a chore into pure enjoyment. This guide gives you two proven approaches: a 15-minute fixed stand using basic tools and a collapsible travel version that folds flat. Both cost under $15 in materials yet replace commercial units selling for $50+, making this project ideal for beginners and woodworkers alike.
Simple Fixed Stand Construction for Beginners
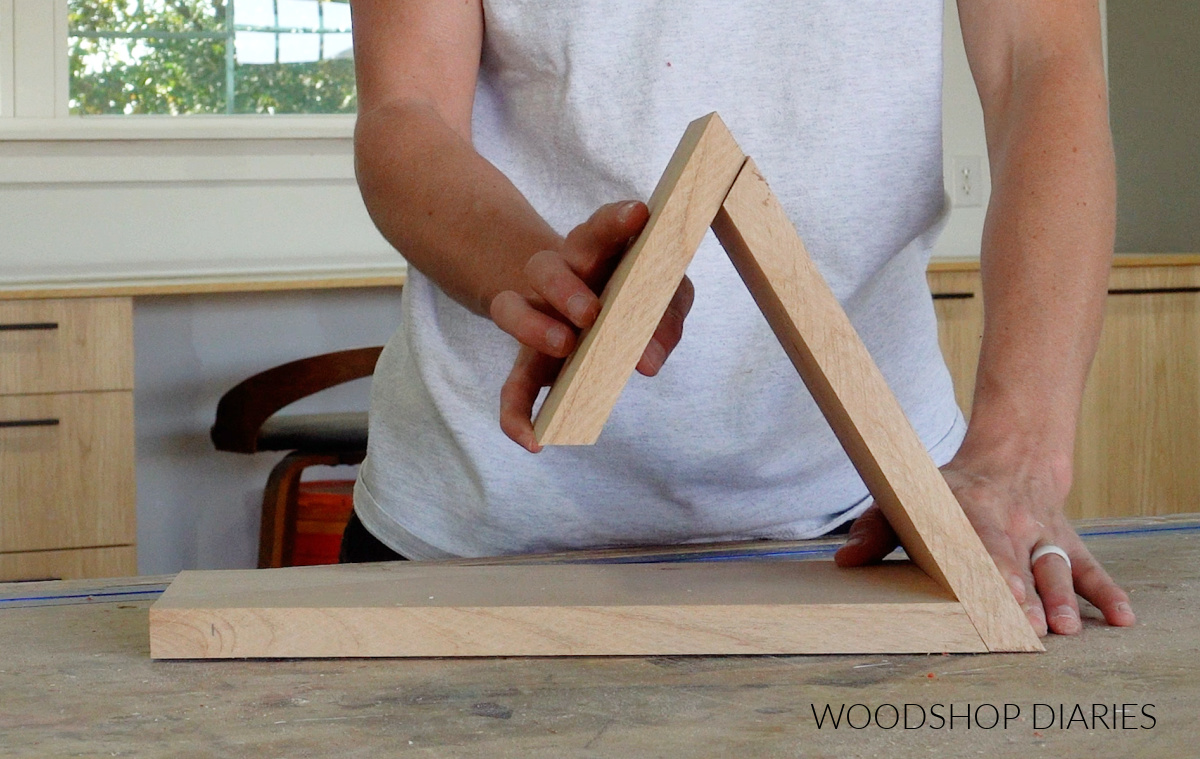
This no-frills design uses three precisely cut pine pieces that lock together at 30-degree angles to create an instantly stable reading platform. The fixed stand’s rock-solid stability makes it perfect for nightstands or kitchen counters where portability isn’t needed.
Cut Three Precision Components in Minutes
Start with a single 1×6 pine board (actual dimensions 0.75″ x 5.5″) and cut these three pieces using a miter saw set to 30 degrees:
- Base piece: 13″ long with one square end and one 30-degree beveled end
- Tall support: 9″ long with both ends beveled at 30 degrees (non-parallel cuts)
- Short support: 6″ long with both ends beveled at 30 degrees
These exact dimensions work perfectly for standard paperbacks and hardcovers. For larger textbooks or art books, simply scale up using 1×8 or 1×10 boards while maintaining the 30-degree angle. Pro tip: Test your miter saw settings on scrap wood first—consistent bevels are critical for proper assembly.
Nail and Glue for Unshakeable Stability
Sand all pieces thoroughly before assembly—it’s impossible to reach joints afterward. Apply wood glue generously to all angled mating surfaces, then position the tall support against the base’s beveled end. Since clamps struggle with these non-perpendicular joints, hold pieces firmly by hand while securing with a brad nailer. Drive 18-gauge nails at opposing angles through the support into the base for maximum strength. Immediately wipe away excess glue with a damp cloth to prevent sticky residue. Repeat for the short support piece, creating a triangular support structure that won’t wobble.
Finish for Immediate Book Contact
Fill visible nail holes with a paste made from wood glue and sawdust from your project for an invisible repair. Once dry, sand the filled areas smooth with 220-grit paper. Apply a thin coat of oil finish like Walrus Oil Furniture Butter using a lint-free cloth, working with the wood grain. Critical warning: Allow at least 72 hours for complete curing before placing books on it—uncured oil will transfer permanent stains to pages. This simple stand holds its position reliably for decades with proper glue joints.
Advanced Folding Stand for Travel and Tight Spaces
The collapsible design uses ¾” plywood and brass hinges to create a professional-grade holder that folds flat for backpacks or shelves. While requiring intermediate skills, this version rewards you with adjustable angles and portable functionality commercial models struggle to match.
Prepare Plywood with Professional Edges
Cut your plywood to size using a sharp fine-tooth saw or table saw for clean edges. Standard dimensions measure 5.5″ deep x 8.5″ tall x 13.75″ long, but precision matters less than perfectly straight edges. Immediately refine all cut edges with a block plane to remove splinters and create crisp lines. Slightly bevel the top and front edges with sandpaper for comfortable handling. Create the book ledge by cutting a narrow plywood strip matching your stand’s width—use a try square and bench hook for dead-straight cuts that won’t wobble during use.
Install Hinges for Smooth Folding Action
Clean reclaimed brass hinges by removing old paint with medium abrasive paper—this adds vintage character while ensuring smooth operation. Key detail: Use specialized hinge screws with smaller heads designed for flush mounting; standard screws will prevent the stand from collapsing flat. Position the main support 8mm above the bottom edge when folded—this tiny gap prevents binding while maintaining compact storage. Install the book ledge hinge parallel to the stand board, ensuring it folds flush against the front without gaps. Test the folding motion repeatedly before final screw tightening.
Create Gentle Page Retention Hooks
Modify straight brass hooks into custom page holders by cutting off the hook ends and filing all edges smooth—this prevents paper tears while securing pages. Drill 3/16″ holes in the front edge of the ledge at a 15-degree backward angle for optimal page retention. Insert hooks and test their pivot action: they must turn sideways when folding to nest neatly against the stand. If hooks bind, enlarge holes slightly with a tapered reamer. These subtle angles keep pages open without damaging spines—a critical improvement over spring-loaded commercial holders.
Adjust Reading Angle with Cord Restraint
Drill matching 1/8″ holes through both the stand board and support arm 4″ from the hinge point. Thread strong paracord through these holes and secure with a reef knot. Pro technique: Treat both cord ends with superglue before threading to prevent fraying, then apply additional glue to the knot after tying. This cord limits how far the support opens, letting you fine-tune the viewing angle for different reading positions. Shorten the cord for upright textbook viewing or lengthen it for relaxed novel reading—all without complex mechanisms.
Material Selection Made Simple
Choose Wood Based on Your Project Type
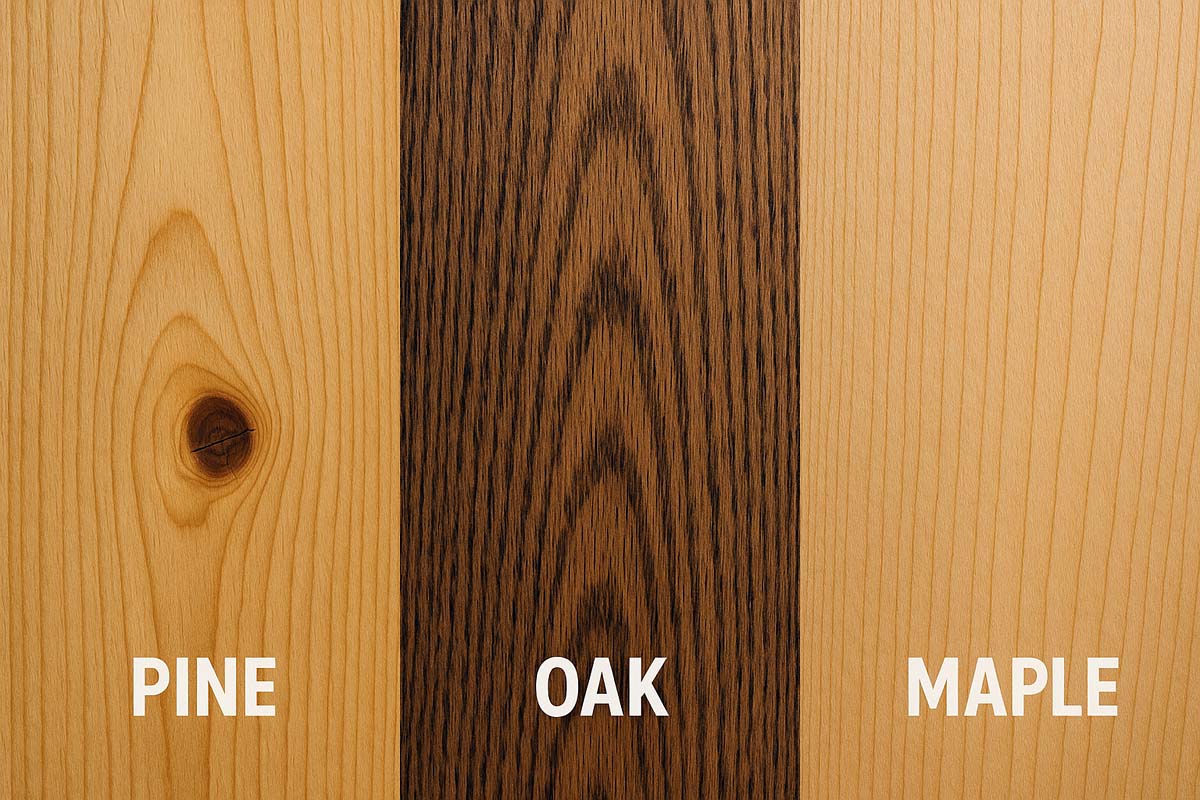
Pine remains the ideal beginner choice for fixed stands—it’s affordable, easy to cut, and accepts finishes beautifully. For premium fixed holders, upgrade to maple, walnut, or oak for heirloom durability. Folding stands demand ¾” plywood for its strength-to-weight ratio; Baltic birch plywood provides the cleanest edges. Budget tip: Both designs require under 3 feet of board length—perfect for using scrap wood from other projects. Standard 1×6 boards accommodate most books, while 1×8 or 1×10 versions handle oversized technical manuals.
Essential Hardware Checklist
For fixed stands:
– Wood glue (Titebond II recommended)
– 18-gauge brad nails (1-1/4″ length)
– Wood filler or glue/sawdust mix
– Oil finish (avoid waxes that attract dust)
For folding stands add:
– 2-3 brass hinges (reclaimed or new)
– #6 x 3/4″ hinge screws
– 550-lb test paracord (12″ length)
– Straight brass hooks (2-3 per holder)
– Super glue for cord treatment
Troubleshooting Like a Pro

Fix Angled Cut Errors Before Assembly
If your 30-degree cuts don’t align during dry-fit assembly, the bevel angle is inconsistent. Recheck your miter saw’s calibration using a digital angle gauge—most affordable saws drift over time. For hand-saw cuts, clamp a 30-degree template to your workpiece as a guide. Critical fix: Never force misaligned pieces together; this creates stress points that cause joint failure. Recut problematic pieces immediately.
Solve Hinge Binding in Folding Stands
When your folding stand won’t collapse flat, hinges are misaligned by even 1mm. Disassemble and test-fit hinges without screws, using painter’s tape to hold position. If binding persists, deepen hinge mortises slightly with a narrow chisel—remove material in 1/64″ increments. Pro move: Apply paste wax to hinge knuckles before final assembly for lifelong smooth operation.
Perfect Page Holder Tension
Hooks that grip too tightly tear pages; loose hooks let books snap shut. Fix tension issues by gently bending hooks at the base with pliers—just 2-3 degrees makes a difference. If drilling new holes, angle them 5 degrees farther backward for more retention. Test with your thickest book before final glue-up.
Unlock Massive Savings Over Commercial Holders
A fixed pine stand costs just $4.75 in materials (1×6 board: $3.50, glue/nails: $1.25)—commercial equivalents sell for $50+. The folding design runs $12.50 total (plywood: $7, hinges/hooks: $4.50, cord: $1)—versus $75+ for comparable store-bought models. Both projects transform scrap wood into functional art, with folding stands doubling as impressive gifts when paired with a new book. Many woodworkers complete entire stands from cutoffs left over from larger projects.
Extend Your Holder’s Lifespan for Decades
Store folding stands collapsed flat to prevent hinge stress during long-term storage. Never place books on an oil-finished holder before the 72-hour cure period—this causes permanent page stains. Dust regularly with a microfiber cloth; avoid water-based cleaners that raise wood grain. If finishes dull after years of use, revive with a single drop of furniture oil rubbed in with your fingertip. Properly glued joints last 20+ years even with daily use.
Creative Upgrades for Unique Applications
Gift-ready enhancements: Router a 1/4″ groove along the base for pens or highlighters. Include a matching wooden bookmark cut from the same board. Personalize with burned initials using a wood-burning tool.
Workshop adaptations: Build an oversized version using 1×10 boards to hold engineering manuals. Add rare-earth magnets to the ledge for holding metal tools or page markers. Create modular systems where multiple holders connect via dowel pins.
Travel optimizations: Use lightweight cedar for the folding design to reduce weight. Replace cord with quick-release pins for instant angle changes. Attach a leather strap handle to the back panel for easy carrying.
Your custom book holder will become an indispensable reading companion whether propping up cookbooks during meal prep, supporting textbooks during late-night study sessions, or holding novels during weekend relaxation. The fixed stand provides rock-solid reliability for stationary use, while the folding version delivers professional functionality in a travel-ready package. By learning how to build a book holder yourself, you’ve not only saved money but created a personalized tool that perfectly matches your reading habits—a small project with enormous daily rewards.


