
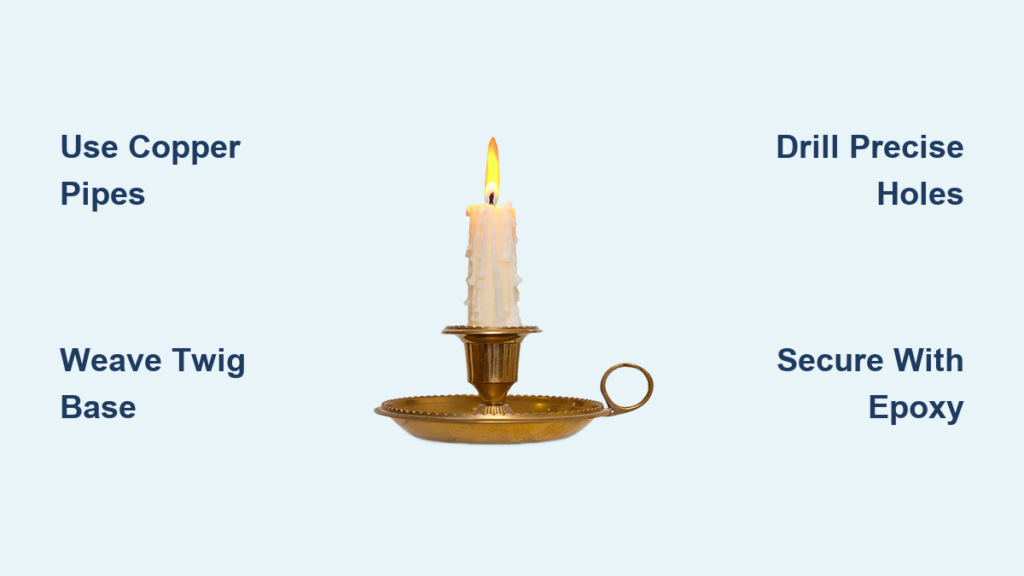
You’re setting the table for a special dinner when you realize—no candle holders. Instead of scrambling to the store, transform ordinary materials into stunning candlestick holders in under an hour. Whether you’re crafting rustic twig holders for a backyard gathering or sleek copper designs for formal dinners, creating your own holders adds personal charm while solving last-minute décor dilemmas. This guide reveals eight proven methods using accessible materials, from scavenged twigs to plumbing supplies, ensuring you’ll never face a candleless table again.
Forget expensive store-bought options that lack personality. Homemade candlestick holders become conversation starters while reflecting your unique style. Within this guide, you’ll discover beginner-friendly projects requiring zero tools alongside advanced techniques for luxury results. Every method includes precise measurements, safety-critical tips, and customization tricks to match your skill level and décor. Let’s turn that candleless crisis into your most memorable centerpiece.
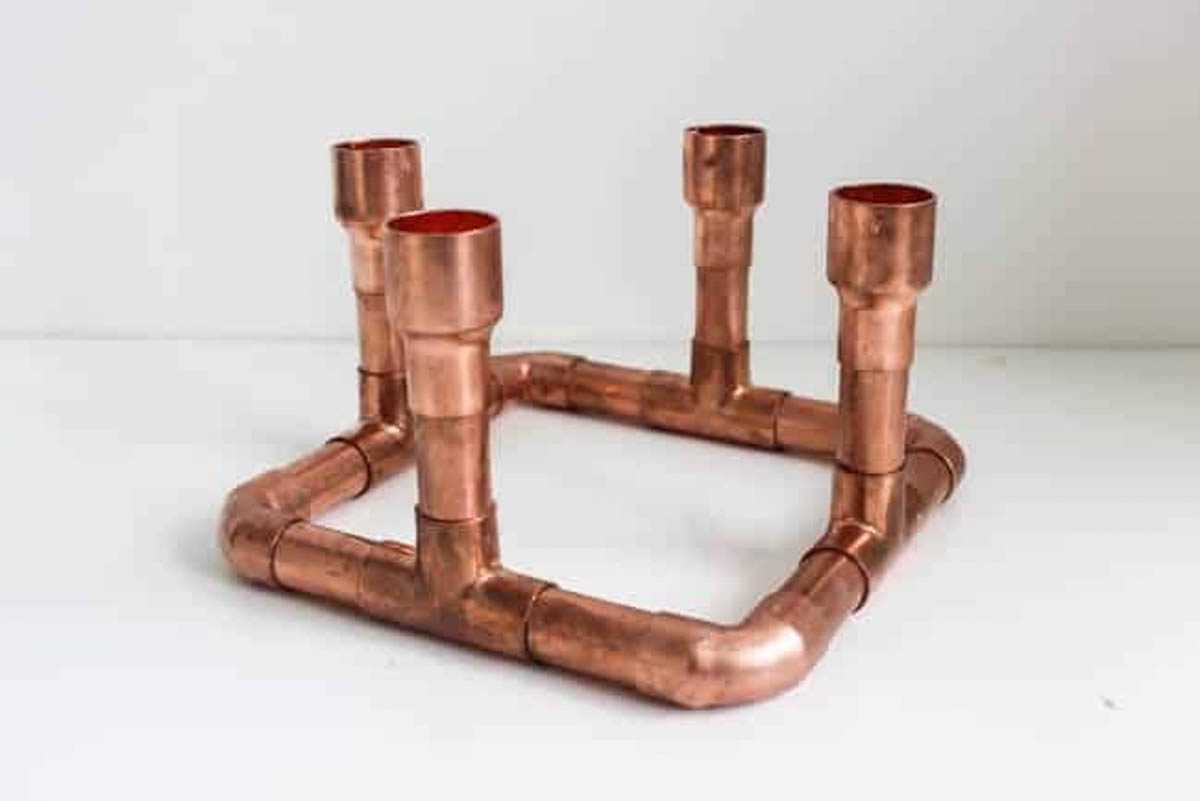
Craft Copper Pipe Candlestick Holders in 3 Hours
Time Required: 2-3 hours | Difficulty: Beginner | Materials Cost: $15-25
Copper plumbing pipes create industrial-chic holders that glow warmly in candlelight. Their sturdy structure prevents tipping, while the metallic finish elevates any table setting from casual to curated.
Choose Correct Pipe Fittings for Perfect Candle Fit
Select ½” or ¾” copper pipes based on candle size—standard tapers need ¾” openings. Gather these essentials:
– 12″ copper pipe for the stem
– Four 90-degree elbow joints
– Two T-connectors for the base
– One copper end cap
– Thread seal tape to prevent wobbling
Measure your candle diameter first—forcing candles into undersized holes cracks the wax, while loose fits cause dangerous tipping.
Assemble Without Specialized Tools
Clean pipes with vinegar to remove factory oils that block paint adhesion. Dry thoroughly with a lint-free cloth. Form the base by connecting T-connectors with short pipe segments into an “H” shape (6-8 inches wide for stability). Wrap thread seal tape 3-4 layers thick around each joint before tightening—this creates friction for tool-free assembly. Test candle fit at the top opening; it should grip firmly without squeezing.
Pro Tip: Skip painting for vintage appeal—seal raw copper with clear lacquer to prevent tarnishing while maintaining its natural glow.
Build No-Tool Twig Candle Holders in 30 Minutes
Time Required: 30 minutes | Difficulty: Beginner | Materials Cost: $0-5
Rescue backyard twigs into rustic holders that evoke woodland charm. Ideal for outdoor dinners or farmhouse tables, this zero-tool method uses nature’s imperfections as design features.
Select Sturdy Twigs for Reliable Support
Gather 8-12 straight twigs (maple or oak work best) measuring 6-8 inches long with consistent thickness. Avoid brittle, dead branches—slightly green twigs bend without snapping. Test flexibility by gently bending each piece; discard any that crack. Soak twigs in water for 10 minutes if too dry, making them pliable for weaving.
Weave a Self-Supporting Base That Holds Candles Securely
Arrange twigs vertically in a circle on a flat surface, spacing them evenly. Start weaving jute twine horizontally 1 inch from the bottom in an over-under pattern, pulling tightly after each wrap. After 5-6 complete wraps, test stability by pressing the center—add extra twine layers if wobbling occurs. Insert dried rosemary or eucalyptus between twigs for fragrance. Place candles in the natural depression formed at the top.
Critical Note: Only use dripless candles—wax adheres permanently to untreated wood. For outdoor use, apply melted beeswax to twigs first to repel moisture.
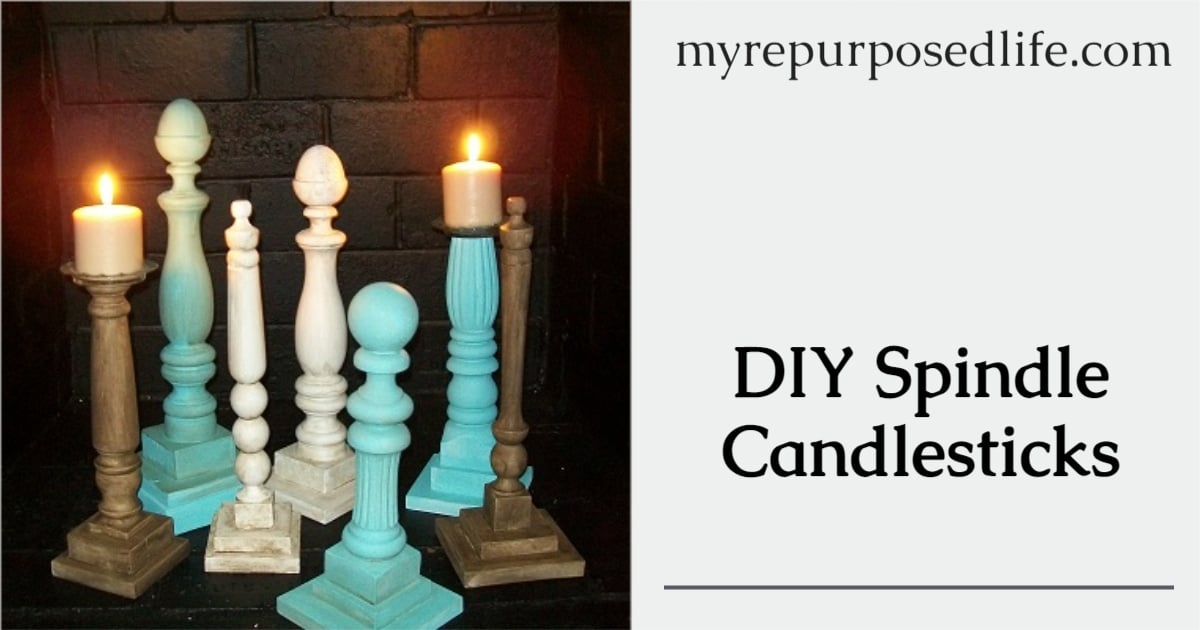
Transform Vintage Spindles into Elegant Holders
Time Required: 3-4 hours | Difficulty: Intermediate | Materials Cost: $10-20
Rescue discarded chair spindles into heirloom-quality holders with vintage character. This method turns forgotten furniture parts into dramatic centerpieces that spark conversation.
Modify Spindles for Stable Candle Placement
Measure your spindle against table height—8-12 inches works best for dining surfaces. Mark a cutting line with a pencil, ensuring a perfectly flat bottom. Use a hand saw (clamp securely to prevent splitting), then sand cut edges smooth with 150-grit paper. Attach an MDF base 2-3 inches wider than the spindle using wood glue—this prevents heat damage to tables and adds crucial stability.
Drill Precision Holes That Secure Candles Without Slipping
Create a test hole in scrap wood first using a ⅞” spade bit. Drill 1-1.5 inches deep into the spindle top—stop when the bit’s shoulder touches the wood. Test with your candle; the hole should hold it snugly. If too loose, fill gaps with wood filler, let dry, then re-drill.
Pro Tip: Apply spackle to cracks before painting—this hides imperfections while creating authentic vintage texture.
Mold Speckled Clay Candlestick Holders Without a Kiln
Time Required: 2 hours + drying time | Difficulty: Beginner | Materials Cost: $8-15
Air-dry clay mimics expensive pottery with customizable speckled finishes. These lightweight holders work for tea lights or tapers and require no firing.
Shape Flawless Candle-Receiving Forms
Roll clay into a cylinder (2-3 inches wide, 4-6 inches tall). Press your candle into the top center while clay is pliable to create a perfectly sized hole—remove immediately to prevent sticking. Smooth the exterior with damp fingers, using a ruler to create sharp edges for modern looks. Let dry 48-72 hours on a flat surface to prevent warping.
Create Professional Speckled Effects with Household Items
Dilute acrylic paint 50/50 with water. Dip an old toothbrush in the mixture, then hold it 6-8 inches from the dried clay. Flick bristles with your thumb while rotating the holder for even coverage. Seal with two light matte spray coats—this prevents clay from absorbing candle wax.
Cut Minimalist Wooden Dowel Holders in 60 Minutes
Time Required: 1 hour | Difficulty: Beginner | Materials Cost: $5-10
Hardwood dowels deliver Scandinavian simplicity that highlights natural grain. These holders suit modern tables where less is more.
Drill Perfect Candle Holes That Prevent Leaning
Cut 1″ diameter dowels to 8-12 inches using a hand saw with a miter box for clean 90-degree angles. Sand cut ends with 150-grit paper, progressing to 220-grit for smoothness. Mark the center top with an awl to prevent drill bit wandering, then bore a ⅞” hole 1 inch deep for tapers (use 1½” for votives).
Achieve Gallery-Quality Finishes on a Budget
For natural wood, apply Danish oil with a cloth—wipe off excess after 15 minutes. Two coats deepen grain dramatically. For painted versions, use acrylic paint in soft gray or cream, sanding lightly between coats with 220-grit paper. This eliminates brush strokes for furniture-store smoothness.
Assemble Luxury Copper and Marble Taper Holders

Time Required: 2-3 hours | Difficulty: Advanced | Materials Cost: $25-40
Marble bases with copper stems create hotel-worthy elegance. Precision cutting is essential for this high-impact project.
Cut Marble Safely Without Professional Tools
Use a wet saw with a diamond blade (rentable at hardware stores) to cut 4×4″ marble tiles into 3×3″ squares. Submerge the tile during cutting to reduce dust. Sand edges with 400-grit paper, progressing to 1200-grit for smooth, chip-free edges. Polish copper pipe caps and stems with metal cleaner before assembly—the shine makes all the difference.
Bond Stone and Metal with Unbreakable Adhesion
Drill ⅞” holes through marble bases and copper caps using a masonry bit. Thread copper pipe stems through both pieces, securing with stone-rated epoxy. Wipe excess epoxy immediately with acetone-dampened cloth. Allow 24 hours to cure—rushing this step risks separation under candle weight.
Critical Safety Note: Marble adds significant weight—test stability on uneven surfaces before use. Place on trivets to protect delicate table finishes.
Essential Candlestick Holder Safety Protocols
Prevent Fires with Non-Negotiable Clearances
Maintain 2 inches between candle flames and holder edges—closer distances risk igniting materials. Always place holders on heat-resistant surfaces like stone or ceramic tiles. Paper or vellum holders require LED candles only—real flames ignite these materials in seconds.
Guarantee Stability with Proven Base Ratios
Test balance with an unlit candle first. For holders under 8 inches tall, ensure the base diameter is 1.5× the height (e.g., 6-inch holder needs 9-inch base). Tall holders (8+ inches) require a 2:1 ratio—this prevents dangerous tipping during use.
Match Holder Holes to Standard Candle Sizes
| Candle Type | Diameter | Hole Size | Depth |
|---|---|---|---|
| Taper | ⅞” | ⅞” | 1-1.5″ |
| Pillar | 2-3″ | 2-3″ | ¼-½” |
| Votive | 1½” | 1.5″ | ¾” |
| Tea Light | 1½” | 1.6″ | ⅝” |
Maintain Your DIY Candlestick Holders Like a Pro
Clean Without Damaging Delicate Surfaces
Wipe metal holders with a damp cloth immediately after use—dried wax sticks stubbornly. For wood, dust regularly with a microfiber cloth; never use water. Clay holders need gentle brushing only—water causes cracking. Reapply Danish oil annually to wooden holders when the surface looks dry.
Store for Longevity Through Seasons
Wrap delicate finishes like copper or painted wood in acid-free tissue paper. Store in climate-controlled spaces—avoid attics or garages where temperature swings warp materials. Label containers with creation dates; air-dry clay degrades after 2 years if improperly stored.
Choose Your Perfect Project in 60 Seconds
Emergency solution: Twig holders (30 minutes, no tools)
Weekend project: Spindle upcycling (3-4 hours, vintage charm)
Showstopper piece: Copper-marble combo (2-3 hours, luxury results)
Creating your own candlestick holders transforms ordinary moments into cherished memories. Start with the twig method tonight, then master advanced techniques as your skills grow. Remember—the most beautiful holder isn’t the most expensive, but the one that makes your space uniquely yours. Light your first candle in it tonight and watch the magic unfold.


