
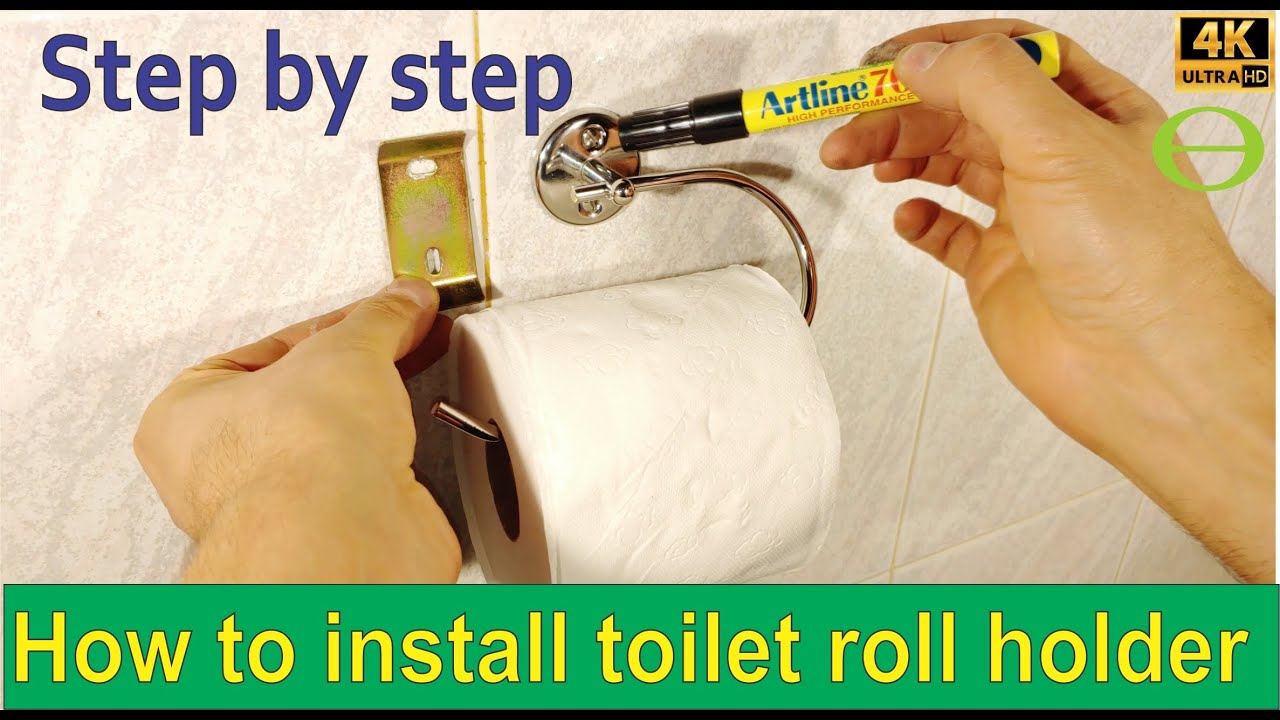
That wobbly toilet paper holder has finally had enough—it’s time for an upgrade or a bathroom renovation. Before you grab the nearest tool and start prying, knowing exactly how to remove a toilet paper holder from wall is critical to avoid costly drywall repairs or shattered tiles. Most homeowners waste hours patching avoidable holes because they skip one simple step: identifying the mounting type. This guide cuts through the guesswork with field-tested methods for every holder style, whether you’re dealing with stubborn adhesive mounts in rentals or hidden hardware in designer fixtures. You’ll learn to remove any toilet paper holder cleanly in under 30 minutes while preserving your wall’s integrity.
Ignoring the mounting mechanism risks cracked tiles, gouged drywall, or stripped screws that turn a 10-minute job into a weekend renovation. I’ve seen DIYers accidentally drill into plumbing behind walls because they rushed this step. Your specific approach depends entirely on whether spring-loaded mechanisms, exposed screws, adhesive strips, or concealed hardware hold that roll in place. By the end of this guide, you’ll confidently tackle removal without calling a handyman—saving $50-$100 in professional fees while gaining skills for future bathroom projects.
Spot Your Holder’s Mounting Type Before Touching Tools
Identify Spring-Loaded Designs in Seconds
Spring-loaded holders masquerade as floating units with zero visible screws. Test yours by firmly gripping the roll bar in the center and compressing one end toward the wall—if it gives slightly and pops free, you’ve got a spring mechanism. These are common in Kohler and Moen fixtures. Never yank the bar straight off; the spring-loaded end must compress inward first to disengage the catch. Look for subtle seams near the bracket where the bar inserts—it’s often the side with a tiny release button.
Locate Hidden Screws Under Decorative Caps
Screw-mounted holders hide Phillips, flathead, or hex screws beneath plastic or metal caps. Run your fingernail along the bracket base—if you feel a slight ridge or color variation, that’s a cap seam. Gently insert a flathead screwdriver under the seam and twist slowly to pop it off. Common screw sizes are #2 Phillips or 5/32″ hex. If caps break, don’t panic; replacements cost $1 at hardware stores. Pro tip: Shine a flashlight sideways across the bracket to reveal hidden seams invisible in normal light.
Detect Adhesive Mounts on Rental Walls
Adhesive holders bond directly to drywall or tile using double-sided tape or industrial glue strips. Check for a thin, uniform gap (about paper-thin) between the bracket and wall—this indicates adhesive, not mechanical fasteners. These are rental-friendly but notorious for damaging paint during removal. Press your thumb firmly on the bracket edge; if it doesn’t budge but feels “sticky,” heat is your first step. Avoid prying immediately—this rips drywall paper or tiles.
Reveal Concealed Hardware Behind Snap Covers
Concealed screw systems disguise fasteners under decorative elements. Flip the holder upside down and inspect the bracket underside for tiny hex holes (1/16″-1/8″ size) or hairline seams. Some require loosening a set screw before sliding the holder upward. Others have snap covers that release with upward pressure after removing a single set screw. If you see a small slot but no screw, it’s likely a spring-loaded cover—not mechanical hardware.
Remove Spring-Loaded Holders Without Breaking Components
Compress and Release the Roll Bar Correctly
Grip the bar firmly 2 inches from the spring-loaded end with one hand while placing your other hand on the opposite bracket. Push the spring end toward the wall while simultaneously pulling the free end away from its bracket. You’ll hear a soft click as it disengages. Never pull both ends outward—that bends the bar. Once one side releases, lift the entire bar straight up to clear the fixed bracket. Set it aside safely; these bars often have fragile plastic inserts.
Remove Mounting Brackets Without Wall Damage
With the bar removed, support each bracket with your palm before unscrewing. Use a #2 Phillips screwdriver with downward pressure to prevent stripping—spring-loaded brackets often have shallow screw threads. If screws spin freely, the anchor is loose; push the bracket toward the wall while unscrewing. For stubborn brackets, slide a plastic putty knife behind them to break adhesive residue before removing screws. Always plug holes with spackle immediately to prevent dust buildup.
Take Down Screw-Mounted Holders Without Stripping Screws
Expose Hidden Screws Without Breaking Caps
Place a rubber band over the screw head before inserting your screwdriver—this fills stripped grooves for better grip. For stuck caps, heat the seam with a hair dryer for 20 seconds to soften adhesive. Never use metal tools to pry; a bent paperclip inserted into the seam works better. If caps shatter, vacuum debris immediately—tiny plastic shards can scratch fixtures. Save broken caps; matching replacements are often sold online by model number.
Unscrew While Supporting Heavy Fixtures
Ceramic or metal holders can weigh over 2 lbs. Hold the fixture with your non-dominant hand while unscrewing the final screw with your dominant hand. Place a towel on the floor below—it’s inevitable one screw will drop. If screws resist, apply a drop of penetrating oil and wait 5 minutes before retrying. For hollow-wall anchors, expect slight wobble; push the anchor into the wall cavity rather than forcing extraction if it spins.
Separate Adhesive-Mounted Holders Without Ripping Drywall
Heat Adhesive to 140°F for Clean Release
Set your hair dryer to medium heat and hold it 3 inches from the bracket for 90 seconds per side, moving in slow circles. The adhesive softens at 140°F—too little heat won’t release it; too much bubbles paint. Test temperature with a thermometer or your wrist (should feel hot but not painful). For tile walls, reduce heat time to 60 seconds to avoid grout damage. Never use heat guns—they scorch surfaces instantly.
Cut Through Adhesive With Dental Floss Technique
Thread 18 inches of unwaxed dental floss behind the bracket at the top edge. Pull the floss in a sawing motion like cutting cheese, working downward. The thin floss slices adhesive without gouging walls. For thick adhesive, alternate with a plastic putty knife: slide it behind the bracket, twist gently to create a 1/8″ gap, then reinsert floss. If resistance increases, reapply heat—cold adhesive re-bonds instantly.
Handle Concealed Hardware Without Breaking Snap Covers

Loosen Set Screws With Precision Tools
Use a 1/16″ hex key for initial turns—overtightening these micro-screws strips threads. If the screw won’t budge, tap the wrench handle lightly with a hammer to break corrosion. For stubborn set screws, apply a drop of vinegar to dissolve mineral deposits. Never force rotation past resistance; these screws often require only 1/4 turn to release. Keep screws in a magnetic tray—they vanish instantly on bathroom floors.
Remove Snap Covers Without Cracking Plastic
Insert a guitar pick (or plastic spudger) into the seam between cover and bracket. Apply upward pressure while sliding the tool sideways—this releases hidden clips better than prying straight up. If covers resist, freeze them for 2 minutes with canned air; cold plastic contracts and releases easier. Broken covers? Measure the bracket width—universal replacements fit 90% of models.
Essential Tools Checklist for Flawless Removal
Must-Have Removal Kit
- Phillips screwdrivers (#1 and #2 sizes)
- Hex key set (1/16″–1/8″ for set screws)
- Plastic putty knife (prevents wall scratches)
- Unwaxed dental floss (cuts adhesive cleanly)
- Hair dryer (medium heat setting only)
- Magnetic parts tray (catches tiny screws)
Wall Repair Supplies You Can’t Skip
- Spackle (for drywall hole filling)
- Goo Gone (adhesive residue removal)
- 220-grit sandpaper (smooths patched areas)
- Touch-up paint (match within 24 hours)
- Painter’s tape (protects adjacent surfaces)
Fix Common Removal Disasters in Minutes
Rescue Stripped Screw Heads Immediately
Place a wide rubber band over the stripped screw, then press your screwdriver through it into the head. The rubber fills worn grooves for 2-3 extra turns. If that fails, clamp needle-nose pliers onto the screw edge and rotate counterclockwise. For completely ruined screws, drill a 1/8″ pilot hole and use a screw extractor—never force it, or you’ll enlarge the wall hole.
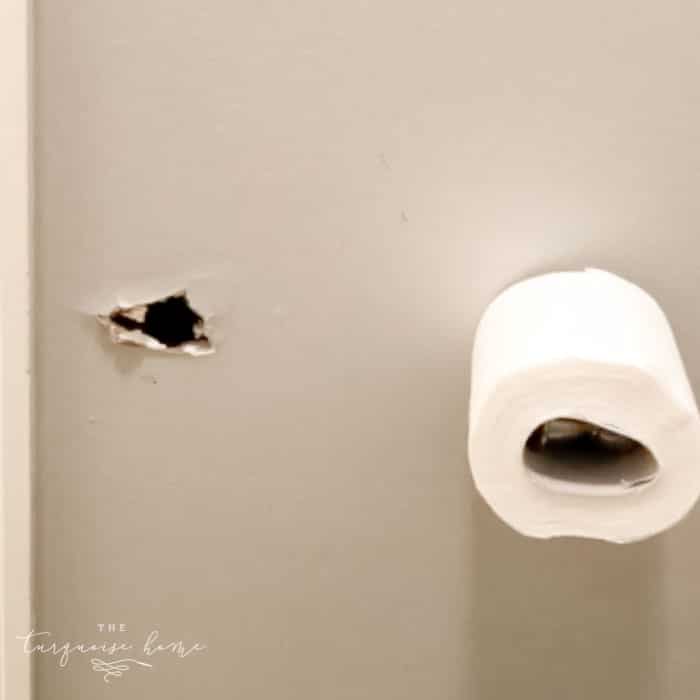
Remove Broken Wall Anchors Safely
Push plastic anchors through the wall cavity using a 1/4″ screwdriver. For metal anchors, cut them flush with a utility knife, then push inward. If anchors spin, fill the hole with spackle mixed with toothpicks for grip. Never leave anchors protruding—they snag tools during reinstallation. For large holes, patch with a self-adhesive drywall patch before spackling.
Clean Adhesive Residue Without Damaging Paint
Apply Goo Gone to a microfiber cloth (never directly to walls) and rub in small circles. Test on a hidden area first—some removers discolor flat paint. For stubborn spots, reheat the area and scrape with a plastic credit card at a 15-degree angle. Never use metal scrapers on drywall; they remove the paper layer. Wipe residue with rubbing alcohol afterward to eliminate stickiness.
Wall-Specific Removal Tactics
Drywall: Prevent “Popcorn” Damage
Place painter’s tape around the bracket before removal. When extracting anchors, push them inward rather than pulling out—this avoids enlarging the hole. For crumbling holes, inject spackle with a syringe before inserting a new anchor. Always patch holes within 24 hours; humidity makes them harder to fix later.
Tile: Avoid Cracking Glazed Surfaces
Wrap your screwdriver tip in masking tape to prevent tile scratches. Drill new holes only at tile grout lines—not the tile itself. If adhesive bonds to glaze, use acetone instead of heat (which cracks tile). For broken tile holes, fill with epoxy grout matching your color. Never hammer near tile edges—they chip easily.
After Removal: Smart Next Steps
Patch Walls Like a Pro in 20 Minutes
Fill holes with spackle using a putty knife, overfilling slightly. Let dry 2 hours, then sand flush with 220-grit paper. Dab touch-up paint with a cotton swab for precision. For tile holes, mix spackle with grout powder for texture match. Always photograph patched areas in natural light—what looks seamless at noon may show under bathroom lighting.
Choose Your Next Holder Wisely
Measure existing hole spacing before buying replacements—most holders use 7″ or 9″ center-to-center brackets. For tile walls, select adhesive-mounted models to avoid drilling. If previous anchors failed, upgrade to toggle bolts for drywall. Pro tip: Install new holders 26-28 inches above the floor for ADA compliance and comfort.
Removing your toilet paper holder takes just 15 minutes when you match the method to the mounting type. Always identify hardware first, protect surrounding surfaces with tape, and patch holes immediately—these three steps prevent 95% of DIY disasters. Whether you’re refreshing your bathroom or prepping for a remodel, these techniques ensure clean removal with zero wall damage. Ready to install your new fixture? Measure twice, drill once, and remember: the right approach starts long before you touch a tool.


