
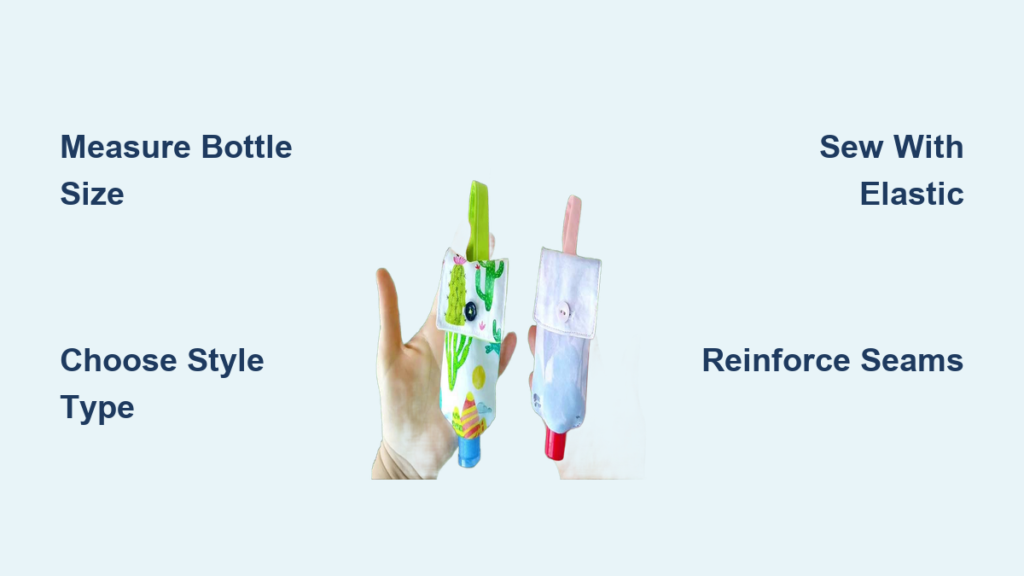
Your hand sanitizer bottle rattles loose in your bag, leaks sticky gel onto receipts, or vanishes when you need it most. A custom fabric holder solves this chaos—keeping it clipped securely to keys, purse straps, or backpacks while protecting against leaks. Forget flimsy store-bought cases; this guide reveals how to sew three professional-grade holders using basic sewing skills and scrap fabric. You’ll craft a durable, washable pouch tailored to your exact bottle size in under an hour. Whether you need quick keychain access or a purse strap sleeve, we’ll cover every stitch with foolproof measurements.
Identify Your Bottle Dimensions First
PocketBacs, 100ml TSA bottles, and generic flip-caps all fit perfectly with this custom sizing method—no guesswork required. Skipping this step guarantees leaks or a sloppy fit.
- Trace without the neck: Stand your bottle on paper (cap on) and trace its body silhouette. Exclude the neck and cap entirely—only trace the widest part of the bottle.
- Add seam allowance: Cut out this shape, then add ½ inch around the entire outline for fabric seams and bottle wiggle room.
- Mark the neck slot: Fold your paper template vertically. Draw a 1-inch wide slot centered ½ inch down from the top edge—this is where the neck protrudes.
- Label and cut: Write your bottle type (e.g., “60ml Flip-Cap”) on the template before cutting. This single template works for cotton, denim, or canvas.
Pro Tip: Test your template with cardboard first. Slide the bottle through the slot—it should grip snugly without forcing.
Compare Holder Styles for Your Bottle Type
One-size-fits-all kits fail because Bottle A’s narrow neck needs different support than Bottle B’s wide cap. Match your sanitizer to these three field-tested designs:
| Style | Best Bottle Match | Clip Attachment | Sewing Difficulty |
|---|---|---|---|
| Flap-and-Button Pouch | Any bottle (30-100ml) | Fabric loop + button | ★★☆☆☆ (Beginner) |
| Elastic-Top Sleeve | PocketBac-style narrow necks | Swivel lobster clip | ★★☆☆☆ (Beginner) |
| Snap-Flap Keychain | Structured 100ml bottles | D-ring + keychain | ★★★☆☆ (Intermediate) |
Critical note: PocketBacs (like Bath & Body Works) require elastic or snap closures—they’ll slip out of buttoned pouches due to their smooth, tapered necks. Wider-cap bottles work with all three styles.
Gather Materials from Your Scrap Bin
You likely own everything needed—no specialty tools. Avoid these common mistakes: using heavy interfacing (makes pockets stiff) or skipping seam finishes (causes fraying after 2 washes).
Core Supplies:
– Fabric: Two 5″x7″ scraps of quilting cotton, lightweight denim, or canvas (outer + lining)
– Stabilizer: Light fusible interfacing (ironed to outer fabric only)
– Notions: ⅜” elastic (for sleeve style), KAM snaps or ⅝” buttons, 1.5″ swivel clip
Skip the store run: Repurpose old pillowcases for lining or cut bias tape from fabric scraps. Use dental floss in a pinch for strong thread.
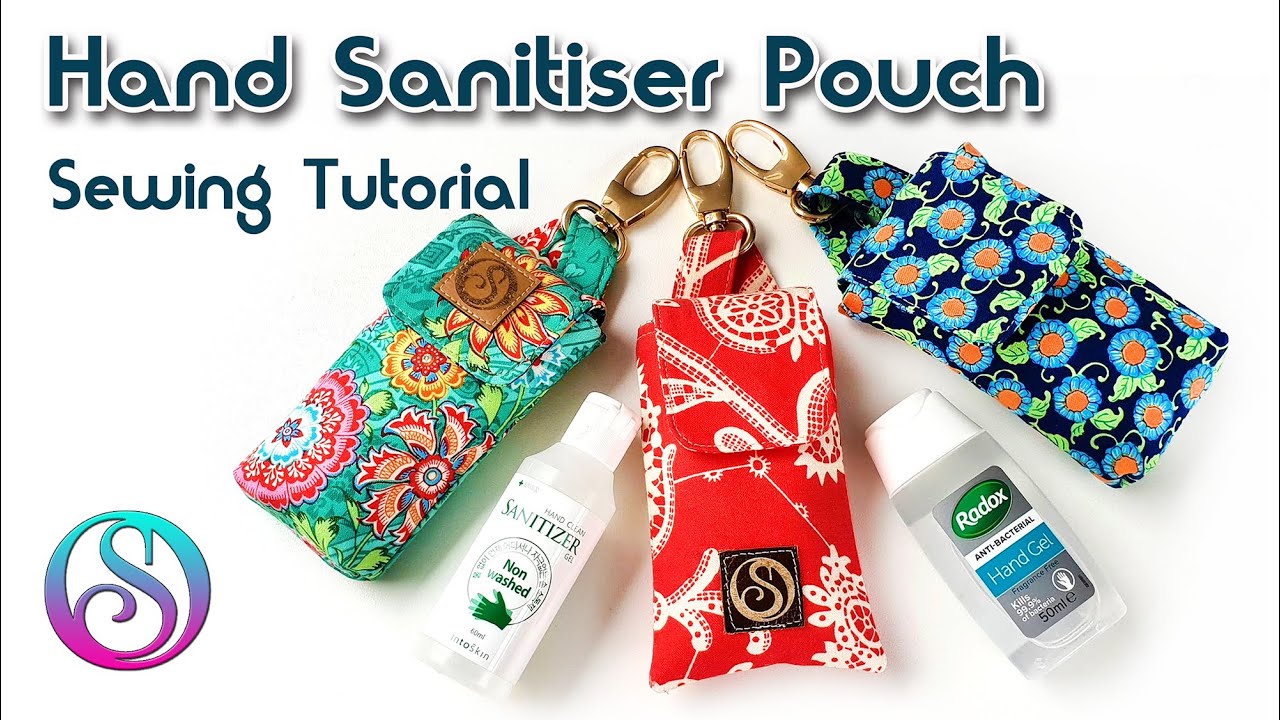
Build the Flap-and-Button Pouch for Any Bottle
This universal design fits 30ml to 100ml bottles with full coverage. Complete in 45 minutes using techniques you already know.
Cut and Prepare Fabric Pieces
- Outer fabric: Cut front/back at 4.5″x5.5″, flap at 4.5″x7″, strap at 1.5″x8″
- Lining: Duplicate all outer pieces
- Fuse interfacing to wrong side of outer pieces only. On front/back, mark the 1″ neck slot ½” down from top as traced earlier.
Sew the Bottle Neck Opening
With right sides together, stitch front and back pieces along sides and bottom using ¼” seam allowance. Stop stitching when you reach the neck slot mark. Pivot, stitch across the slot, then continue to top. Repeat for lining. Clip curves at slot corners, turn right-side out, and press flat.
Warning: If you skip clipping curves here, the slot will pucker and won’t lie flat. Use sharp scissors to snip right to the stitching line.
Attach the Strap and Flap
Fold strap long edges to center, then fold again. Top-stitch both edges. Pin raw strap end between outer back piece and flap at top edge (right sides together). Sew flap outer and lining right sides together around edges, leaving bottom open. Turn, press, and top-stitch ⅛” from edge.
Final Assembly
Place main pouch and lining right sides together, with strap/flap sandwiched between at top. Sew around entire perimeter, leaving 2″ gap on side seam. Clip corners, turn right-side out through gap, and press. Top-stitch ⅛” from edge to close gap and secure layers. Sew button to body and buttonhole to flap tip for closure.
Craft the Elastic-Top Sleeve for PocketBacs
This streamlined version grips narrow-neck bottles (like PocketBacs) without snaps or buttons. Elastic tension holds the cap securely—no slipping.
Cut and Prep Key Components
- Cut two 5″x2.5″ rectangles for body
- Cut 2″x2″ fabric scrap for clip tab
- Attach elastic first: Zig-zag 3.5″ of ⅜” elastic to one short edge of a body rectangle while stretching elastic slightly. This creates grip under the cap ridge.
Install Clip and Finish Seams
Fold clip tab into ½” strip and top-stitch. Sandwich raw tab end between body rectangles ½” down from top edge (right sides together). Sew long edges with ¼” seam allowance.
Critical step for durability: Create French seams to prevent fraying:
1. Sew wrong sides together at ⅛” seam allowance
2. Trim seams to 1/16″, turn right-side out
3. Sew right sides together at ¼” allowance, encasing raw edges
Turn right-side out, press, and top-stitch top edge. Slide bottle in from top—the elastic hugs the cap base.
Make the Snap-Flap Keychain Pouch for Quick Access
This structured holder uses KAM snaps for secure one-handed opening. Boxed corners add depth so bottles don’t tip over.
Shape the Curved Flap Opening
Fuse interfacing to one main 4.5″x5.5″ piece. Mark a gentle 1.5″ curve ½” down from top center. Place interfaced and plain pieces right sides together. Stitch around curve using 1.5mm stitch length (shorter stitches prevent puckering on curves). Clip curves carefully, turn right-side out, and press.
Create Keychain Attachment and Depth
Fold 1.5″x4″ tab strip lengthwise twice; top-stitch to form D-ring holder. Insert raw tab end between pouch layers at side seam when stitching sides. For 3D depth: pinch bottom corners ⅜” inward, then stitch perpendicular seams across corners.
Install Snaps for Reliable Closure
Glue-baste ½” bias tape around curved flap edge and top-stitch. Attach male snap to flap tip and female snap to front body. Align snaps while bottle is inserted—close the pouch and mark snap positions through the fabric.
Skip Hardware with the Button-Strap Wrap
No clips? No problem. This no-metal alternative wraps around purse straps without scratching surfaces.
Sew two buttons ½” apart on the holder’s back. Cut a 1.5″x8″ strap with buttonholes at both ends. Wrap strap around your bag strap, thread ends through buttonholes, and button closed. Adjust strap length for backpack handles or belt loops.
Prevent Wash-Day Disasters with These Pro Tips
Hand sanitizer holders face daily wear and frequent washing—these techniques ensure longevity:
- Seam protection: Always finish edges with zig-zag stitch or French seams. Unfinished seams fray after 3 washes.
- Stress point reinforcement: Back-stitch 3 times at strap attachments and snap points—this prevents tearing when clipped heavily.
- Elastic replacement: If elastic loosens over time, unpick one side seam, replace elastic, and resew.
- Washing instructions: Machine-wash cold with mild detergent; air-dry flat. Never tumble dry—heat degrades elastic.
Pro Tip: Add a drop of clear nail polish to snap prongs before installation. This prevents loosening from repeated opening/closing.
Your custom holder is ready to clip on and conquer germy surfaces. Whether you chose the snap-flap keychain for gym bags or the elastic sleeve for PocketBacs, you’ve created a washable, leak-proof solution that outlasts plastic cases. For extra protection, line pouches with PUL fabric—it repels sanitizer gel while looking identical to cotton. Now never hunt for sanitizer again: clip it to your life.


